M4
Madness
Out of the thousands of people that own an AEG, I'm almost certain that
you either hate the amount of M4A1s that are being used, or are one of the
people that use them. Now I was one that hated them until I was fortunate
to buy one off a good friend as he could no longer give it the use that
it deserved. Alas, I'm not here to review the M4, there's plenty of places
elsewhere that would do that for you. I've just decided to show you lot
what I've done to mine to make it more unique, but at a very good price...
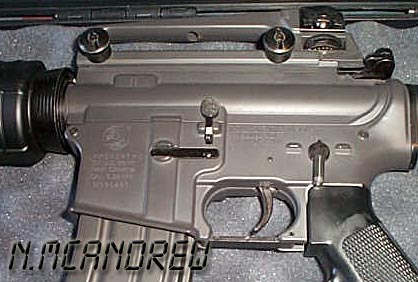
Machine pressed M4 When I first received the M4, I was pleased with it's performance but it's appearance lacked that certain edge. Maybe the rather lacklustre grey receiver set that was stock kind of put me off. So I set about looking around for a metal replacement. Taken aback at the prices people were asking for these things, some of which were 100USD more than I'd paid for the AEG. Not wanting to keep my newly acquired AEG stock, I had to do something to alleviate the situation. Having a look around the wonderful world of the internet. I saw that you could order different stock parts from WGC. One that particularly stuck out was the SR16s receiver set. Obviously cheaper than a metal body kit, but still a hefty 80USD pricetag was attached to it. Once again I was left stroking my chin...
DIY Obviously not willing to shell out hundreds of pounds worth my hard earned *cough* money. I was left with the old do it myself option. We've all heard about the many wonderful applications of Plasticote(r) especially used on the plastic stock and grips on the AK47 series. So after a little research, I came out of the local DIY shop with a can of matt black spray (called flat black on the tin) a small bottle of white spirits and an even smaller tin of white enamel paint all costing *drum roll* a little over ten whole english pounds. Anyway, on with the show...
Preperation To those weak of heart, or just unwilling to take their AEG to pieces, this part may hurt a little bit. Being the nosey begger that I am, I just like to find out how things work, so taking apart the M4A1 to me was merely a case of taking out all the screws and spring loaded parts that will have your eye out if you're not careful. With everything removed that could be removed, all that remained was the rear assist button, which was swiftly covered in masking tape.
The body shop Clearing a space in the garage is essential when using spray paint products, so a large empty space has to be made and prepared by laying copious amounts of old newspaper down. Just before spraying the receiver set, the whole area to be painted should be wiped down using white spirit. This helps remove all dirt and grease from the body and makes sure the paint stays on the body. Once this dries quickly you are ready to paint. Again, with all things paint, several thin layers are better than one thick blob. Taking care not to let the paint drip and also not to let the trademark areas get clogged up either. After another couple of layers, allowing plenty of drying time between layers, it's time to move on...
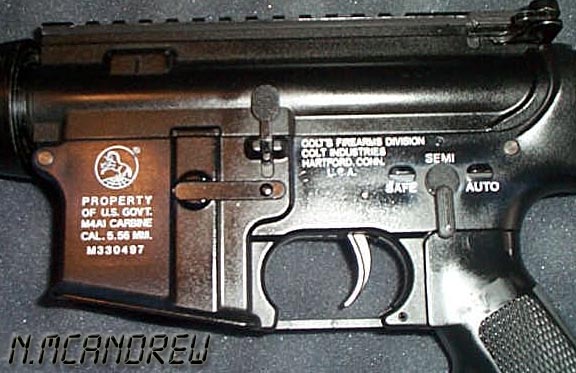
Touching up Now that everything's dry, it's time to crack open the enamel paint. After giving it a good shake, to make sure that none of the paint is seperated as it sometimes can be. With a fine sable paintbrush, that I had from previous painting projects, a large blob of paint was applied to the grooves of the trademarks, not being too careful with the painting though. After all the trademarks are filled with paint, and the whole thing is dry for a final time. It's time to use the white spirit...
Spiritualised With an old piece of cloth, not fluffy cloth though as that's just asking for trouble, carefully apply some white spirit to the cloth. With this wipe over the whole receiver to achieve a uniform look. With some more force, continue to rub over the trademark area to remove all paint in that area. This will eventually remove all excess white paint, but leave all that was in the recessed areas painted. If you had used a looser material, there was always the chance of removing paint from within the trademarks. So it's better to be safe than sorry. Once all the receiver has had a covering, remove the last of the white spirit with a clean cloth.
Robert's your father's brother To finish the job, a healthy spray & polish with silicone brings everything to a pleasing metalic shine. And the contiued use of the silicone will extend the life of the finish and give you a more unique weapon on the field of play...
Machine pressed M4 When I first received the M4, I was pleased with it's performance but it's appearance lacked that certain edge. Maybe the rather lacklustre grey receiver set that was stock kind of put me off. So I set about looking around for a metal replacement. Taken aback at the prices people were asking for these things, some of which were 100USD more than I'd paid for the AEG. Not wanting to keep my newly acquired AEG stock, I had to do something to alleviate the situation. Having a look around the wonderful world of the internet. I saw that you could order different stock parts from WGC. One that particularly stuck out was the SR16s receiver set. Obviously cheaper than a metal body kit, but still a hefty 80USD pricetag was attached to it. Once again I was left stroking my chin...
DIY Obviously not willing to shell out hundreds of pounds worth my hard earned *cough* money. I was left with the old do it myself option. We've all heard about the many wonderful applications of Plasticote(r) especially used on the plastic stock and grips on the AK47 series. So after a little research, I came out of the local DIY shop with a can of matt black spray (called flat black on the tin) a small bottle of white spirits and an even smaller tin of white enamel paint all costing *drum roll* a little over ten whole english pounds. Anyway, on with the show...
Preperation To those weak of heart, or just unwilling to take their AEG to pieces, this part may hurt a little bit. Being the nosey begger that I am, I just like to find out how things work, so taking apart the M4A1 to me was merely a case of taking out all the screws and spring loaded parts that will have your eye out if you're not careful. With everything removed that could be removed, all that remained was the rear assist button, which was swiftly covered in masking tape.
The body shop Clearing a space in the garage is essential when using spray paint products, so a large empty space has to be made and prepared by laying copious amounts of old newspaper down. Just before spraying the receiver set, the whole area to be painted should be wiped down using white spirit. This helps remove all dirt and grease from the body and makes sure the paint stays on the body. Once this dries quickly you are ready to paint. Again, with all things paint, several thin layers are better than one thick blob. Taking care not to let the paint drip and also not to let the trademark areas get clogged up either. After another couple of layers, allowing plenty of drying time between layers, it's time to move on...
Touching up Now that everything's dry, it's time to crack open the enamel paint. After giving it a good shake, to make sure that none of the paint is seperated as it sometimes can be. With a fine sable paintbrush, that I had from previous painting projects, a large blob of paint was applied to the grooves of the trademarks, not being too careful with the painting though. After all the trademarks are filled with paint, and the whole thing is dry for a final time. It's time to use the white spirit...
Spiritualised With an old piece of cloth, not fluffy cloth though as that's just asking for trouble, carefully apply some white spirit to the cloth. With this wipe over the whole receiver to achieve a uniform look. With some more force, continue to rub over the trademark area to remove all paint in that area. This will eventually remove all excess white paint, but leave all that was in the recessed areas painted. If you had used a looser material, there was always the chance of removing paint from within the trademarks. So it's better to be safe than sorry. Once all the receiver has had a covering, remove the last of the white spirit with a clean cloth.
Robert's your father's brother To finish the job, a healthy spray & polish with silicone brings everything to a pleasing metalic shine. And the contiued use of the silicone will extend the life of the finish and give you a more unique weapon on the field of play...

|

|
|
|
Conclusion
With the best part of a day spent from start to finish, I'm more impressed
with the final job than I'd expected myself to be. So if you're looking
for something new to do to spruce up your m4, why not "try it yerself" (Bad reference to UK TV)
Anyway, if you do end up doing this to your m4 receiver set, please remember
to follow all safety rules on the sides of the tins, especially the ones
about well ventilated areas, solvent abuse kills!
Neil McAndrew
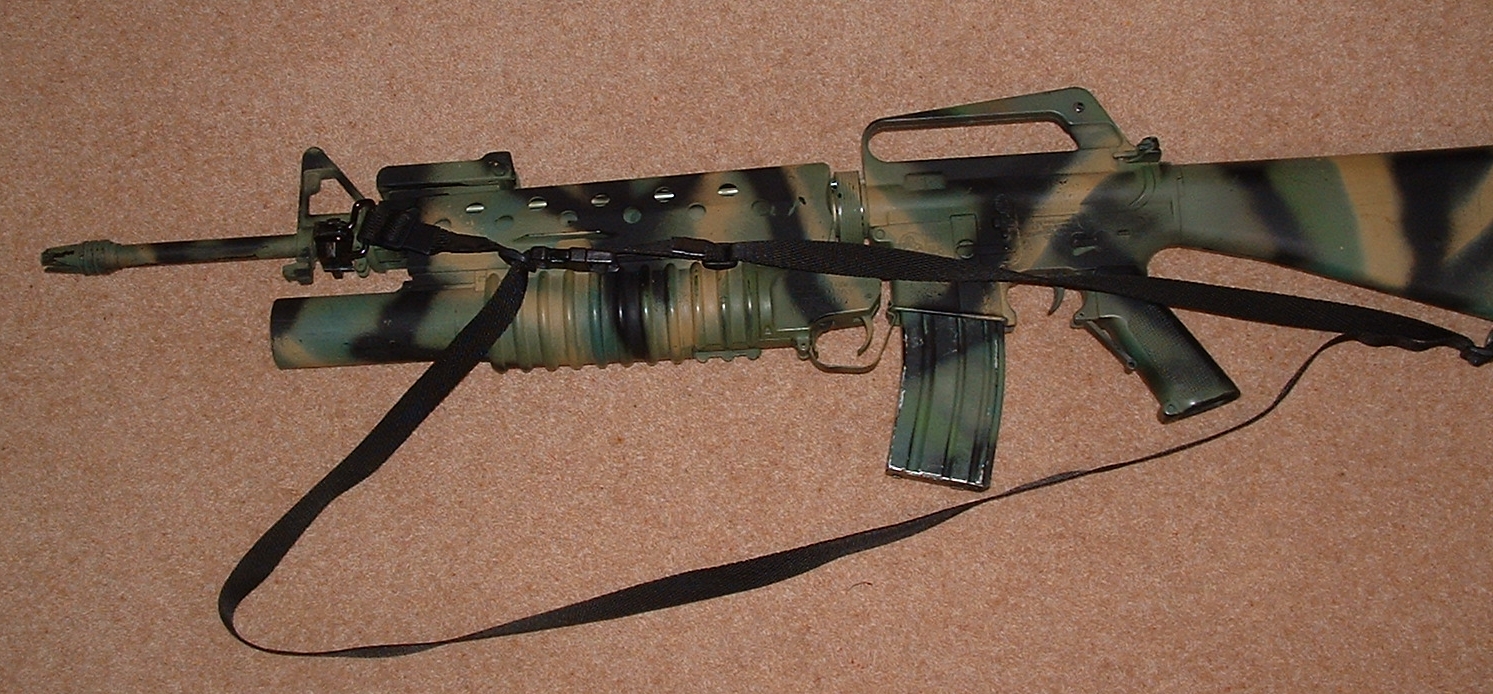
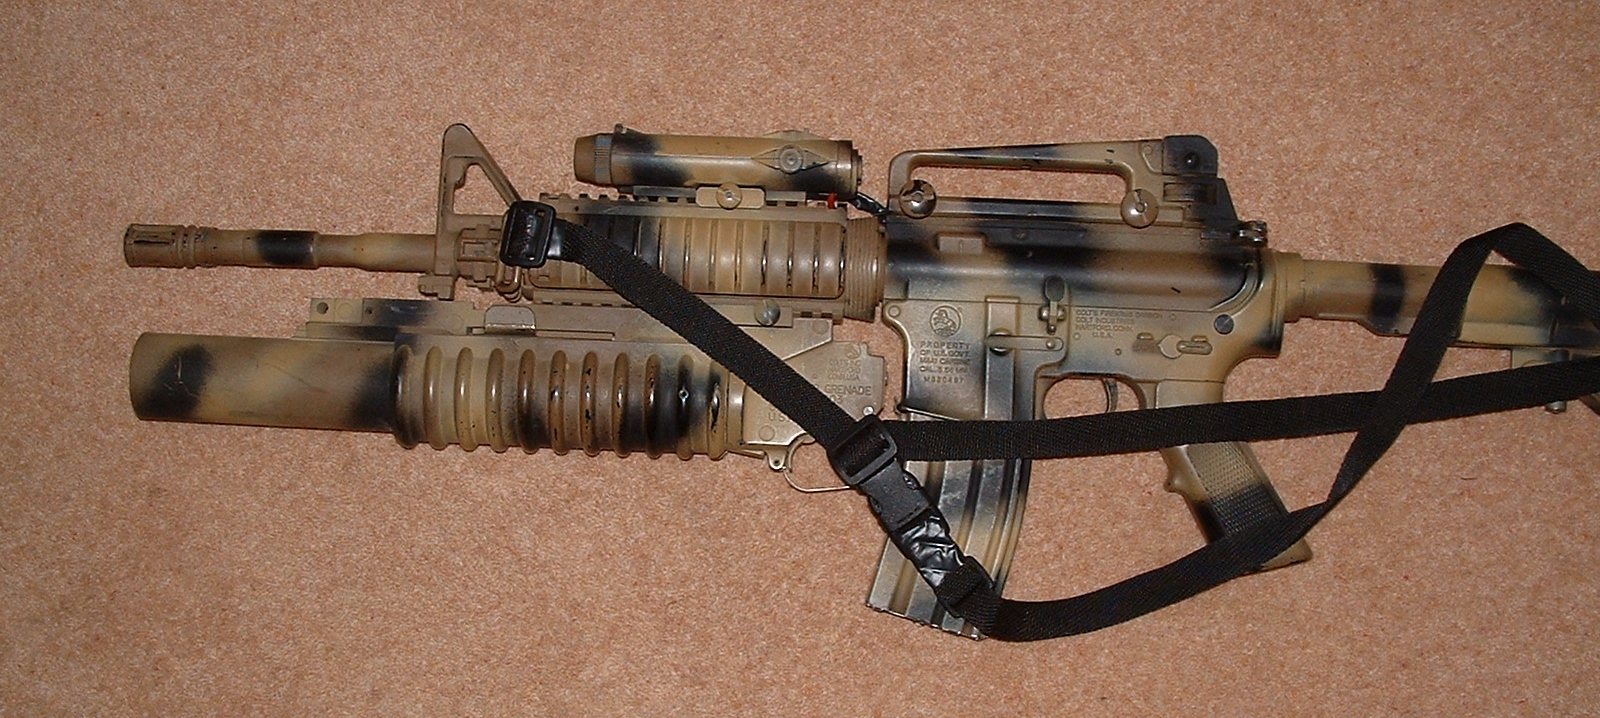
User submitted shots
Derrick
sent over these shots of his own work for publication