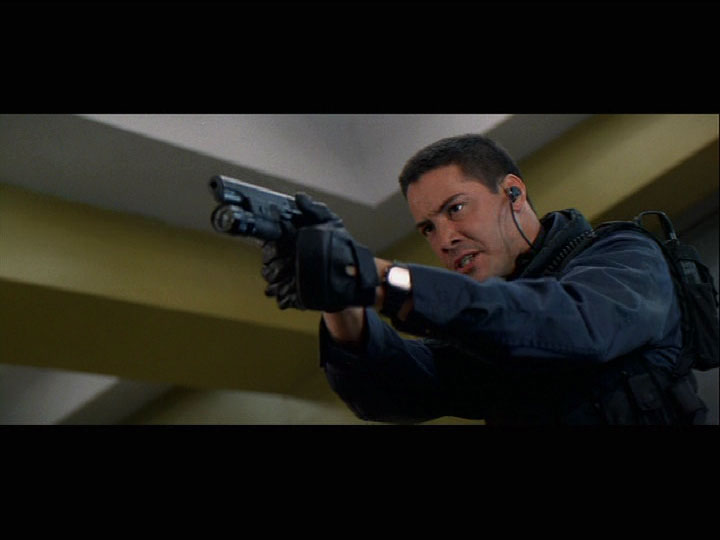
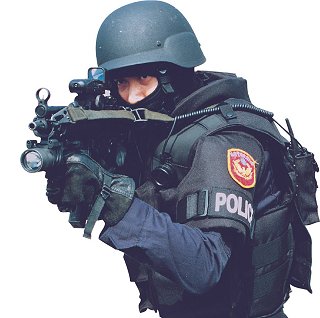
Well it's no secret that I'm a huge fan of Guarder gear. I've yet to see anything of their's that I'd consider to be poorly made, or have a lot of thought put into it. I'd been looking for a decent vest for some time, and had my eye on a certain style of vest I'd seen in a film (where else? ^_^)
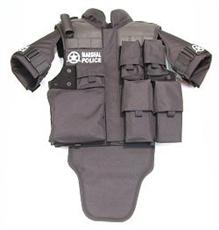
"So what do you do?" Well when I got the chance to pickup a Guarder SWAT vest I jumped at the chance! Okay so one quick order from WGC later, and a large box turns up courtesy of UPS. Now the first thing you should note is that the vest comes prepackaged in a clear plastic bag, and from the outset this vest is extremely impressive. There's something about a good quality vest when compared to the likes of MilForce gear. That's not to say that MilForce gear is bad.. far from it, but this Guarder gear is just of a different class - and so it should be given the price difference. What struck me as I took the gear out of it's bag was that there are no instructions included with it. I don't know if this is the case with all vests, but believe me you really do need them. I've never used a real SWAT vest (funnily enough), and this perfect copy of it is somewhat bemusing to work out for a poor old layman like me. There's oodles of velcro, zips and popper bits everywhere. Now this vest has been hanging in my cupboard until I got the chance to get to a decent CQB orientated game. This is a vest designed for use in CQB and FIBUA scenarios, you can be certain of that. ^_^ Well up came February the 1st and the chance to pop down to Sterling Services for a spot of room entry and hostage rescue training.. oh and a skirmish or two. ^_^ What better gear to wear to such a well organised site? Anyway.. the vest was beginning to look silly in my wardrobe next to my suit and dinner jacket.
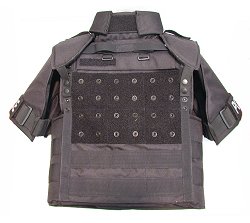
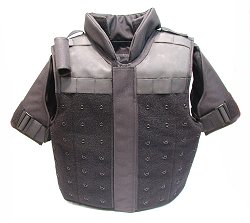
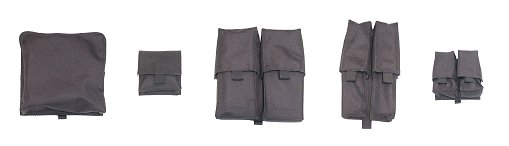
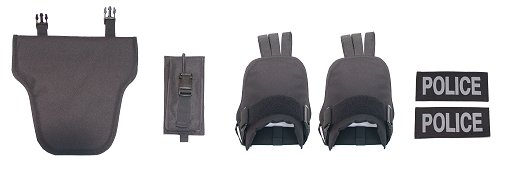
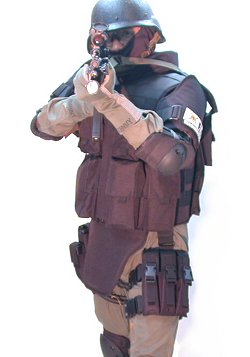
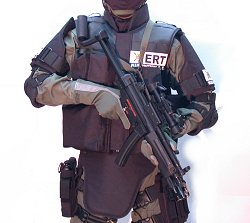
You may not have seen the shoulder and groin accessories in use before, but I gleaned a wealth of information from the US cable-televisions The History Channel and The Learning Channel (TLC). In their Bulletproof one-hour special a veteran member of the LAPD SWAT team, who had been on the force through the evolution of body armor through to its modern form, explained why the panels are there. These additions came into play relatively recently when the real US Police discovered that a large percentage of fatalities were coming from shots through the arm and into the chest cavity. These new shoulder pads mean that your upper torso is basically covered in a bullet proof bucket when your arms are near your sides. It's not completely "bullet proof", but then again there's no real certainty these days in anything - my rather expensive watch is only classed "water resistant", despite it being a sailing watch. The shoulder and groin pouches when fitted are a bit of a mobility trade-off, but definitely worth it to stay alive in the real world. Remember we're dealing with Airsoft here, so the extra pads really boil down as a cosmetic option. Handily all the pouches come prefitted in a fairly decent layout that is fairly perfect for the right handed user. There's a radio pouch and pyro bag on the back, a large pouch on the bottom left, a pistol mag pouch top left, rifle mag pouch bottom right and a small utility pouch top right (note all views are from the wearer's point of view). Early versions of the vest are shown as coming with velcro badges such as 'Police' etc, you do not get these on current issue Guarder vests. Please also remember that in the UK and most other countries wearing "Police" logos is not advisable in skirmish scenarios.
Adjustments: Now I've always been somewhat bemused by velcro/popper constructions as I just couldn't believe that things stayed on when you ran around with the gear fully loaded up. Well I couldn't have been more wrong. Once you get the pouches aligned on the vest and secured on with the poppers there's no way to get the pouch off without dilberately tearing from one corner to remove the attachment. Actually writing this review I remembered seeing some guy at a theme park bounce in a velcro suit onto a wall of velcro and stick there. I seem to be rambling here... now where was I? Oh yes, pouches! The other thing to note is that the shoulder pads and the groin armour come packaged flat to conserve space. Now I've built car engines, I've built computers from scratch, I even once managed to start up a tank accidentally (I was 5 at the time - I scared the crew and the tourists on and infront of it to death when that beast fired up) .. anyway I was saying; it's not like puzzles and challenges are something I find too difficult, but the shoulder pads were somewhat of a mystery to me. Fitting the to the vest is easy, there's three elastic straps that fit to one of around 8 loop points under the shoulder. You simply loop the straps through the holes on the shoulder and then stick them to the underside of the shoulderpad. That's the easy bit. The difficult bit came in working out how the strap that holds the pad to the arm actually works. This still has me fairly puzzled to this day. I think I've worked it out, but it's somewhat of a bodge. The shoulder pad came with the strap neatly folded around the pad, but not in any way that I envisage see it could be tightened up to hold it to an arm. Either side of the shoulder pad there's an rectangular buckle with a hole either side. The idea is that the strap goes underneath, from one side to the other, and can be tightened. Sounds easy? Trust me, it's not. The biggest problem is that the elastic tends to slip through the buckles. You'll also find two loops of material wrapped around the elastic, again I really can't explain what they are for. For the sake of explaining how I came to the revelation of fitting my pads, and the crate of Asahi beer that helped the deliberations here's a photo of my strap setup. Once you put the vest one you'll discover some more hidden pouches and clips and things. I have NO idea what these are. I'm guessing that the inner pouch is some sort of map pouch, but I can't quite work it out. To use the inner pouch you need to undo the vest meaning that it sags at the sides, and dangles around you. It also means that you are no longer "armoured" - as you'd expose your chest area to potential attackers. Then again in the middle of a firefight I'm not going to plot a safe route back home from Oxford Street on the London Underground am I? First fitting: Okay this is the part where you ask your better half, who probably has better things to do to "help strap you into this darn thing". You will need assistance the first time that you fit the vest to yourself as unless you have two detachable shoulders you'll never be able to adjust the buttons on the back and adjust the velcro at the same time. There are three main areas that you'll need to adjust. The neck, waist and the shoulder area. Guarder ship the vest out in 'obese mode', meaning that there's room for a small hockey team inside the thing when you get it. First thing to do is undo the vest, put it on, and do the zip and velcro up at the front. It also helps if you have a bit of balast in the pockets to straighten the vest out. Some 'big-ish' AEG batteries or magazines should help here. Second thing is to tighten the waist area. You'll find the straps in the back panel, get your partner/buddy to tighten up the straps evenly either side. You need room to breath, but it needs to be a snug fit. It should also be noted that it's a good idea to do this whilst you have a jacket or shirt of similar size on that you intend to wear whilst using the jacket. Sorry... maybe I should have mentioned that eariler? Oh. make sure it has a collar on it, as Cordura is a very heavy duty material and chafes somewhat on bear flesh. Right now that the bottom is tightish, get your buddy to undo the two poppers that hold the shoulders on and undo the velcro on one side of the shoulder. Pull the front part of the shoulder up and away, and as you do so, pull the back of the vest closer to the front. When you are happy that the front to back tightness is good enough, resecure the two velcroed shoulder pads and do the poppers up. Repeat this for the other shoulder. A useful tip is that if you look under your armpit you'll see the vest sagging and looping under it's own weight if it's too loose. Next up is the neck - this bit is easy, undo each side from the back - again it's all velcro, and reattach at the correct tightness. Make sure everything is symetrical and you can't go far wrong. Corduna's history: Cordura is actually a brand name rather than a specific material, as Du Pont (the manufacturers) have transfered the name of 'Cordura' across different types of nylon material over the years. Curiously enough Cordura started off being used by the military in tyres, and then was developed further into a material for luggage. More recent developments have led to the use of Cordura in sporting lines. Du Pont's material is rather famous in motorcycling circles for example as it was the material that allowed safety clothing manufactureres to produce jackets, trousers and gloves etc. of a more lightweight breathable (and waterproof) material that still had the protective qualities of leather.
"...Cordura® is one of DuPont's most popular fiber products. Its origin dates to 1929 when chemists at the DuPont Rayon Company succeeded in strengthening relatively weak rayon filaments into fibers suitable for use as sewing threads and tire cords. Subsequent tests on commercial vehicles proved that the new rayon lengthened tires' life span, so in November 1934 DuPont started production of Cordura® durable cord rayon tire yarn. Research during World War II improved Cordura® and enabled its manufacture on standard rayon production equipment, thereby boosting both quality and output. The tendency of Cordura® to strengthen when heated led to its extensive use in military tires made from synthetic rubber, which ran hotter than natural rubber. Consequently, Cordura® became widely known as an essential product for America's war effort. In 1950 DuPont introduced Super Cordura® tire yarn, but Super Cordura® faced a formidable rival in another DuPont product, nylon. After performance tests in the 1950s showed nylon's superiority, DuPont phased out Super Cordura® and replaced it with a new industrial nylon yarn called N-56. The last Super Cordura® rayon plant closed in 1963 as DuPont officially exited the rayon business. In 1966 DuPont transferred the Cordura® brand name to the N-56 nylon product line. In 1977 DuPont researchers discovered a process for dyeing Cordura®, which opened a wide variety of commercial applications. By 1979 soft-sided Cordura® luggage had captured about 40 percent of the luggage market. In the 1980s DuPont expanded its Cordura® line into sporting apparel and equipment, including boots and shoes, golf and ski bags, and backpacks. A softer version called Cordura® Plus entered the market in 1988. Subsequent improvements made Cordura® even lighter in weight and gave the fabric greater protection against fading from sunlight and washing. In 1996, Cordura® Plus Natural, with the look and feel of natural cotton canvas, became immediately popular with sporting goods and marine apparel manufacturers..." Du Pont website
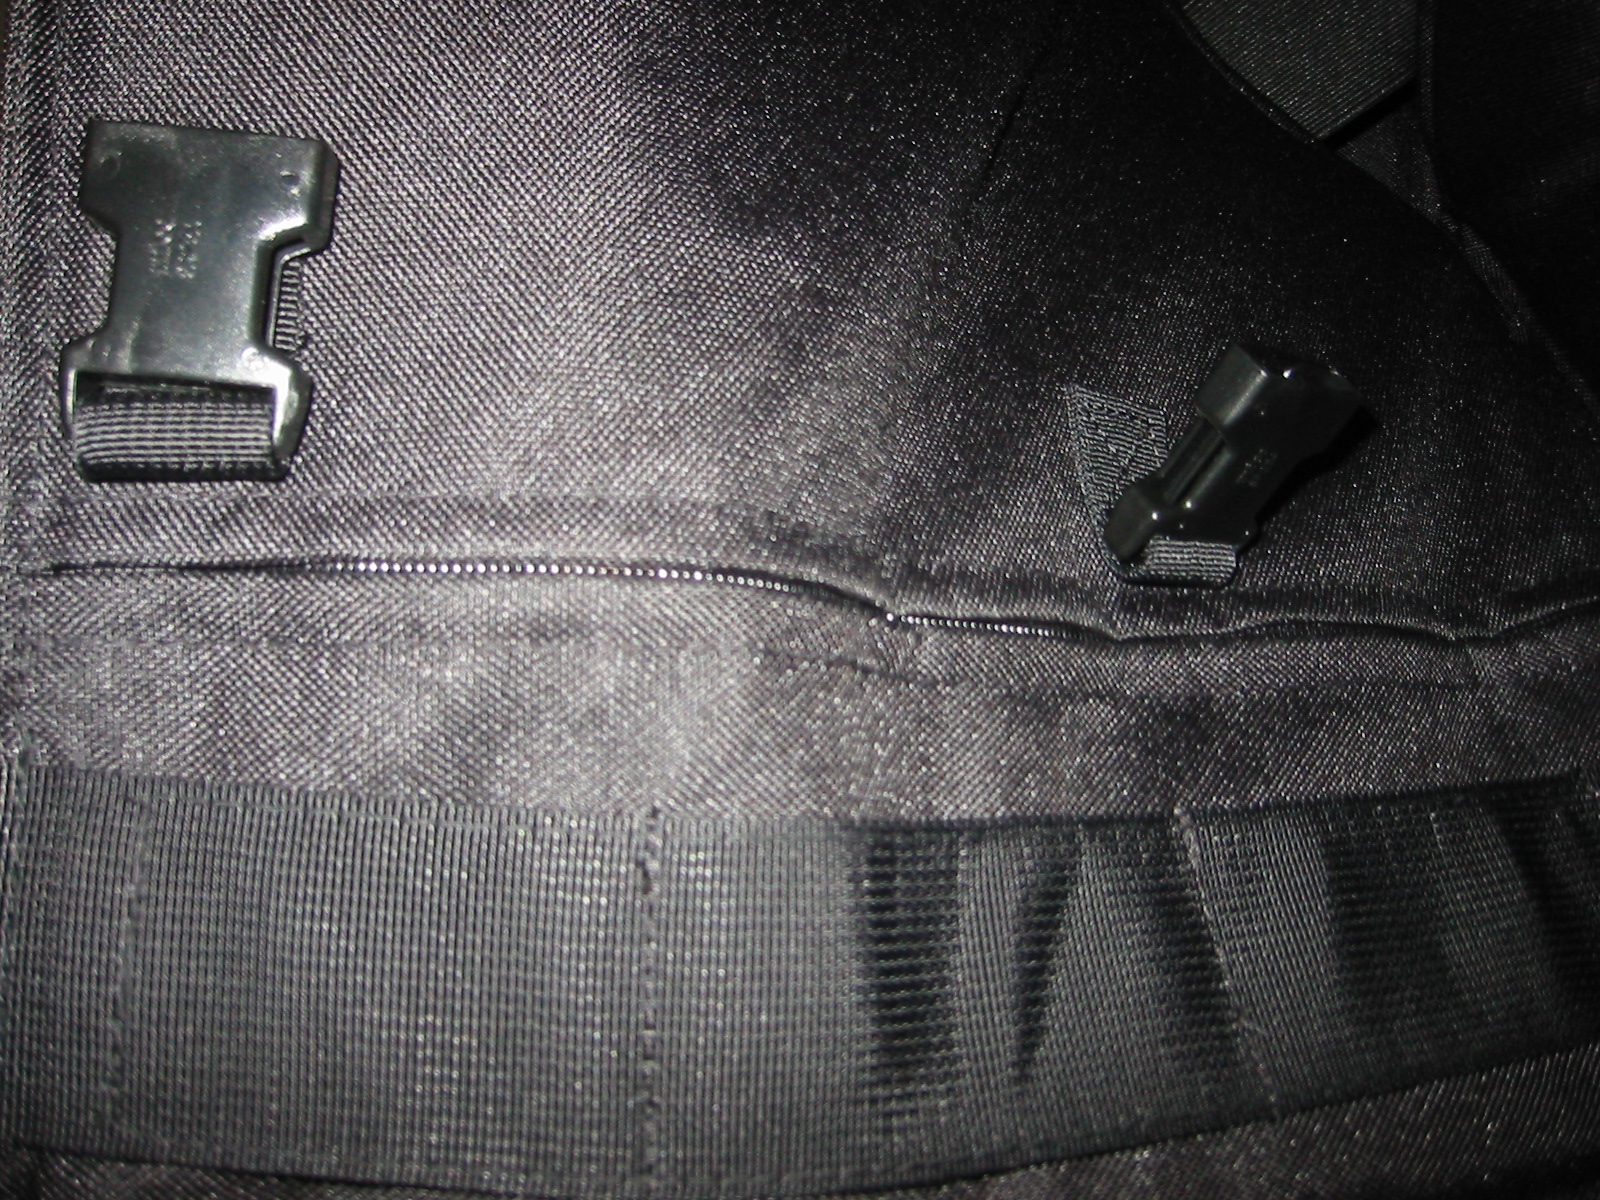
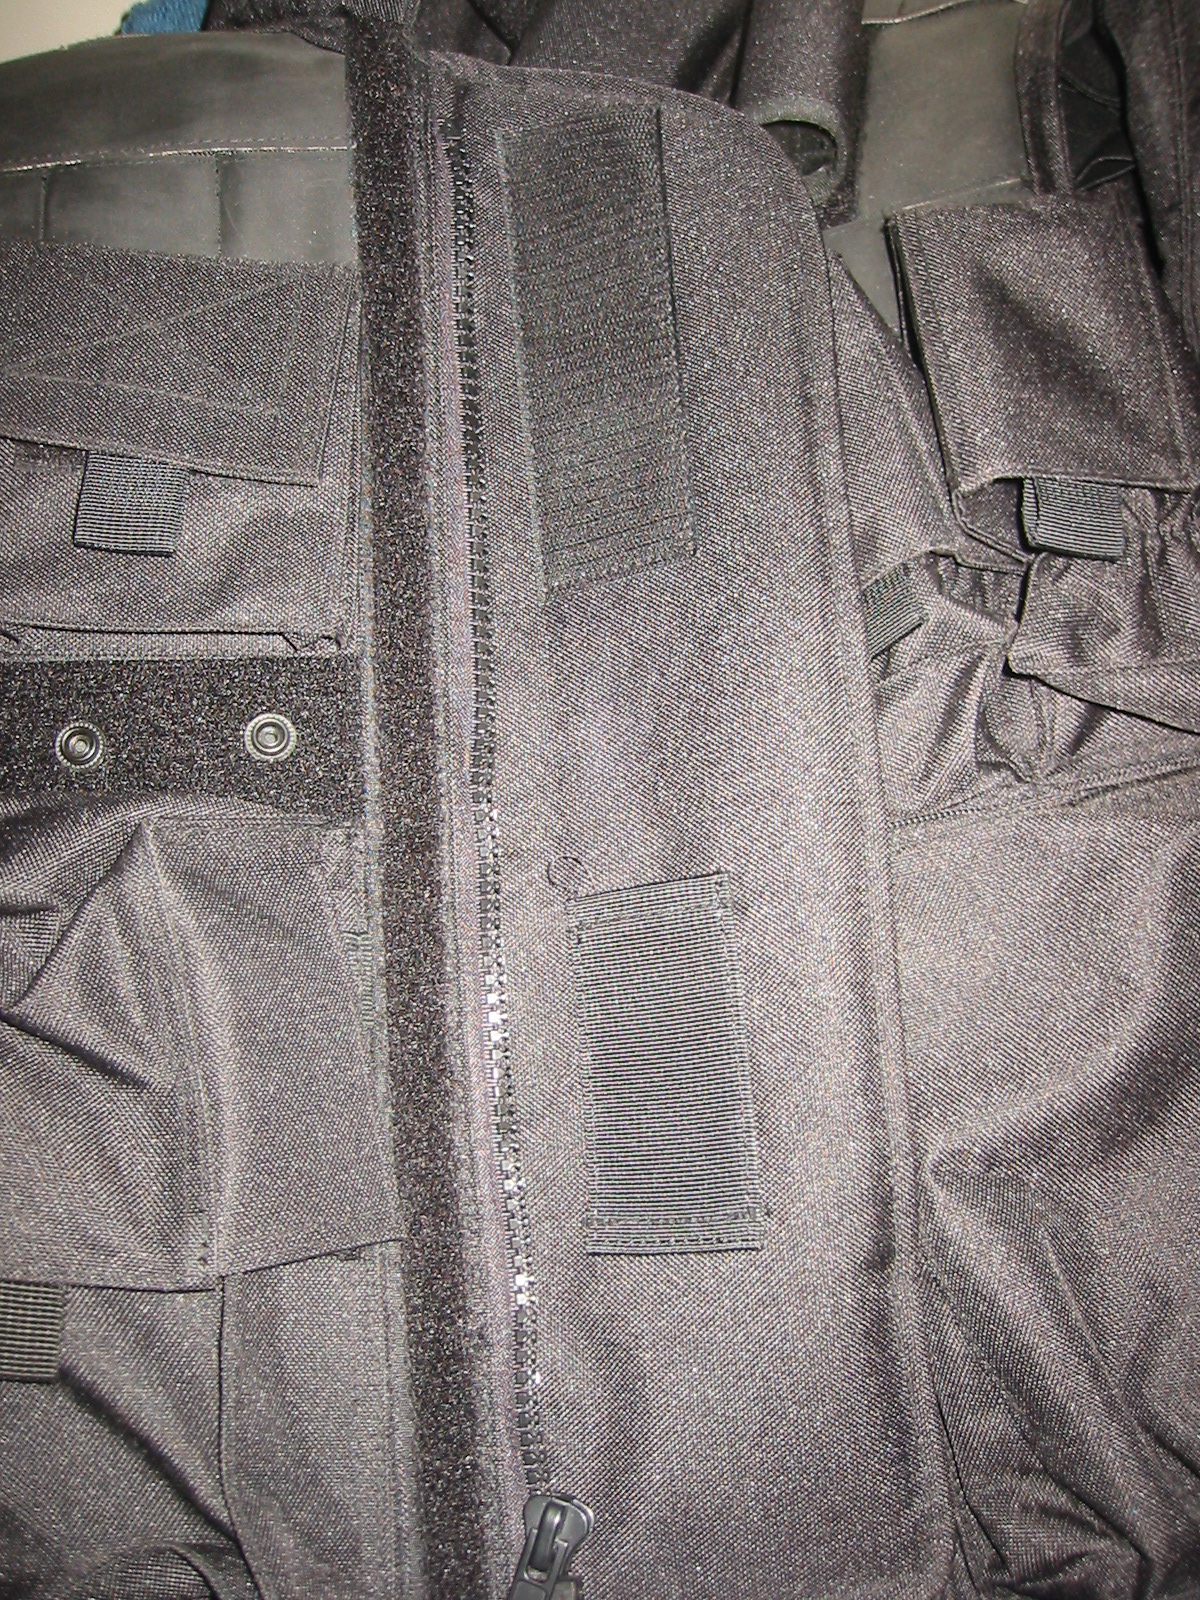
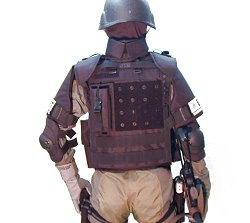
The zips are of a decent quality, and certainly look to be the type that will stand the test of time. Each 'part' of the vest has it's own individual Guarder label, which is rather cute, and very pleasing to see. Inside the jacket you'll find foam inserts rather than kevlar. These help the vest keep it's form, but I suppose you could take them out to fit real keval if you wished, or simply to remove the padding to help keep the vest from getting to hot for you. Features: Firstly there's a radio loop over the shoulder, that looks like a Cordura loo-roll for passing cables over your shoulder and keepingthem snag free. The cable collector can be placed on either side for left or right handed radio useage. You'll also find some nice non-slip padding to rest the buttstock on in the shoulder area. On the back of the vest there's an array of buckles, but I've yet to discover their use. The Airsoft replica has plastic buckles so they aren't really suitable for any load bearing purposes. They are handy for fitting a shotgun holster to them though. Inside the vest you'll find plenty of zippers and the ability to remove the foam lining if it needs cleaning. At the front you'll find to buckles for cliping the groin guard to.
Breathability - This is a problem you wil face with any armour copy, so it's not one you can really hold against the Guarder replica, although it is worth mentioning. It stands to sense that being wrapped in a lot of material (particularly non vented gear) will somewhat increase your uper body temperature. The Guarder gear is no exception, and you will get rather warm when you're wrapped up in it. I found that it was fine for 3-4 hours at a time, but got rather too warm after a day's use. Remember this gear is designed for CQB use really, so therefore for limited time frame engagements, and not for running around outside of buildings for huge amounts of time. Getting warm is all par for the course really, so as I said it' not a bad point, but bear it in mind when you choose your inner layers of clothing for under the vest. You will need soemthing that won't be too uncomfortable when damp, and won't rub against the neck and armpits. Comfort - I've already said that Cordura rubs, so don't do a Keanu and just wear a t-shirt under vest, trust me it's like wearing a sandpaper bucket.
The vest bends nicely in all the right areas, but it does restrict neck and upper torso movement somewhat. It's a very good idea to make sure that you firstly know where everything is in your vest, and secondly can reach and get to everything yourself. There's nothing worse than trying to crane your neck downwards to look into your lower pockets fumbling for something.
Loadbearing - Boy can you load this vest up! I managed to load into my vest on it's first outing 8 TM 200rnd MP5 mags, 4 pistol mags, 2 3000rnd bags of BBs, 2 spare batteries, a loading tude, 8 TM shotgun shells and I still had room for lots more. The front big pocket really is a proverbial bottomless bucket (I shall refrain from making any sexist remarks comparing it to a ladies handbag, but you get the picture ^_^). You really don't notice the weight on you until you take the vest off and drop it to the floor (and then try to pick it up afterwards), so take care when you pop back at the end of a skirmish. I would recommend getting a buddy to support the vest as you get out of it, if you want to take it off loaded up. This will avoid any undue wear and tear on the stitching. This may be a slight overkill, but I prefer to do this than risk putting undue stress on gear - after all nothing is indestructable right? Similarly don't undo the zip all the way at the front unless you plan on taking the vest off. This isn't for any reason other than the fact that craning your neck downwards to align and zip up the centre zip when either side ofthe vest is loaded up with bulk and weight is well.. somewhat 'stress enducing'. Pocket sizes: The rear pocket is suitable for just about any radio, it'll fit just about anything from the standard issue Kenwood radios, to the smaller civilian PMR sets.
The top pouches will fit standard pistol magazines. Standard 9mm Beretta/Glock magazines fit nicely although extended magazines are more of a snug fit. The lower right bag pocket will happily fit a standard first aid pack or other sundries. There's a small pocket opposite the pistol pouches that will fit tools, such as a Leatherman or keys. The lower pouches will fit 4 standard mp5 hicaps, or two AK /M4 mags.
Comment on this review in the forums Last
modified:
Tuesday, January 13, 2004 10:29 PM
Copyright 2003 ArniesAirsoft
|


 WGC
WGC