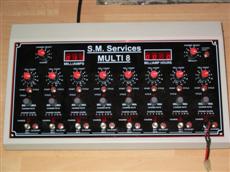
There comes a time in every airsofter’s life when they realise they have too much kit; when opening up your closet to marvel at your collection is like opening a vault at a TA divisional armoury, when your wardrobe looks like a divisional quartermasters store room and when popping out for a skirmish at Combat South requires days of logistical planning. I reached that stage a long time ago, probably 2 years ago, but it never really hit home until I acquired my ShadowAUG. With its 4 12V 600mA and 2 9.6V 1700mAh batteries charging times multiplied from hours to days – preparing for a skirmish took a week. My 3 chargers (2 TLP Premiums and 1 TLP AC-94) could charge 1 battery at a time, on slow charge, for 14-18 hours. Multiply that by 6, then add on the 2 batteries for my M4 meant getting them ready for a skirmish took about 6 days. I only every charged my batteries during the day because the noise of the fans on the TLP Premiums kept me awake at night. Added to this time issue, the fact that none of my chargers were able to cope properly with the 10.8 and 12V packs I used, I would only get a partial charge. So the answer in short was to buy several new chargers that were rated to 12V (10 cells). I initially looked at the Systema chargers, and some of the brick chargers sold by several UK retailers. But whilst being rated for 12V it would still take days for me to charge all my batteries. My team mate found the apparent solution to all my problems on a website belonging to a small, company called S.M.S Services. Specialising in model aviation product where multiple multi current and multi voltage packs are common - their premier product, the Multi 8, appeared to be exactly what I was looking for. At £300 it had to be!! Specifications
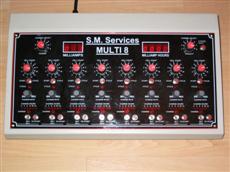
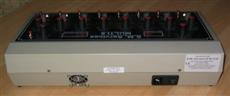
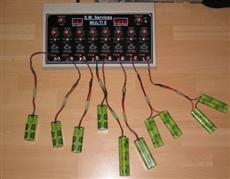
Shopping I ordered the charger by calling SM Services themselves, and spoke to Terry who was exceedingly helpful and gave me the low down on the charger, its features and functions. Being sold on it I asked him about the connector leads, as the Multi 8 uses 2.5mm plugs to connect the battery to the charger. I requested he solder power leads onto the 2.5mm plugs – as soldering was hardly my speciality. He said he would gladly oblige providing 1m worth of cable per lead on each plug. They accept Switch, Visa, Mastercard etc… I paid for mine and Terry informed me they would deliver it in 3 working days – 1 for testing and 2 for delivery. 3 Days later a large box arrived containing a very padded charger. I rushed home and opened it up. I was impressed by what I saw.
Set-up I bought the charger with my AUG in mind. Mike my team mate uses 4 of the same 12V packs in his AUG so I took responsibility for charging them as well. These combined with my 6 AUG packs and 3 M4 packs meant I had over 12 batteries with the small Kyosho style connector. Since I also had occasion to use a large battery pack with a Tamiya connector and packs with DEANS connectors I had to have all options open to me. So when I ordered the charger I got 10 plugs with fly leads attached; 8 intended for small plugs, 1 for a large plug and 1 for a DEANS connector.
Setting them up was merely a case of soldering the plugs onto the fly leads, and covering the join with some heatshrink tubing.
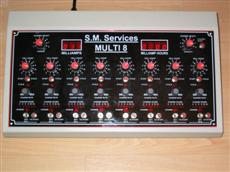
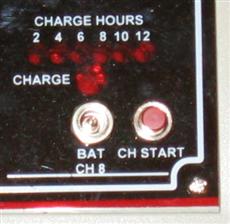
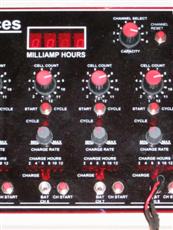
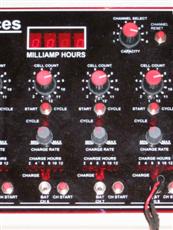
Once Channel 1 was set I did repeated the process for the other 7 channels and the charger did the rest. Every 2 hours I noticed a time indication LED came on (these are located above the socket on the front panel and read from 2 – 12). After 14 hours of silent charging (yes even with all 8 battery packs) the time indication LED’s went out and the charge LED started blinking. At this point the charger reverted back to supplying a minimum top-up current to the battery. Amazingly simple, and silent – again I could not get over the fact that the unit’s fan NEVER came on. The Multi 8 took 14 hours to charge 8 batteries, the TLP Premium charger would have taken 112 hours, truly amazing. I had effectively charged ½ of all my batteries in half a day.
Discharging I used most of those batteries at the following Combat South skirmish, 2 days after I had set the charger up properly. So I now had to use the Multi 8’s very useful discharge function.
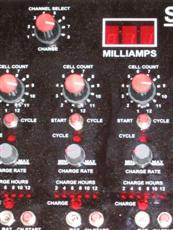
One of the features of the Multi 8 is that the when it comes to discharging the channels are divided into 2 blocks. Each block is set to discharge a certain capacity range. Channel’s 1-4 discharge batteries up to 650mAh and Channels 5-8 do everything above that. This means that discharge rates are more stable and more specific to pack capacities. Discharging battery packs is more complicated. You first have to set the channel up to match the number of cells on the battery pack (so for the 12V packs it is 10 cells), and set the capacity channel to channel you are discharging from. I then set the charger up as though I was charging the batteries, setting the channel, battery charge rate etc… Once the CHARGE LED came on I pressed the CYCLE button located above the charge rate knob. The left LCD flicked down from 060mAh to 011mAh, and the right LCD started counting up from 0000, in intervals of 2. I repeated the process for all 8 channels, putting 4 600mAh packs on Channels 1-4 and 4 1700mAh packs on Channels 5-8. After 2 hours the unit felt hot to the touch and I finally noticed the cooling fan in operation. From 3 meters away it was totally inaudible, but up close you can just about hear it. Soon after the first 600mAh packs started to finish discharging, this was indicated by the CHARGE LED flashing. I noticed that the right LCD was reading 598 (mAh), it had effectively discharged the battery and checked it capacity at the same time a bonus feature for identifying dead battery packs! The 1700mAh packs took about 4 hours to discharge, but again 4 hours to discharge 8 battery packs – even with the TLP premiums and my TM dischargers (all 4 of them) it would have taken at least double that amount of time. Conclusion This charger is nothing short of amazing. It has the ability to set individual charge rates on 8 battery packs, up to 14V. It has a discharge and battery checking function built in and is silent in operation. For the first time ever I can’t find anything wrong with a product I am reviewing, I can’t find anything to fault it, it excels in every area. It’s totally adaptable, easy and intuitive to use, well made and has a full 1 Year guarantee. The price is a bargain when you consider that to obtain the same functionality from the TLP Premium chargers you would have to buy 8 of them – and at £50 a go including P&P (and not TAX) that’s still £400 with no guarantee, over £100 more than the Multi 8. I usually advocate going overseas for airsoft kit usually because of price, but here I make an exception. BUY the Multi 8, buy it knowing you are buying the BEST charger on the market, buy it in full confidence knowing its supported by a 1 year warranty, buy it know its been designed and built but enthusiasts like you and me. If you are a site owner, or just have more batteries than you know what to do with buy the Multi 8 it will make your life a lot easier, and prolong the life of your batteries. Simply put a 10/10 product, you won’t find better on the market. by Permian External
Links: Site links: TBA
Comment on this review in the forums Last modified: Wednesday, May 9, 2001 9:37 AM copyright 2001 ArniesAirsoft
|