
Gunsmithing For Dummies

Entry posted by Guest ·
381 views
After a long, long time in limbo, I am more or less satisfied that I have a final plan for my battered old Marui MP5 SD5. My first homemade custom gun; Woo, and veritably yay!!
The stock went to someone else a while ago as I knew this had to be a short gun as soon as I realised it had to be modified, and my amazingly cunning, although horribly disfiguring, previous plan of keeping a giant battery hidden inside an upturned MC51 large battery handguard sitting on the top of the thing has been scrapped, because I have both A Better Idea, and a Large Custom Battery that needs using up. That leaves one with a gun that needs even more shortening of course, but that is for another day 
The main impetus for this being done is the ever-helpful Dave (Shard) who chucked some Krylon paint at me for nothing which gave me the idea of painting those bits that have now been painted, and got me to finally cut down and re-attach the silencer like I had always wanted to do, this time because it was meant to be part of the overall thing and as I was already involved, it would have only been rude, really, not to have done it.
The battery, useless for any other gun in The Collection, is a big-*albatross* stick/rod affair and it measures about 300mm long. The standard stick battery packs are about 7” long so it would normally be bit of a mission to get this into any conventional battery space. I do have an obvious and (hopefully) pretty easy solution for this problem however – its gonna go into the cocking tube/gas tube and fill pretty much the whole of that cylinder that runs atop the length of the gun. The relative lengths of the battery and this compartment leads me to believe that truly, this gun I am making is the will of God/Allah/Blind Io himself 
I hope I don’t get boycotted up for that  Better not draw any risque illustrations of it, just in case.
The pre-assembly stage of this, after I had done the cutting, filing, glueing, sanding and painting (And painting.) (And painting, again.) got me to a point where all the stuff was dried, and it was just on the verge of being assembled for the first time. I was a touch excited – hell, I practically dribbled on the things by the time I got to here:
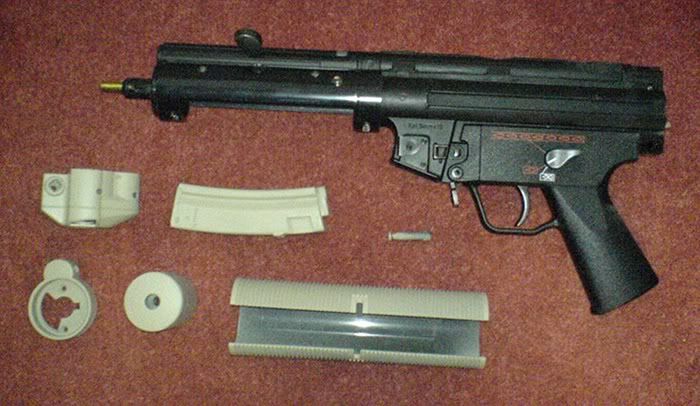
What I actually did, and bearing mind I am supremely inept at anything practical (my Brother got all the practical genes, I seem to have got all the hand-me-downs ) was hacksaw the rear sight block off completely, then remove the front sight block (very bottom left in the picture above) and hacksaw the actual front sight circle right off as well, leaving the shape you can see above, this makes the front end along the top of the gun flat and straight.
The silencer was done according to the most basic theory possible, - and surprisingly it actually bloody worked - chop a lump out of the middle and glue the 2 halves together just carefully measure how much you need to leave at the rear end, by marking the cut on a pencil you just poked into the end, so that the Quick-Detach twisting motion that attaches the silencer is still fully operational. Sanding and painting the result – a good many times – completes it.
Of course it would be best without the fingerprints I forced into it after applying it to the gun with some force before the paint had fully dried, but at least that wasn’t as bad as when my Dad waltzed over and trod on both metal parts that were *just* about fully dry from their final coat, or so I thought, when he was going in from the garden.
In both cases they received another 3 coats of paint anyway so hey, it’s all good.
As well as that:
The endcap is a Classic Army metal MP5 endcap, sanded (badly) and painted Tan like the rest of ‘em, taking care to remove the rear strap buckle from it (much as I removed the front sling hook when taking apart the sight mount section) to keep the lines smooth and clean and without interruption, as far as I could at the time anyway. This a temporary, but reasonably nice feature I reckon.
HurricanE MP5/G3 sight rail sanded and sprayed as well, nice blocky, solid mount but its not for this gun, ultimately….
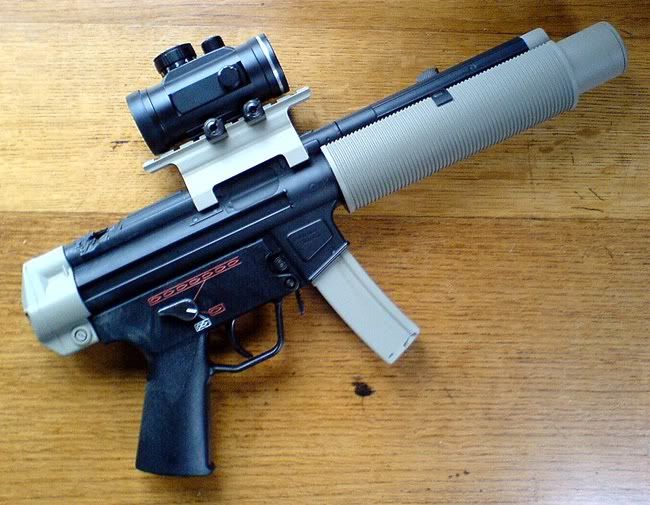
Now so far, then, the gun looks like this :

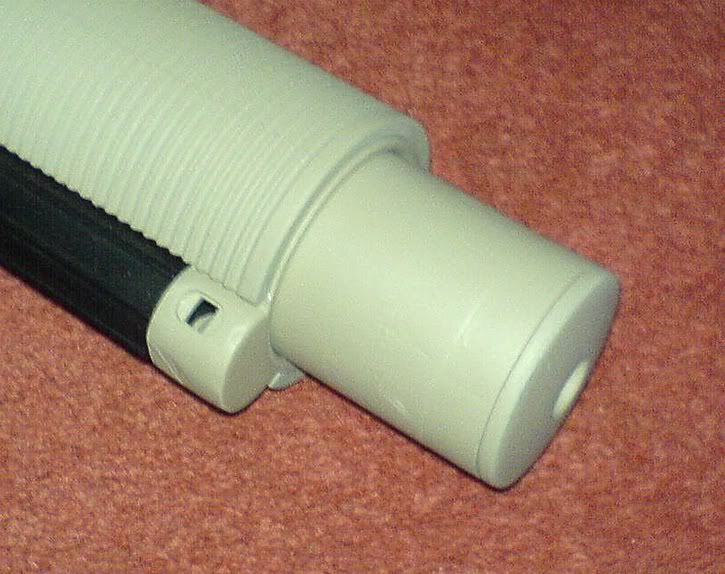
and a close-up of the silencer and front sight mod ( a very-close-up in fact) :
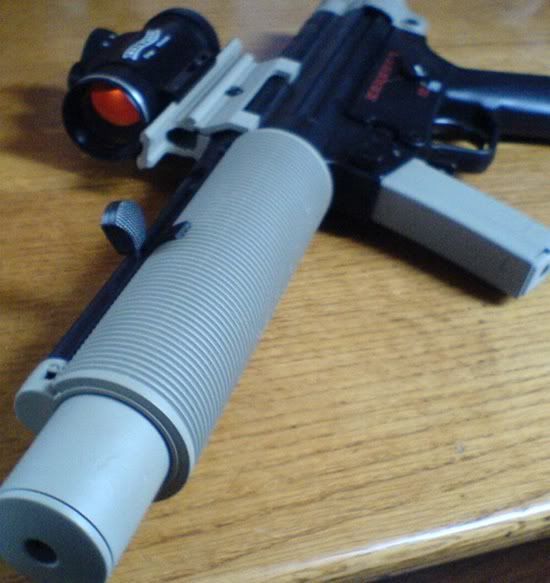
And one o’ them new-fangled `artistically angled` photo-matographic-arrfffs:
And what I plan for it is:
- get an MP5/G3 low mount, as low as freakin’ possible in fact; like as close to a top-mounted rail as I can get, basically; and get a new optic (undecided yet, will choose one when its all completed) which will sit above and around;
- my simplest yet most cunning alteration, namely hacking out the gas-tube/cocking tube completely and stuffing that battery in there. This is a double whammy in effect because it removes the cocking handle at the same time making it totally `clean` along the top. The battery connector comes straight from the gearbox out the back of the gun so the only real challenge is getting the fuse to sit in as little space as possible, as the connector itself will hide inside the end cap of the;
- new sliding stock, or possibly folding stock, that will be painted the same colour (whatever that ends up being) as the other modded bits. The sliding stock will really complete the look though because when its collapsed it will create a thick matching-coloured line in the middle of the receiver – Perfect-a-mondo IMO 
All in all, I am pleased. What I have to do now is find a way to stop myself from hacksawing any other guns up until this is finished 
5 Comments
Recommended Comments