

user7
-
Content Count
132 -
Joined
-
Last visited
Content Type
Profiles
Forums
Gallery
Blogs
Calendar
Posts posted by user7
-
-
I ordered it from airsoft global in hong kong. from order confirmation to my doorstep took about a week.
-
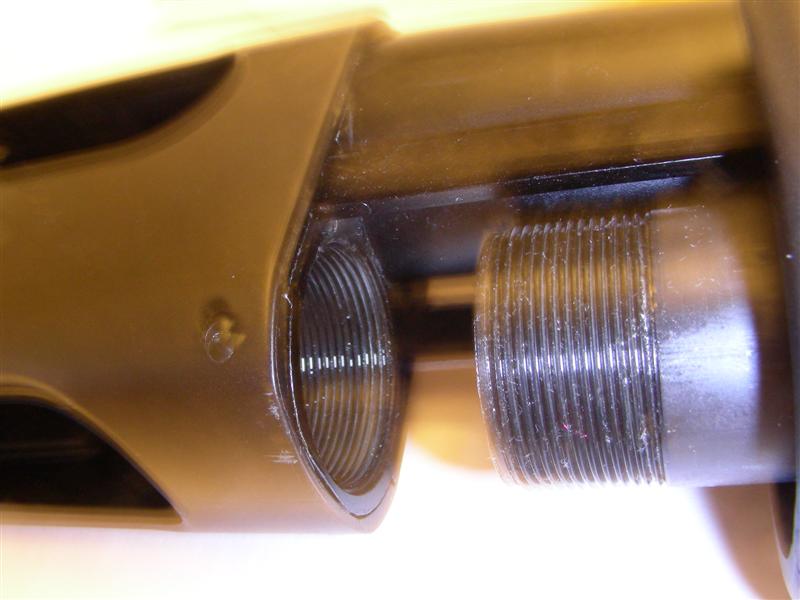
I forgot to mention, when I mounted the dbal to my gun (it took the same real estate as the peq). the vfc tape switch did not fit the G&P dbal. the g&p jack is slightly longer and thicker, however i don't have any measurments. I don't have any other laser remote switches to test out however.
I just tried plugging in my headphones - and they fit! obviously they won't do anything, but i can say that the dbal will fit shure se210 <- whatever that size is.
-
Can you provide the height of the top of the unit down to the rail, while the unit is mounted; I would like to know how much the unit will block my fov while using a red dot/BUIS.
It's about 1 - 1/8" not counting the adjustment dials (those are off to the side)
-
Please bear with the video quality, my $100 camcorder likes to auto-adjust light and focus for max annoyance.
Part I - the review
http://www.youtube.com/watch?v=Wh6padC1AJQ
Part II - function test
-
As some of you may know, many airsoft guns in canada are now partially or wholly clear body, for ease of importation. while it is well known for lesser chinese companies to sell clear plastic airsoft, more established companies such as G&G and SRC have started manufacturing clear bodies for the Canadian market. KJ Works is the first company to create a clear lower receiver for a GBBR.
Before I paint my body black, I wanted to get some video of the mechanism (hammer, sears...) in action. the main focus of the video is the clear body and the internals while in operation.
the the dry fire toggle doesn't want to stay down so I had to hold the bolt release to dry fire.
sorry, i don't know how to embed on this forum
-
Yes there is,
It is a MOE Grip and Ehobby sells it -- http://shop.ehobbyasia.com/magpul-pts-moe-...ries-black.html
Be advised though, the KJW cap screw that fastens the grip down is larger and you will not be able to use the cap screw that comes with the PTS grip.
on a similar vein, what tool is needed to remove the grip. the allen keys i have are too short to reach the screw
-
i justt hope there is a c-mag in the future
-
So now that this thread is back as an active topic... does anyone still have a Tanaka M870 that's actually working at the moment? Or is the internal quality still rubbish and they all fall apart within a few months of use?
You would think that Tanaka would have recognized these faults and fixed them by now, but I suppose the number of airsoft companies that actually listen to their user base and make improvements based on user feedback is very few.
I still have mine, and it still fires (most of the time). even though i'm a plinker, it has shown some worrying wear - namely a crack in the hammer has appeared. I try to not dry fire it or use stronger gas on hot days. I've also noted that there are light strikes during hot summer days when I use green/propane.
it comes down to it that Tanakas in general are not upgradable; there is no aftermarket support, no clones even.
-
it's sooo long, its fantastic. two questions, how many shells does it hold now? and did you replace the old spring with a longer one? (though that would most likely be a yes).
fyi, i recently measured the inner barrel to be 241mm. still do not know if aftermarket aeg barrels would fit as i didn't take apart the hop up to see how it worked.
if anyone cares about my opinion, it seems the new CL slugshots don't use an inner barrel system so in theory one could remove the inner barrel unit, find a way to affix the ring thingy that connects the barrel & mag tube at the front end, it might work. barring that the slugshot rounds don't need to use the cl upgraded firing pin or that there is no hidden lip or anything inside that prevents the shell from working. I might buy a pack to try out when they become available.
-
I dont own a camcorder, so that would be tricky to pull off. My digi cam does have a video function, but i would have to be pretty drunk to believe i'm photogenic enough to put my mug on the internet. Maybe in the future.
-
The performance
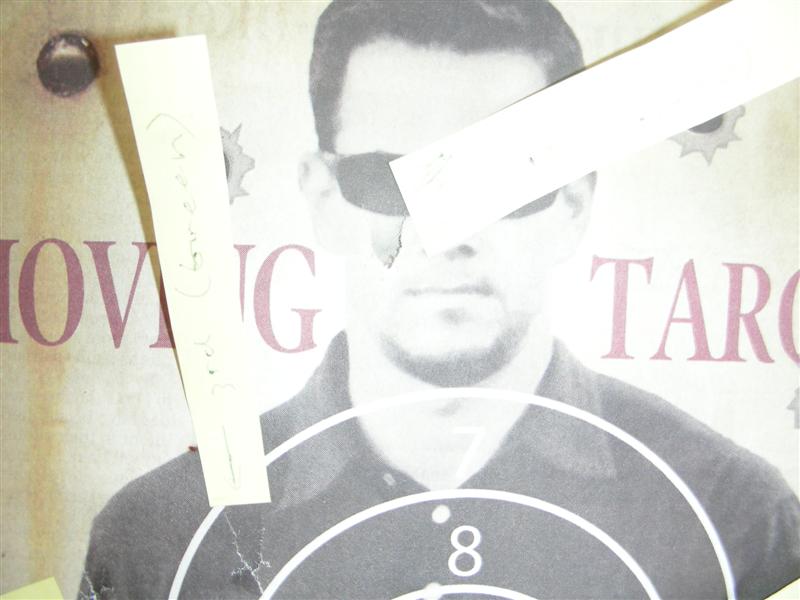
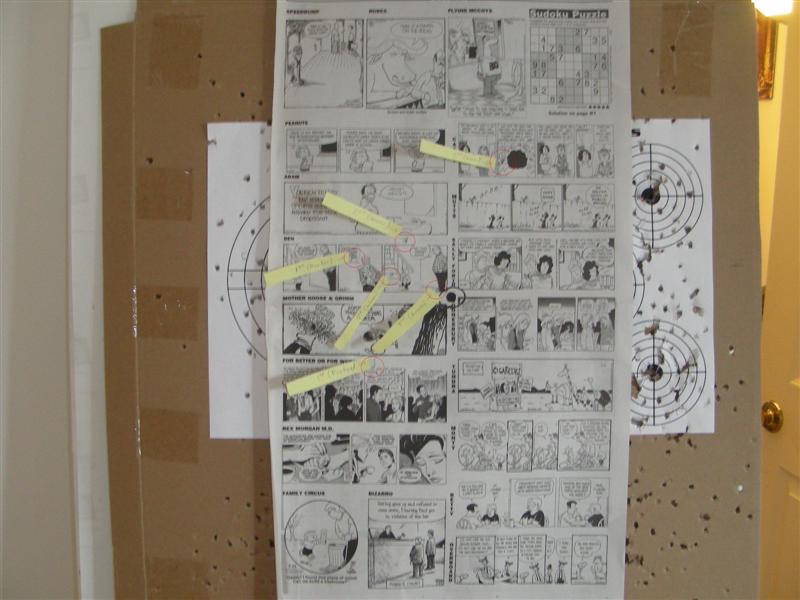
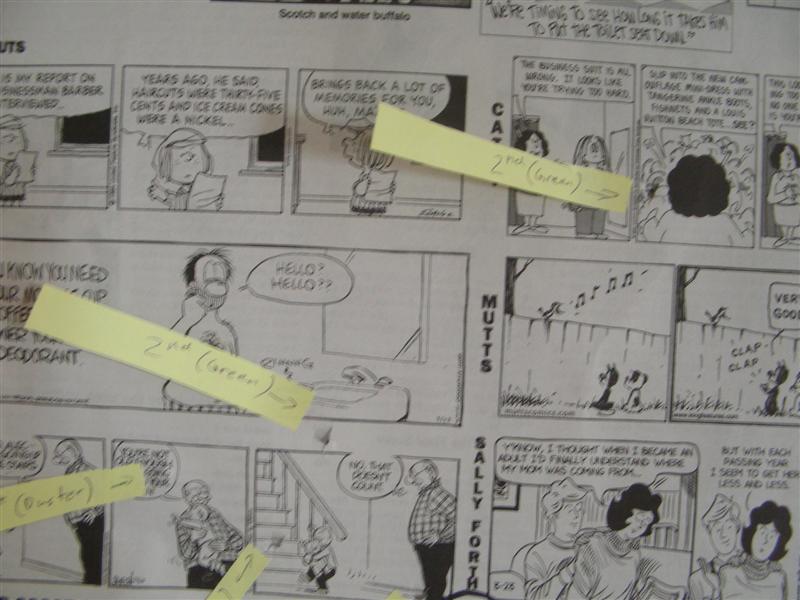
On duster the power is fairly weak, but that is to be expected with the gas pushing 3 BBs through one barrel. Although I do not have access to a crono, I think under 200fps on duster is believable. The range I’m using is 25ft / 7.6M long with an ambient temperature of about 15 C/ 59 F. The first couple of shots on duster seem to show a rather tight grouping; the first shot produced two holes 2cm apart and the second shot produced a single hole. However, it was only after all the shots were fired that I noticed some flyers that did not catch my eye. These where located near the top and bottom of the targets and were most likely from shot 1, 2, and 3 as the number of shots equalled the amount of BBs fired. I am unable to discern which of the holes were made at which shot but the general conclusion thus far is that the spread is up 13cm (measured from the 1st shot hole to the closes unidentified hole. The results using green gas (or propane as I am using) are better and I assume that is what most people will want to use with this gun. The power is similar to what you should expect on typical 134a GBB guns: low-mid 200fps. I’m basing my judgment on my experience with other GBB guns and how different propellants react with my targets and backstop. BB spread remains about the same with green gas: 5.8cm and 10cm on my 3rd and 4th shot respectively. My second target paper showed similar results: 1st shot - duster - 9.5cm, 2nd shot – green – 11cm, 3rd shot – green – 4.2cm. Note that some shots did not register on the target as they may have hit off to the side of the paper. I do not know why the second round of using duster provided such a large spread; maybe that is how variable the shot pattern can be. I can’t say what the max effective range is or how skirmish worthy it is, I’ll let the reader decide on that. I should also say that you could load the shells with 2 or even a single BB to increase fps but the spread is of course, smaller. Accuracy of under loaded shells is about the same as 3 BBs.
(distance from target)
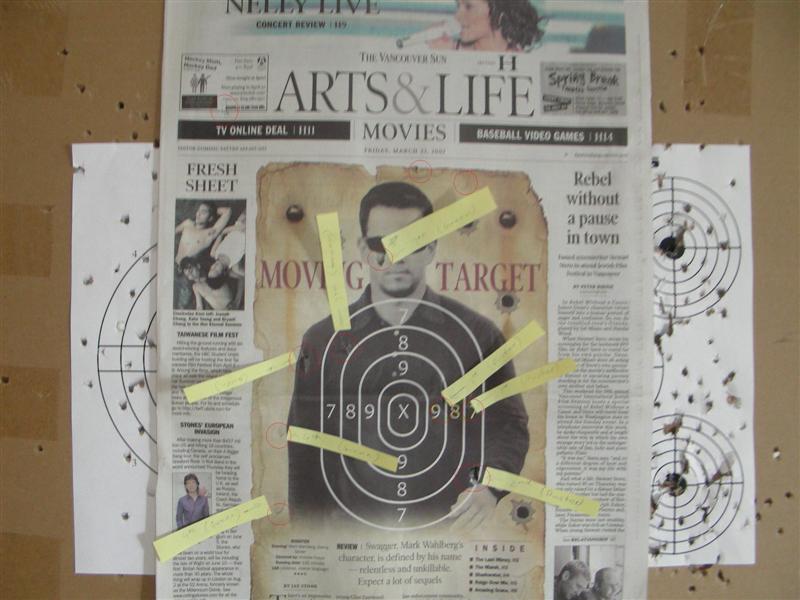
(first paper target, how convenient for this to appear in the paper on that day)
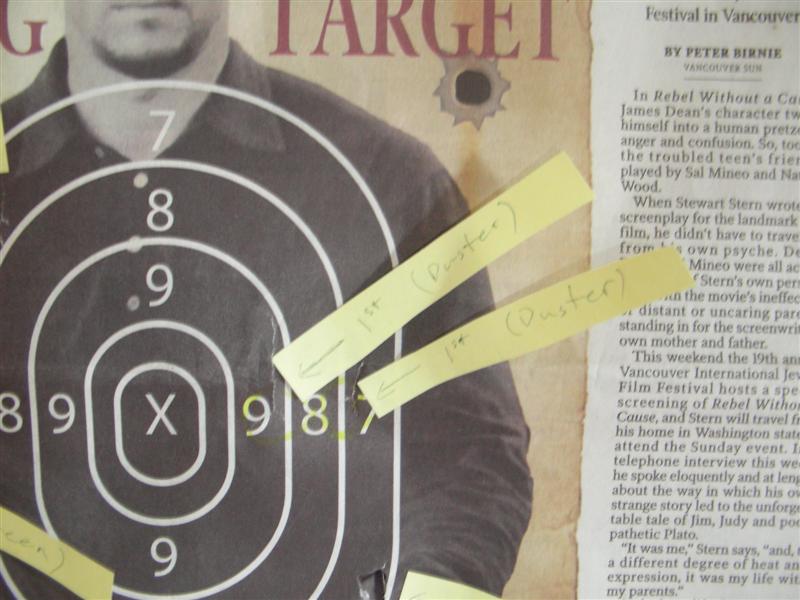
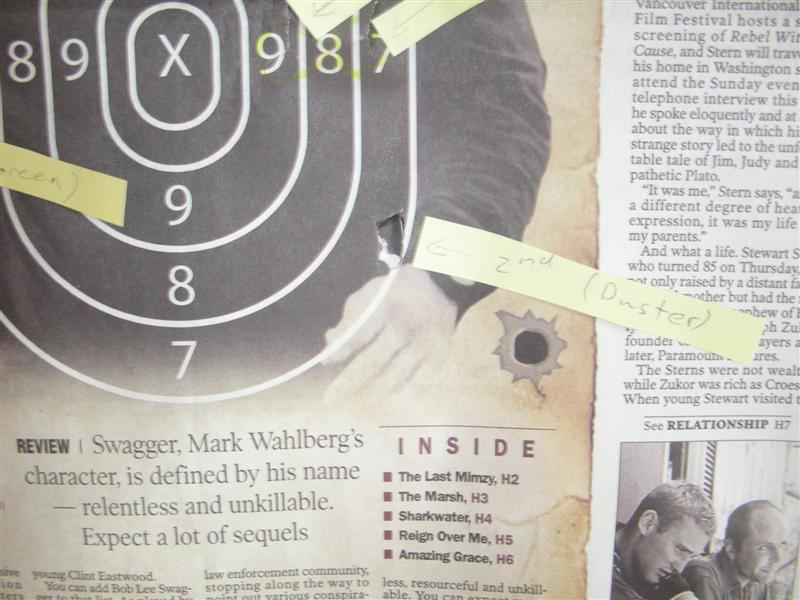
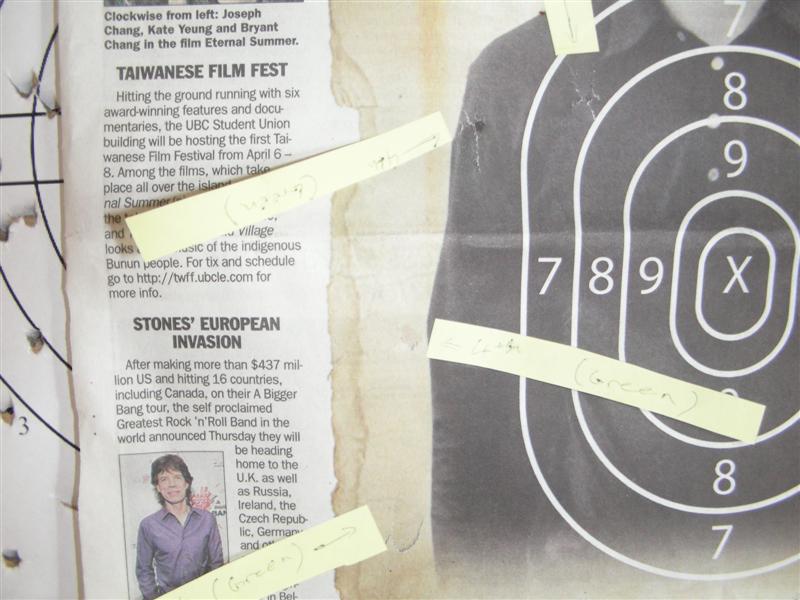
(second paper target)

The conclusion
Is this the best shotgun of modern-day airsoft? I would say yes but this being my only shotgun experience, I’m probably not qualified to say that. Many would argue that the ejecting shells, gas-powered, expensive Tanaka is not suited for skirmishes but I would disagree. It feels robust enough to be dragged through the mud and despite being based on a very common firearm, it’s definitely a special piece in airsoft.
-
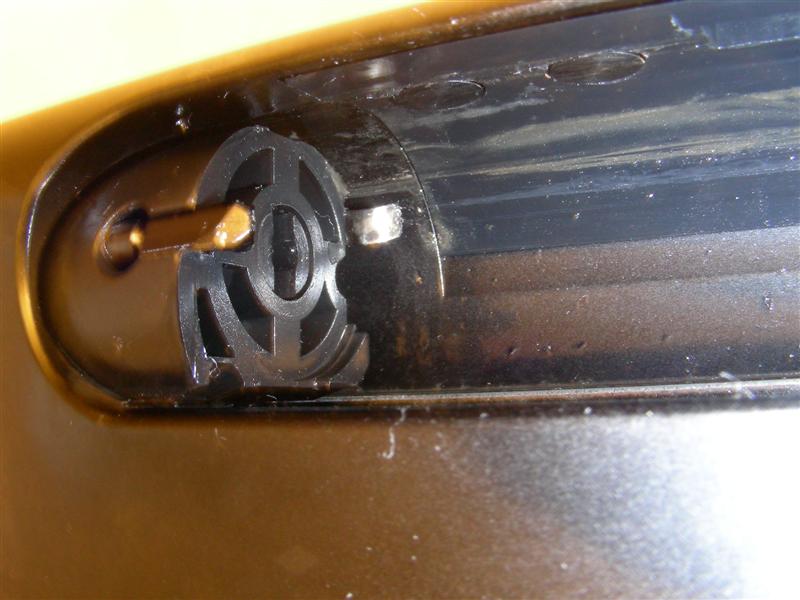
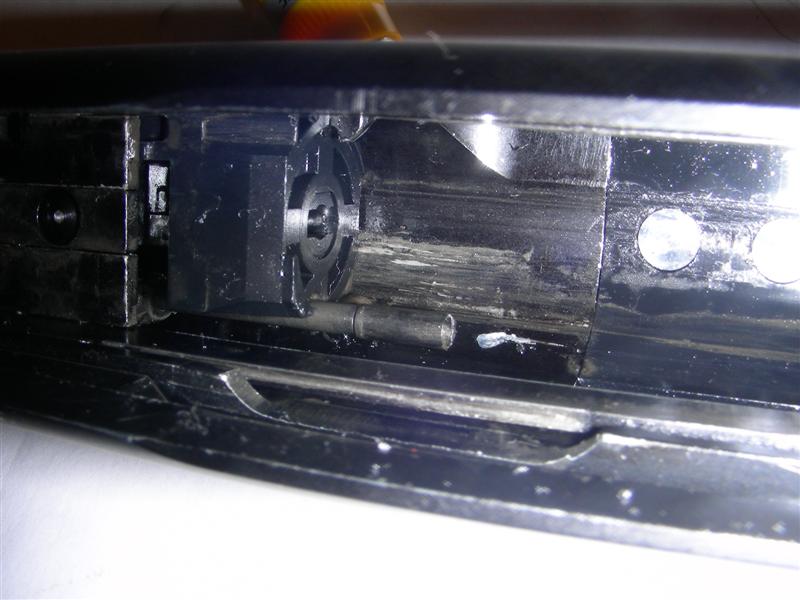
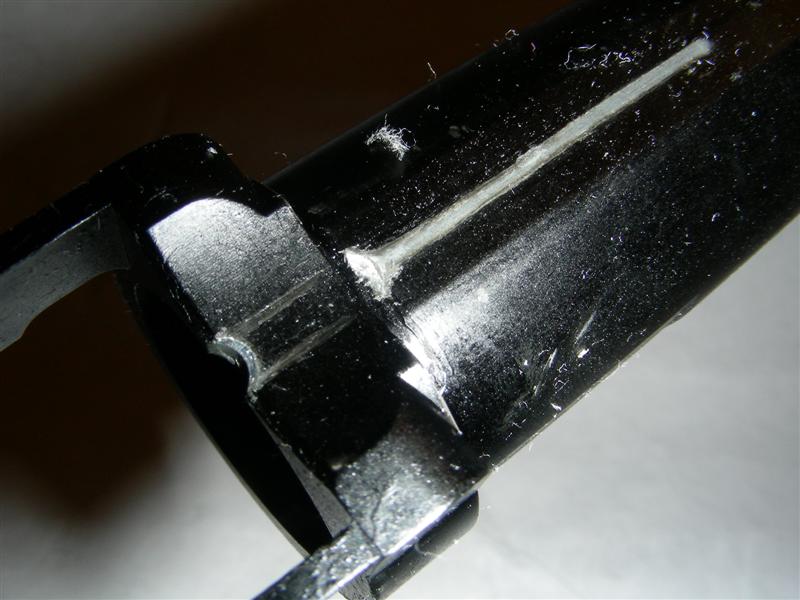
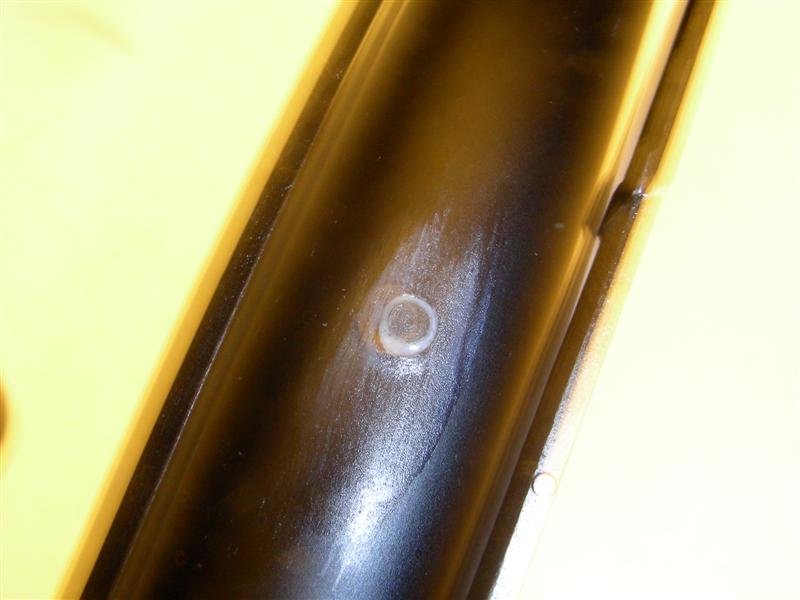
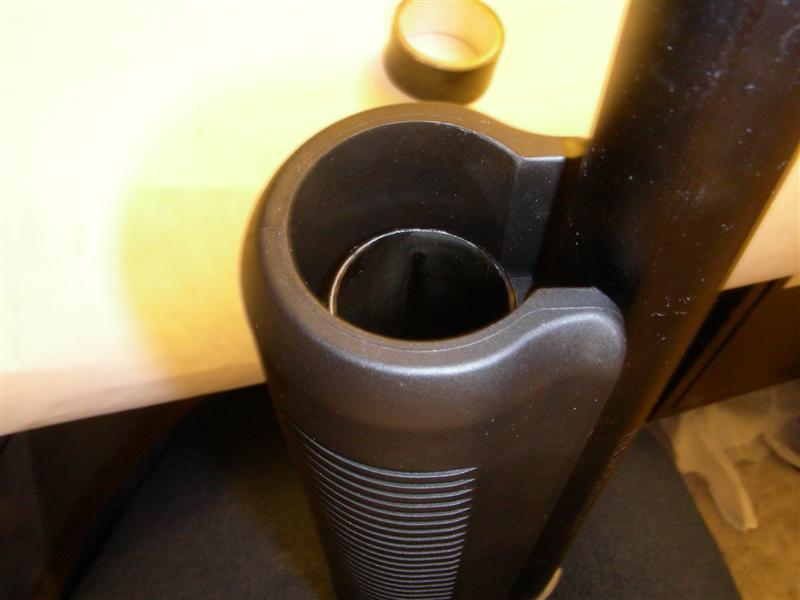
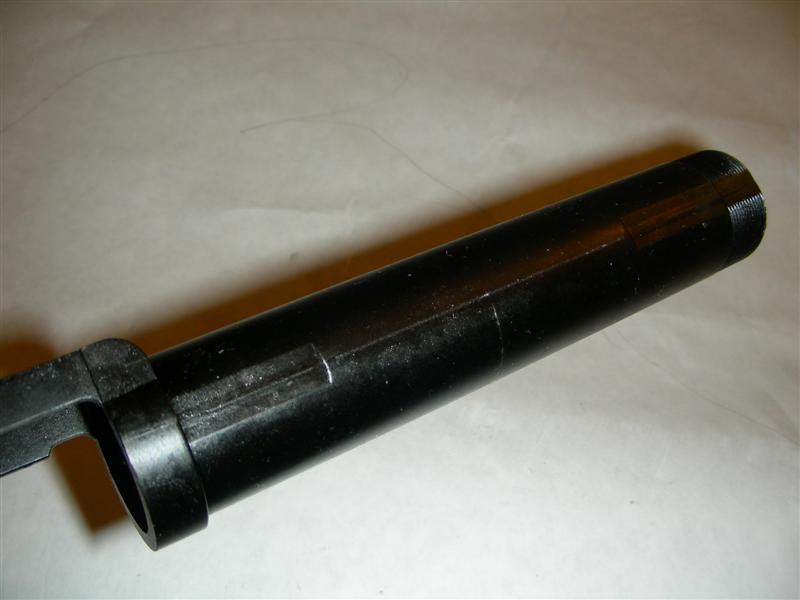
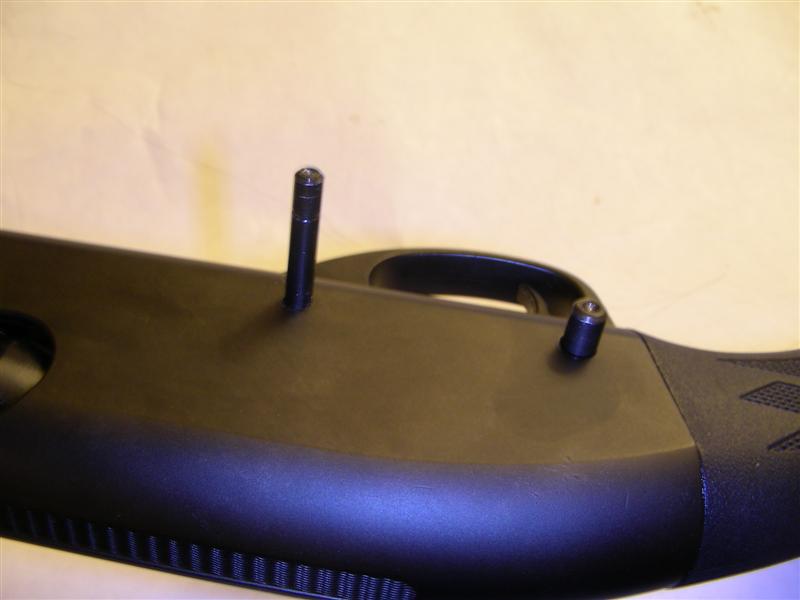
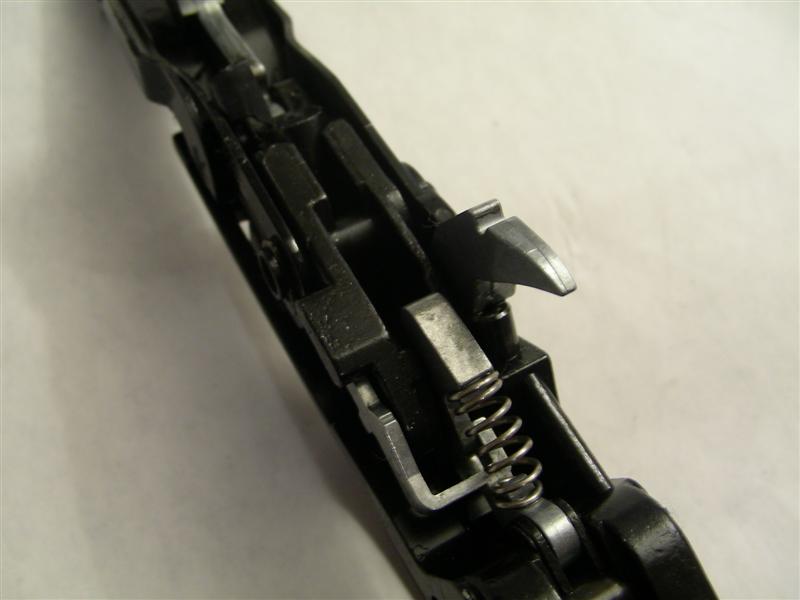
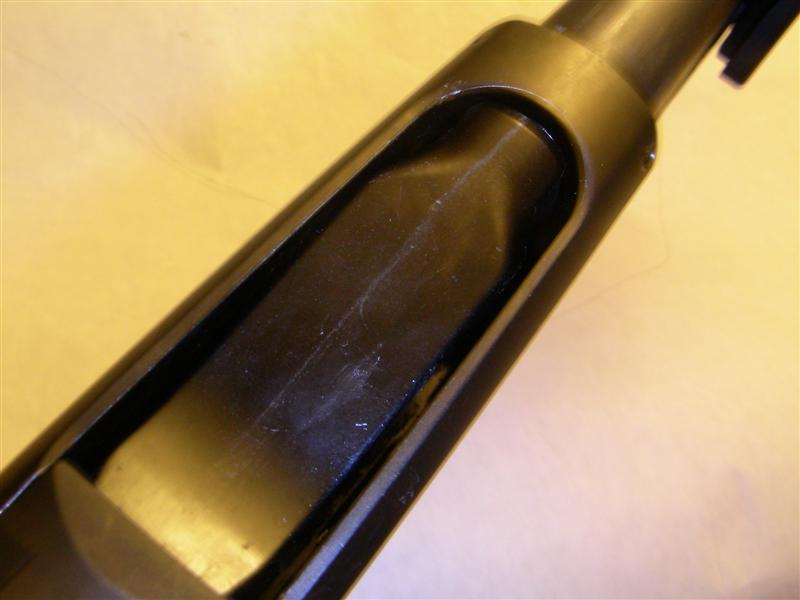
As said before, the outer barrel is held by a small metal pin underneath, near the receiver. The problem is after using the gun several times, the vibrations shake the pin loose, drops down slightly and jams the fore-end tube assembly (see picture). Removing it allows the barrel to be removed and exposes one of the few plastic pieces of the gun, the chamber. I should say that the outer barrel, chamber and breach bolt (which to remove, would require taking the chamber out) are not meant to be disassembled as the exploded diagram in the manual does not go into that detail.
(shot from underneath gun, where the trigger assembly would be)
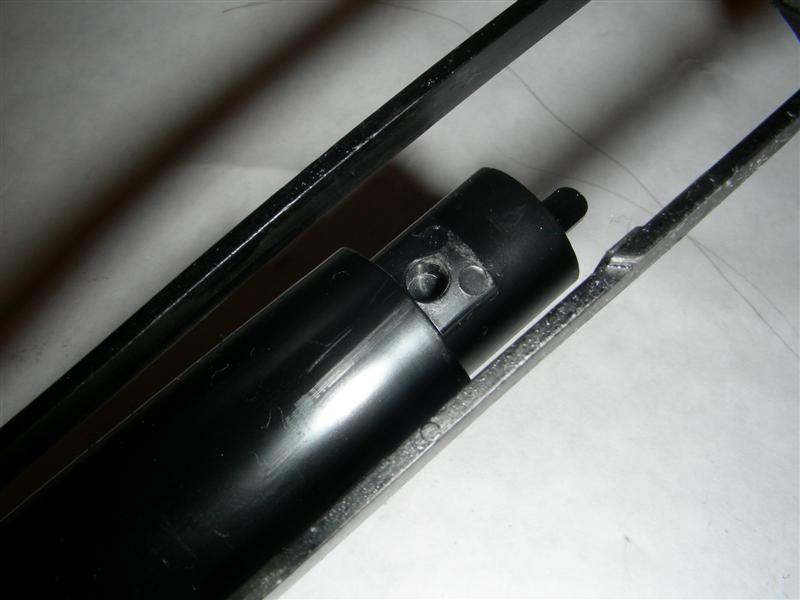
(half pump (?), notice the ejector rod and spring. rod hits end of receiver and pushes shell out as bolt continues to retract.)
(back of breach bolt detailing firing pin)
(face of bolt detailing firing pin, note the extractor rod that pushes the shell out)
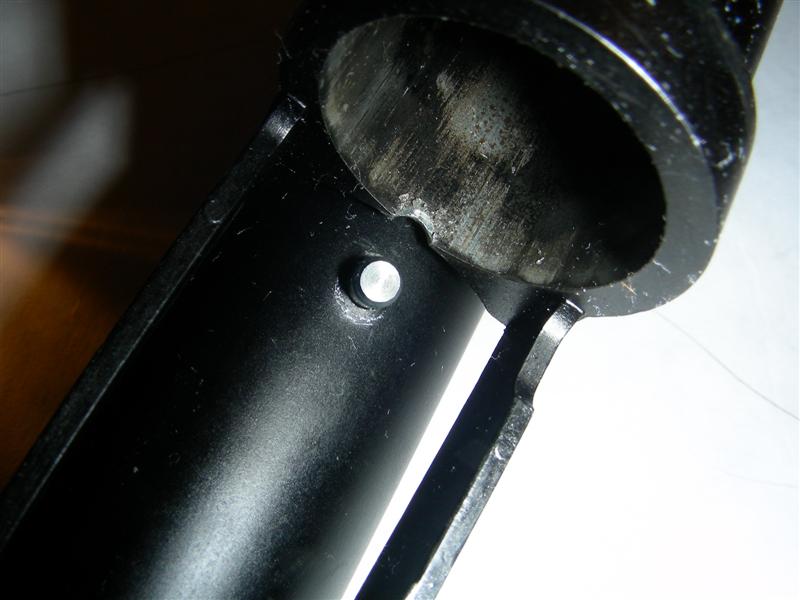
(the pin that jams the pump action)
(the damage)
(barrel removed, plastic chamber that shell goes into)
(the solution I used, gluing the pin to the barrel)
The stock can be removed quite straightforwardly by unscrewing two Phillips screws in the rubber shoulder pad and then unscrewing a long screw inside the stock. The reason that there are no pictures of this is because I had forgotten to take them the first time I took it apart and I did not feel like struggling to do it again. It may sound simple to remove the stock but the reality is that the holes in the shoulder pad are pretty tight for the screw heads and as the holes are quite small in diameter, I had to use a small screwdriver which did not afford myself much grip. The long screw is not hard to remove but screwing it back on was tricky as the nut was at one end of the stock and the screw sliding into the other. Did I mention that normal human hands will not be able to fit inside and precisely guide the screw back in? So I had to drop it while holding the position of the holes as vertical as possible then prod the end with a screwdriver until the Luck Gods gave in and it found the nut on the receiver. It was a bit like trying to thread a stick through a marginally bigger hole with a single fingertip pushing the rear to guide it in. Of course this may mean that I am not familiar at taking the stock off and I just need practice, but I’m not eager to take it off again.
-
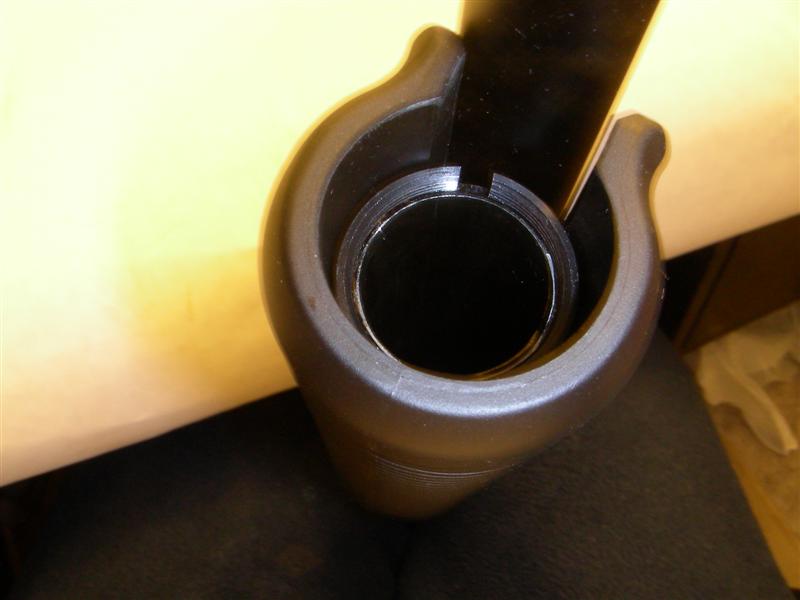
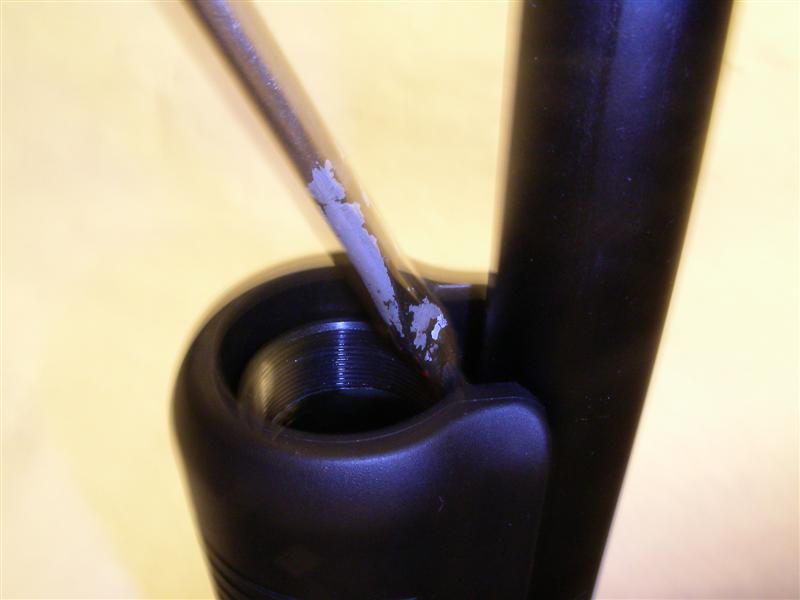
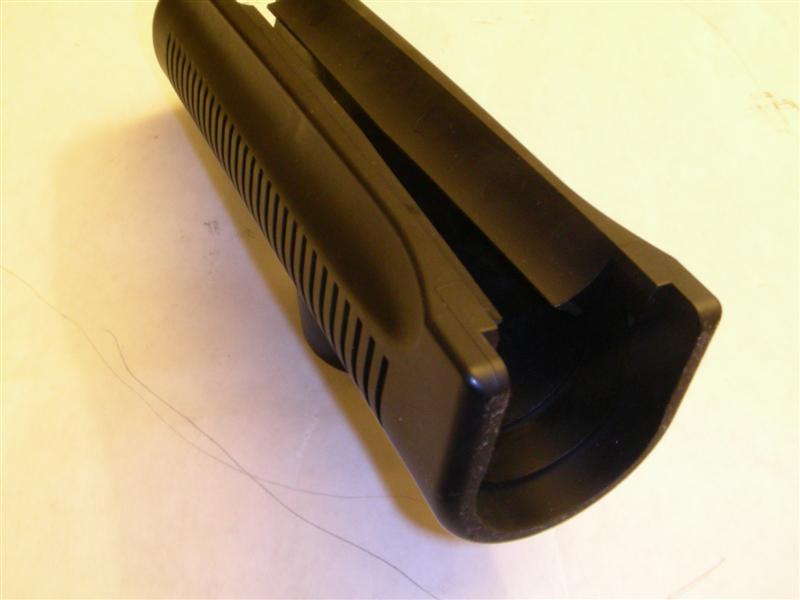
The fore-grip is removed by twisting the fore-end tube nut; I used a used a flat head screwdriver and sort of “stirred” it out, after which the fore-grip slides out. I didn’t remove the fore-end tube assembly because it was not necessary and it seemed difficult to remove; needing to pivot it up slightly and jimmying both of the action bars to disconnect it from the breech bolt.
-
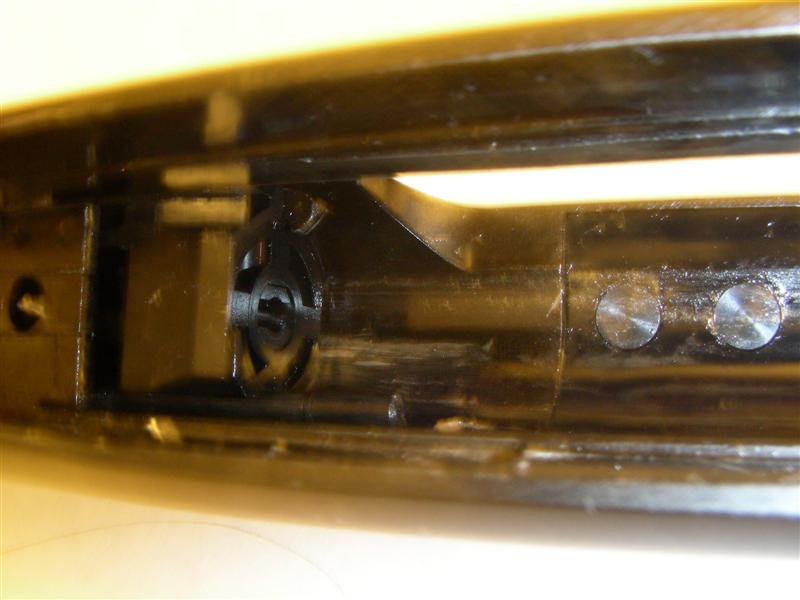
Once that is done, unscrew the mag tube, twisting counter clock-wise and pulling it out from the front. This gives access to the barrel guide ring which is fixed to the barrel via a Philips screw. Incidentally the screw also holds the inner barrel assembly in place, so once that is out the inner barrel slides out the front. As shown in the pictures, there is a fixed hop up, most likely tuned for 0.2g BBs as that is what is recommended in the manual. I unfortuantely forgot to measure the inner barrel but I would estimate it to be around about 24cm in length.

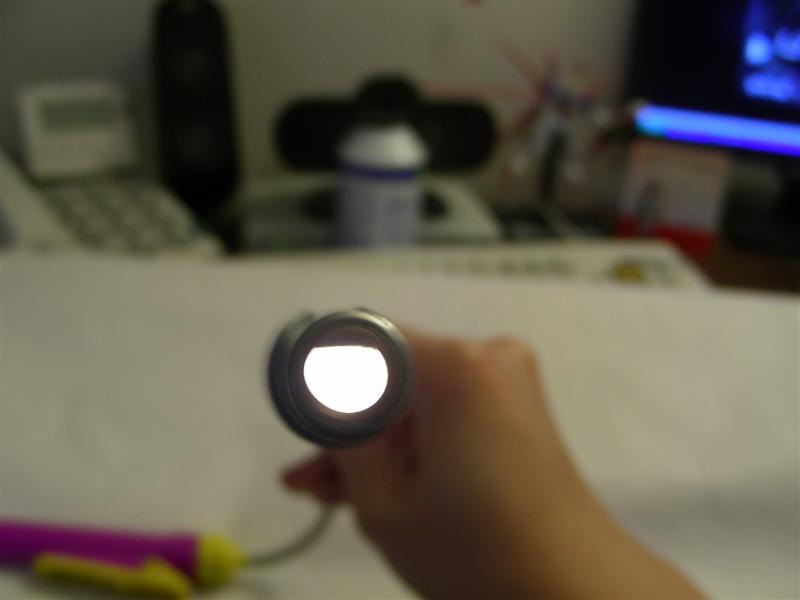
(flashlight shining at one end to highlight fixed hop-up)
-
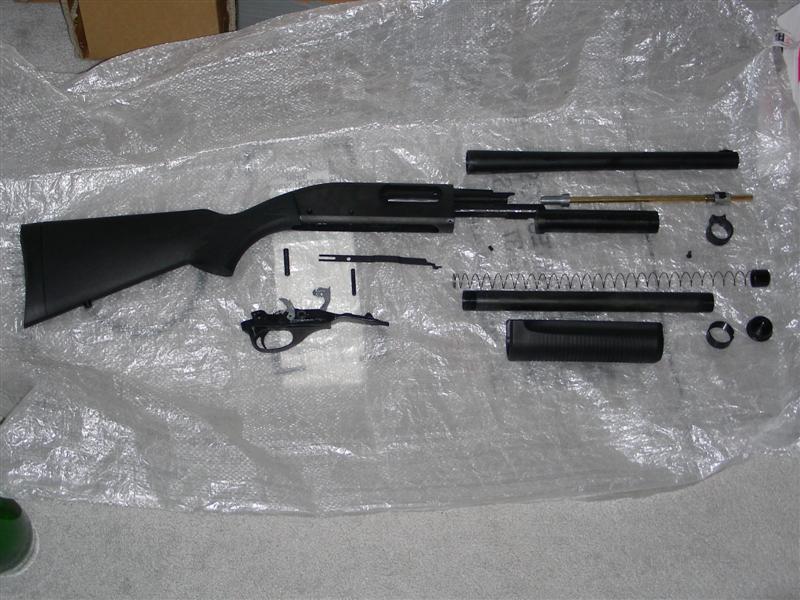
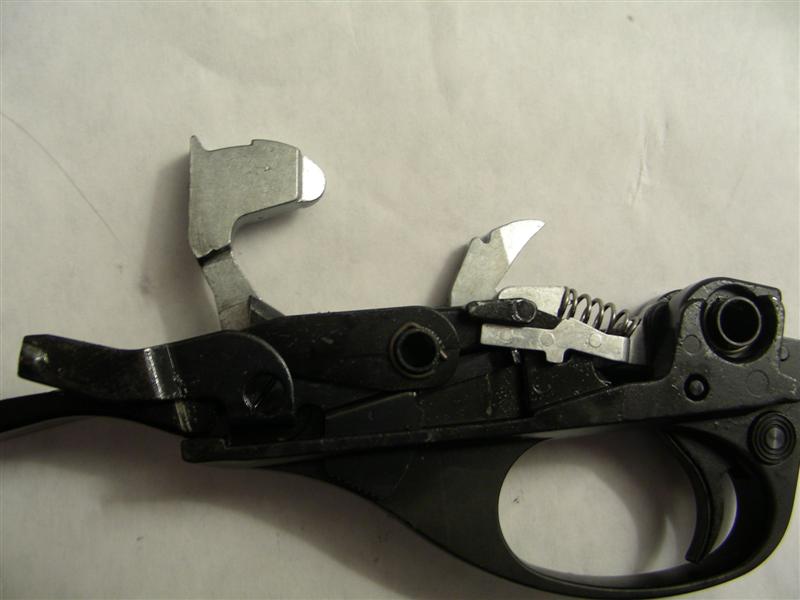
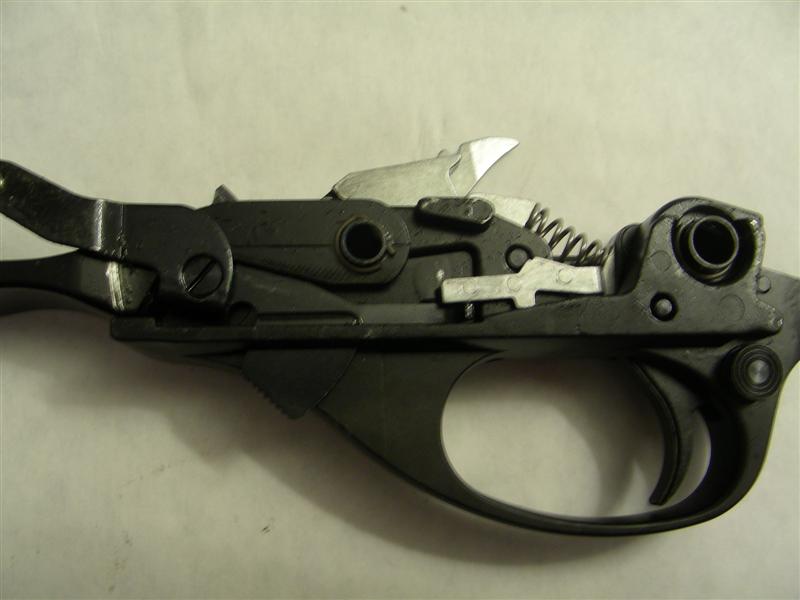
The guts
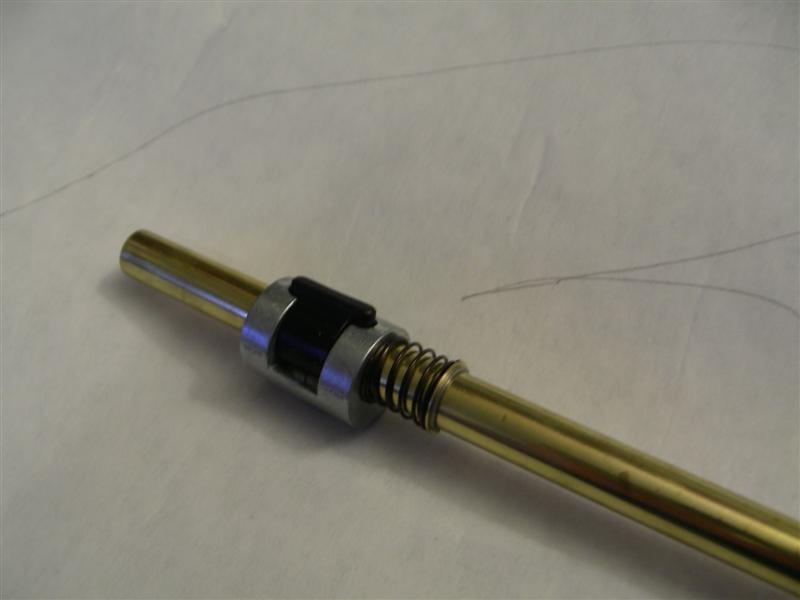
I’m sure everyone has heard that the Tanaka shotgun is close enough to the real steal version in terms of dimensions that one could fit aftermarket furniture and other real M870 accessories. However, comparing the internals of the Tanaka with the manual of the Remington M870, and many of the parts look the same as well. I am not saying that real steal internals can fit or that you could convert it to fire real ammunition, but it is nice to see this attention to detail. Because of a mysterious problem that prevented me from fully cycling my gun, I decided to take my gun apart in order to investigate this issue. ArniesAirsoft board member Crenna pointed out [link to post] that it seems the little bit that secures the barrel to the gun can loosen and jam the fore-end tube assembly, preventing it from going fully back (see picture for clarification).
Taking it apart does not have to be in the order I did it but there are some stuff that has to be removed before getting to another part; the mag tube and barrel guide ring for example.
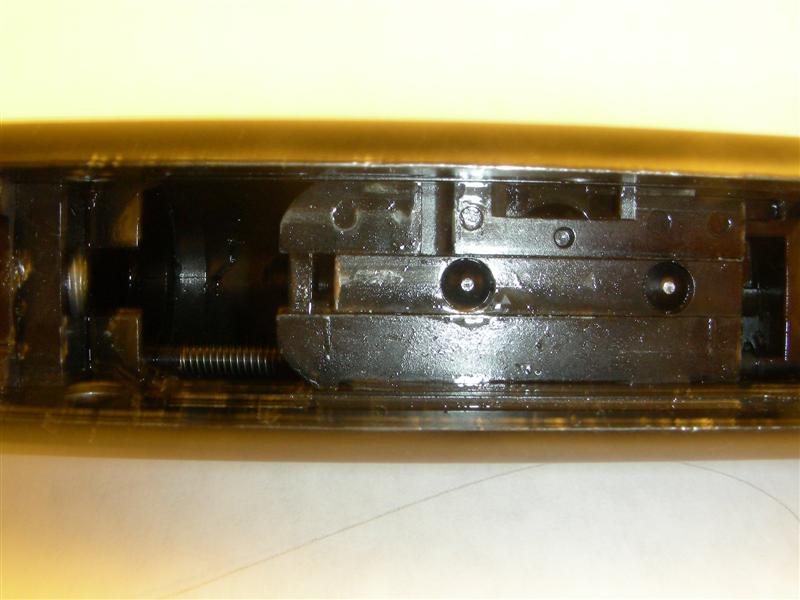
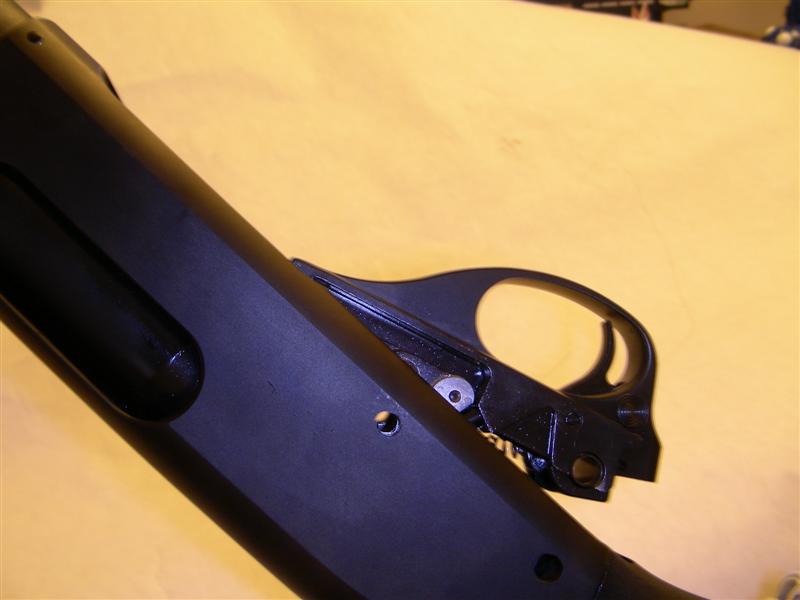
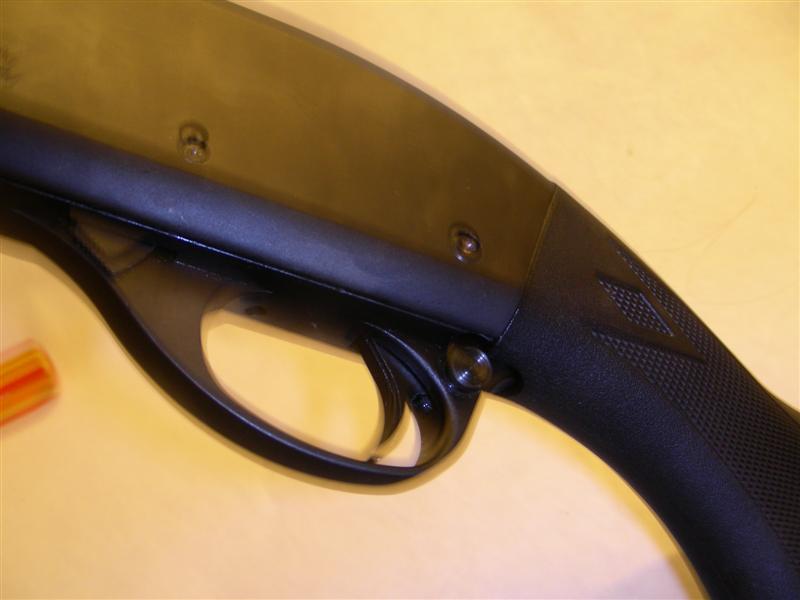
First, I took off the trigger assembly by knocking out two retaining pins from the receiver with a hammer and small screwdriver. The trigger assembly pivots down and out with a little effort, it may be a bit tight so try some light jiggling to coerce it out of the receiver. What surprises me is how compact the part is considering it does the majority of the mechanical operations in the gun, including trigger/hammer release, safety mechanism, action locking, and part of the loading action.
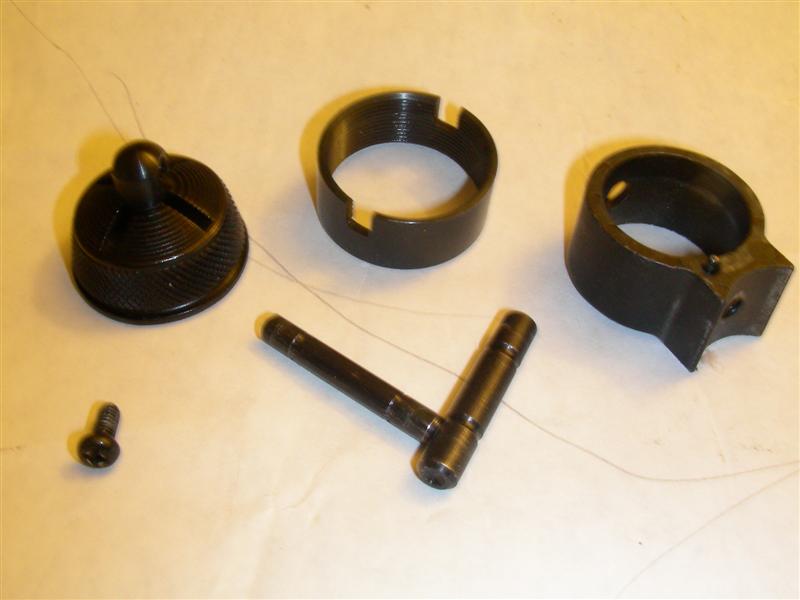
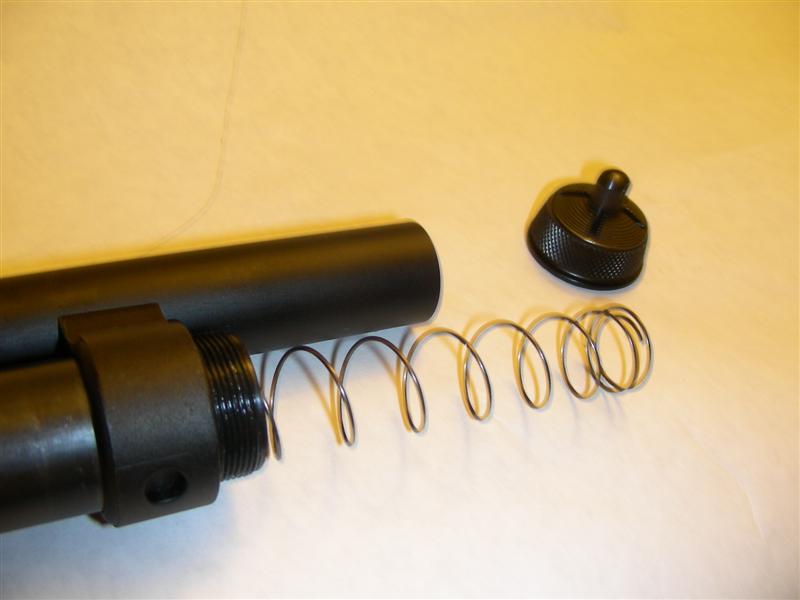
Next I unscrewed the magazine cap and removed mag spring + follower. I probably should have mention this before, but make sure your gun is unloaded before attempting disassembly else the mag spring may fly out.
-
The operation
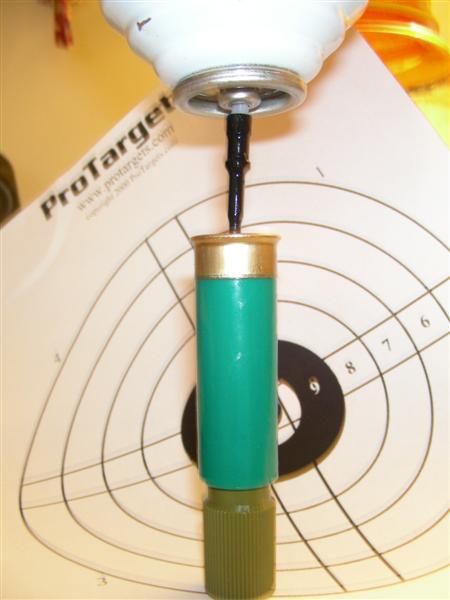
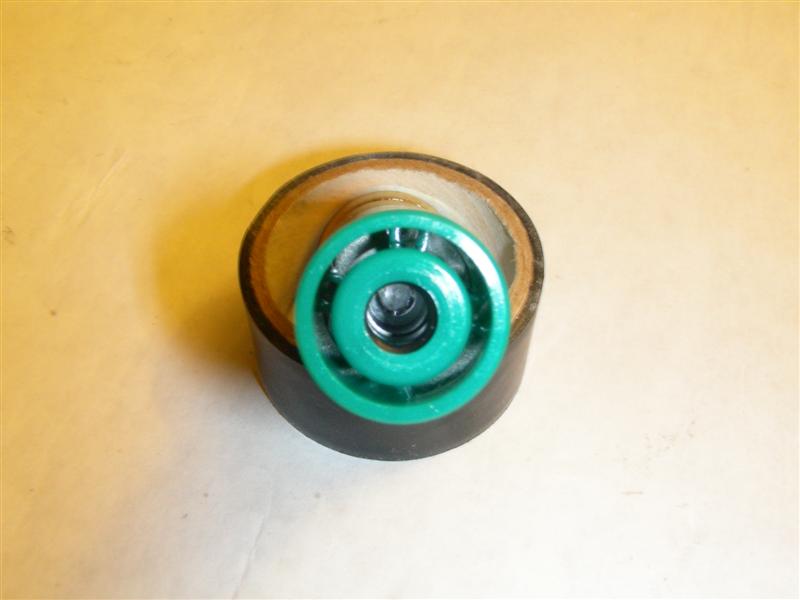
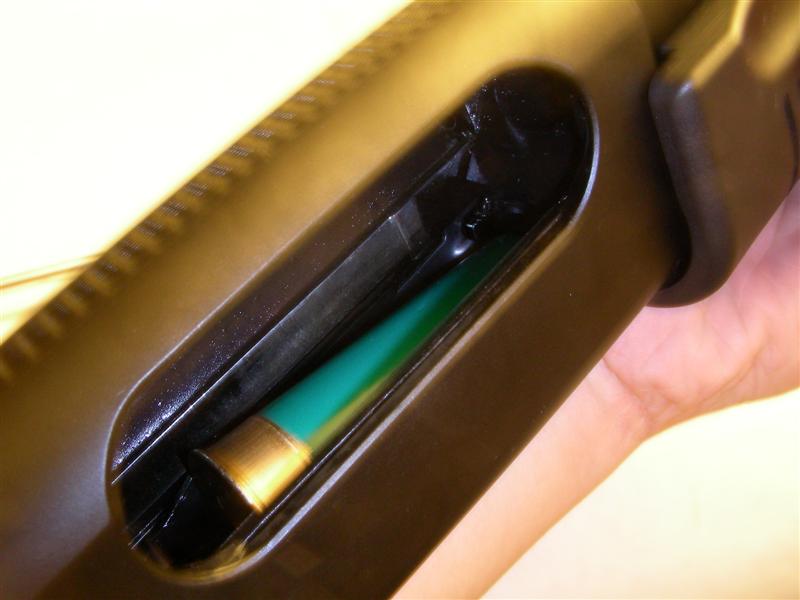
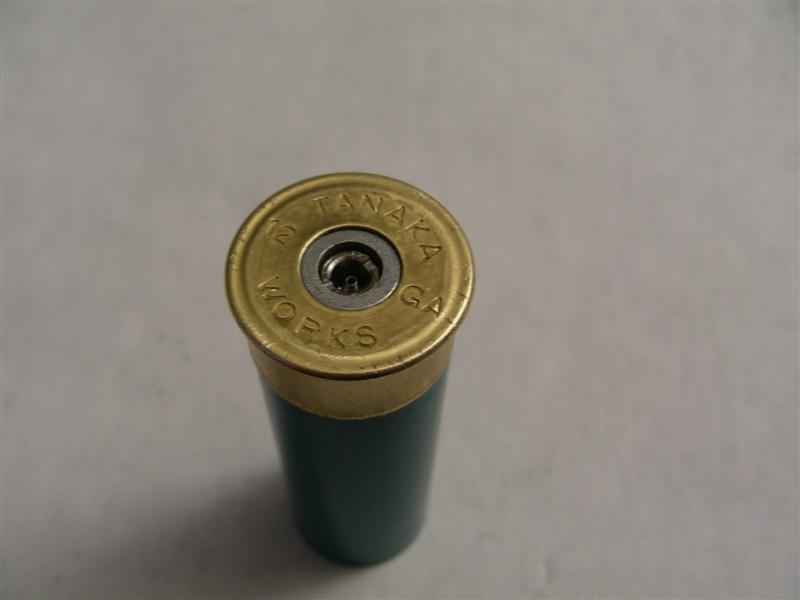
Gassing up the shell requires the included special tool that prevents the valve from opening while filling. As seen in the pictures, the gas fill valve is located in the centre of the back of the shell and around it is the bit that the firing pin strikes to release the gas. I've said before that the shells are like little grenade shells, well they're not exactly like that. The gun does not hold the valve button open, rather like any GBB or NBB it strikes it briefly. I have found that the shells hold enough gas for at least six shots and frankly after the sixth time I got tired of reloading and waiting for it to warm up a bit. Like all gas mags, the shell has to be filled vertically and the BBs are loaded into the front simply by pushing them into the shell (3 BBs max). As you can imagine, loading the gun and firing is as you know in the movies and on TV; shells are loaded underneath and pump to chamber a round/extract spent round. The shells
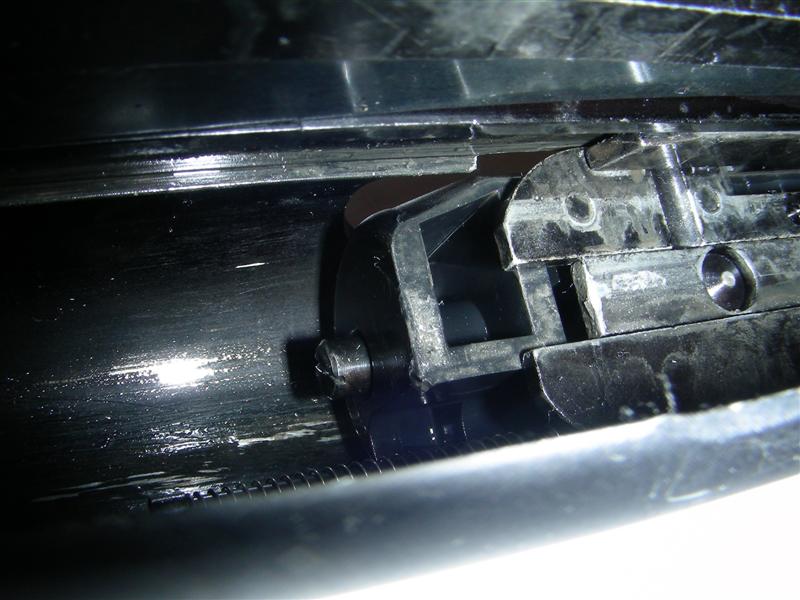
fly out vigorously and it is very fun just to cycle the action and watch the shot shells fly out. One thing to note is that after pumping once, the gun locks the action and is unable to pump again without either squeezing the trigger or depressing the action bar lock. So to eject a live cartridge without firing it, one can press that lever and pump the action to get that shell out.


(action bar lock disengaged)
(action bar lock engaged)
-
More detailed pics
(that shaky look is not intentional, I'm just a poor photographer)
-
The details
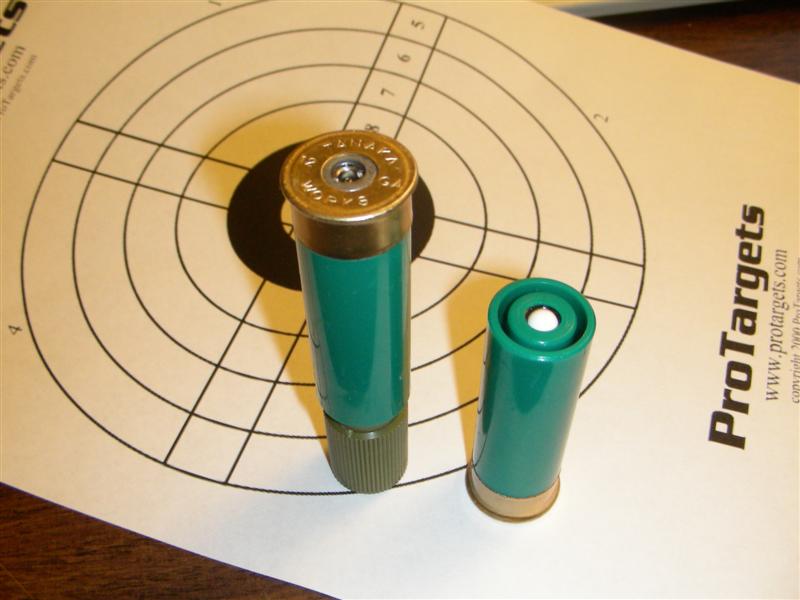
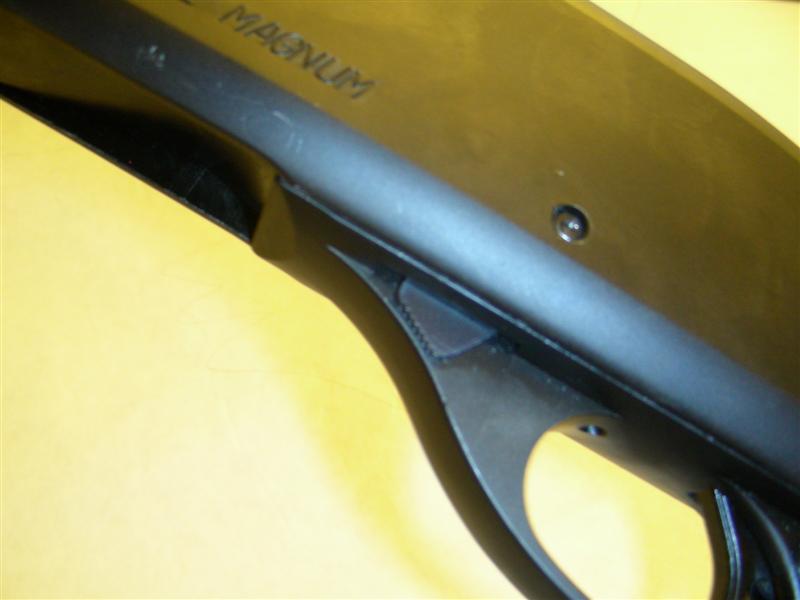
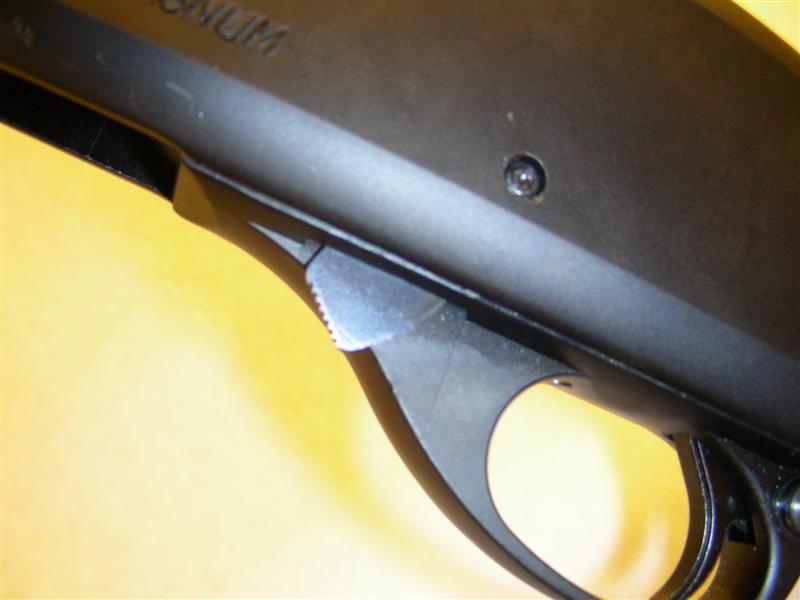
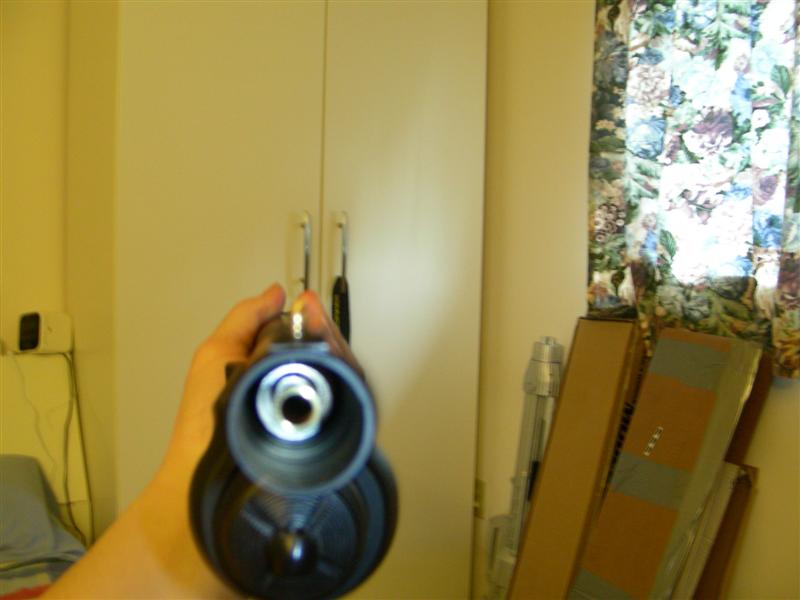
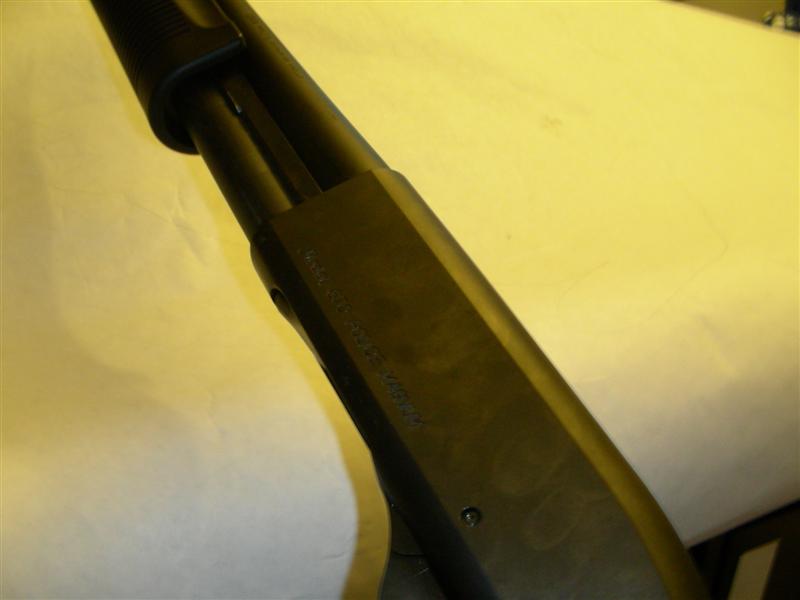
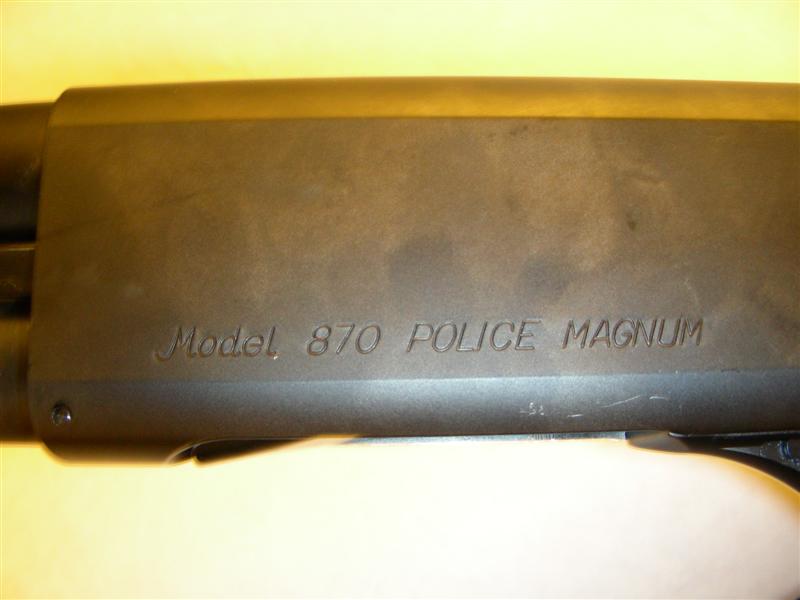
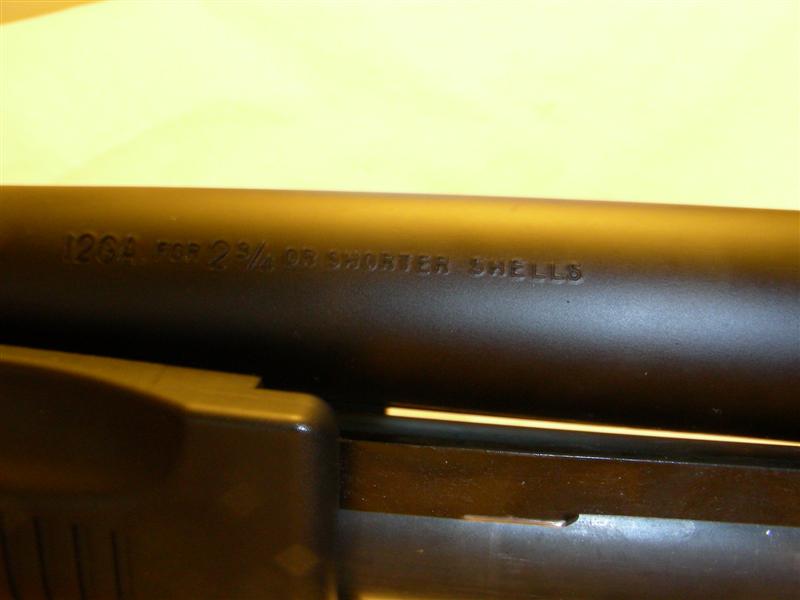
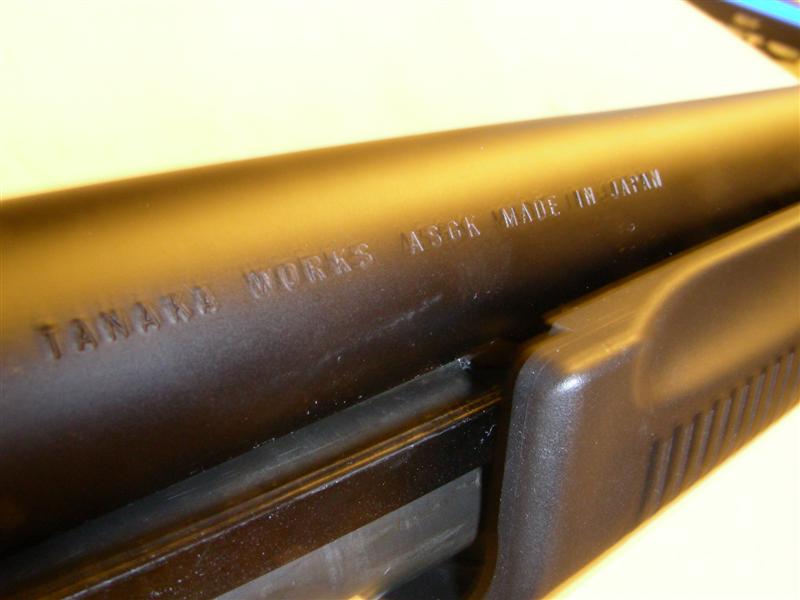
The gun is based on a 14” full stock version of the M870. It can house 4+1 shells but since I only have the two that are included, I can’t comment on the fitting of the shells (such as how tight the last round goes in the mag tube). There is only a front bead sight so this gun is intended for quick point and shoot, which I have not fully mastered yet but rest assured it is easy to aim. I’m just a bit thick. Trades are beautifully engraved with “ 12GA. FOR 2 ¾ OR SHORTER SHELLS” on the left side of the barrel and on the right, “TANAKA WORKS ASGK MADE IN JAPAN”. Similarly engraved on the left side of the receiver is “Model 870 POLICE MAGNUM” and a final “Tanaka Works” is molded into the end of the rubber butt stock. There is a wavy serration on top of the receiver for which I do not know why it exist (on the real steel one) but it is a nice accent in the gun.
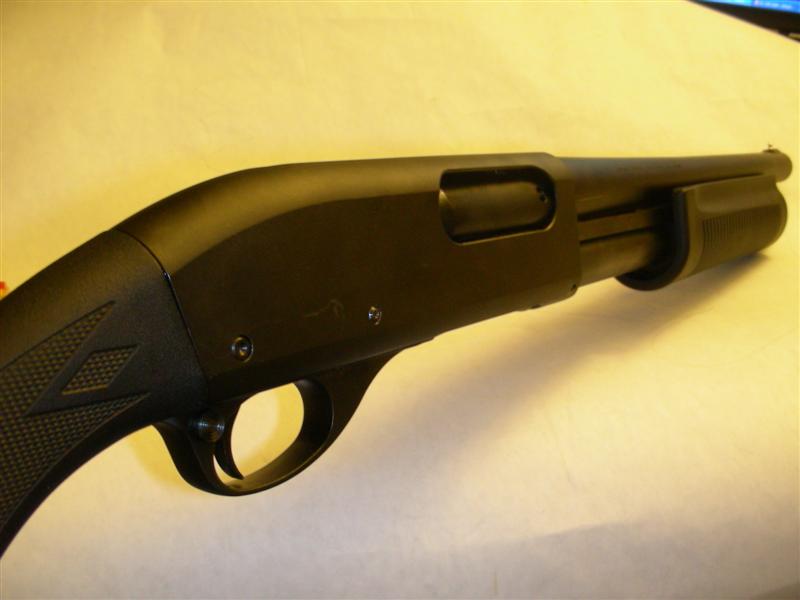

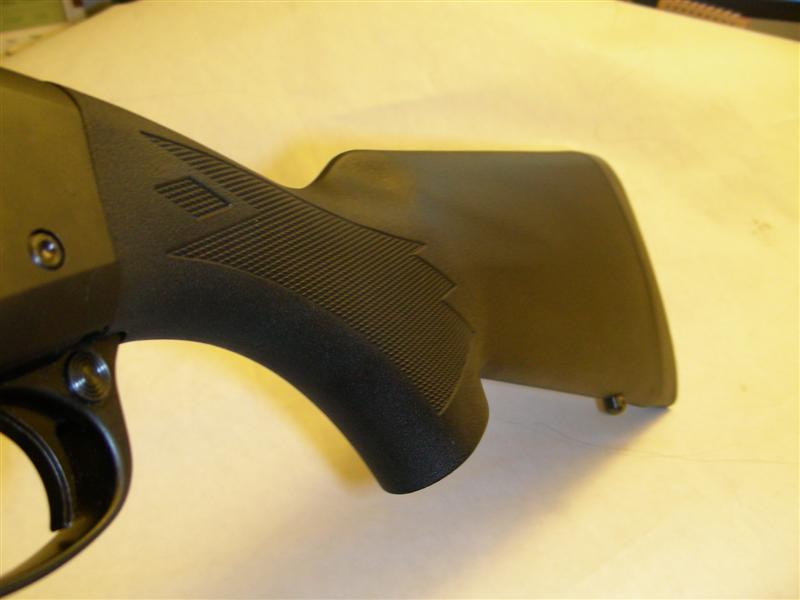
The M870 is a weighty beast and holding it, the user is immediately aware of the quality of this product. Pumping it produces a solid ker-clunk, and pulling the trigger brings the hammer down onto the firing pin with a loud clack. The trigger pull seems to be close to a KSC M11, so it is a bit heavy but short and the safety button securely clicks in place. The plastics on the gun are of a very high quality; they feel very solid and although there are faint seem lines they have been crucially sanded down to provide a smooth, comfortable area to hold. To best illustrate the quality, I point to the fore-grip. Instead of the fore-grip wrapping around the magazine tube, there is a channel in the middle (see picture) so it is more of a “U” shape. I squeezed as hard as I could and yet there was no flex, that’s amazing and the piece is also quite heavy. I was expecting something like an abs Glock barrel in proportion; light plastic pieces contrasted by heavy frame + internals, but the Tanaka M870 is not like that, every bit on the gun seems nice and robust. The checkering on the stock is nice and the whole thing is comfortable to hold, shoulder and operate.
-
The Intro
A while back, Tanaka released a new, more modern shotgun to compliment their m1897 trench gun. The first in the M870 range is a fixed stock , 14” police model. Here are some specs that I err… borrowed from somewhere: weight = 2 550g, length = 875.0 mm, capacity = 4+1, power = 350fps. I’m betting that the power Redwolf reports is based on a single bullet using green gas/propane., performance is significantly reduced when using 3 bbs. Tanaka shotguns, for those that do not know, utilize a gas in the shell system which differ from other gas shotguns and are more like tiny grenade shells.
The presentation
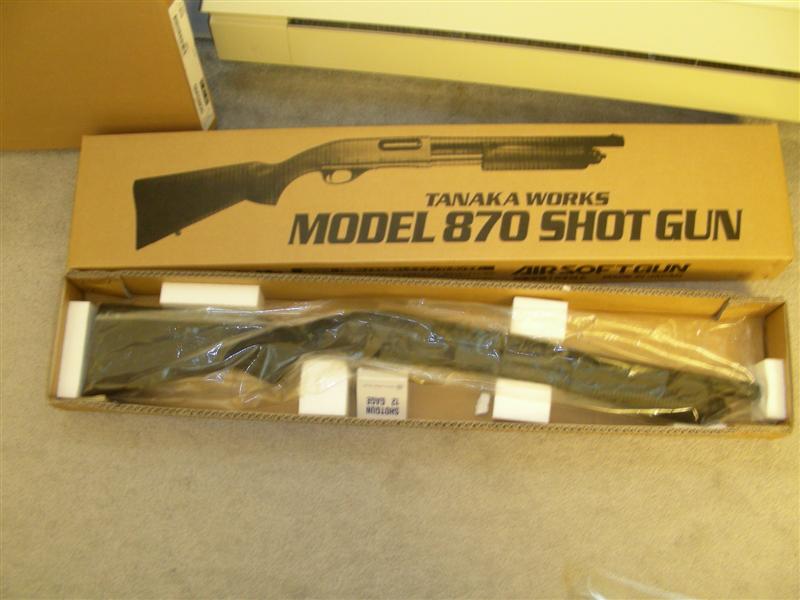
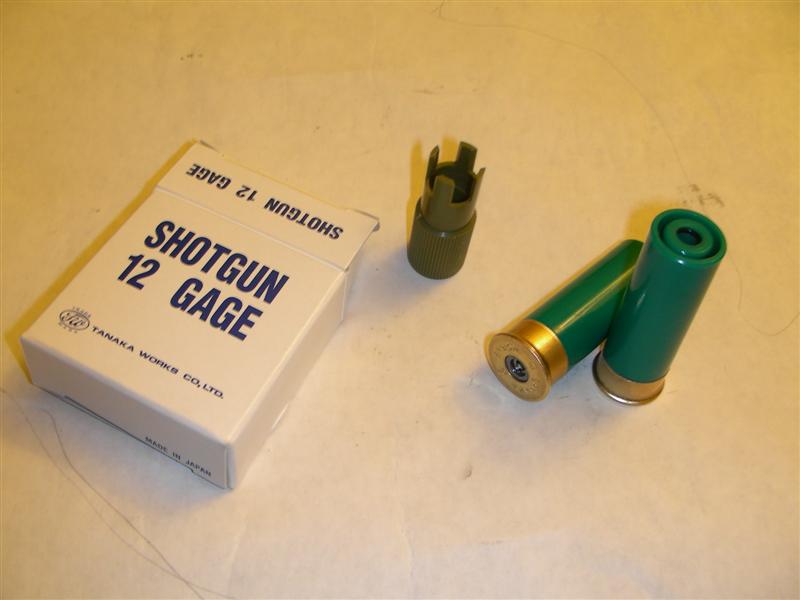
The gun came in a rather plain box, simple brown cardboard box with black graphics as shown in the picture. The cardboard is thick, like the boxes that house large LCD TVs but instead of a gun encased in polystyrene there were smaller pieces all around the inside of the box to keep the gun from shaking. I suppose it works, as the gun seems to have come to me undamaged. Within the box there also contained a short manual, two shotgun shells and a gas filling tool bundle together in a smaller box, and a poorly packaged bag of 0.2g bbs.
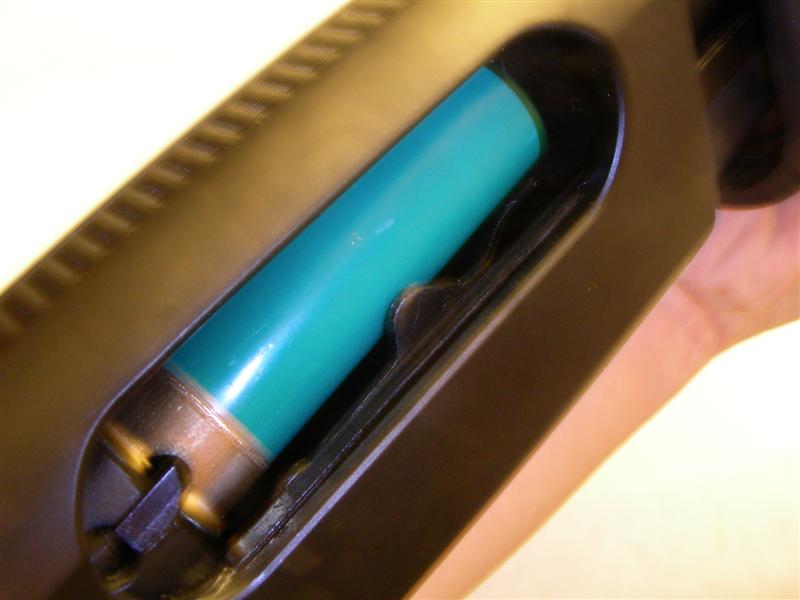
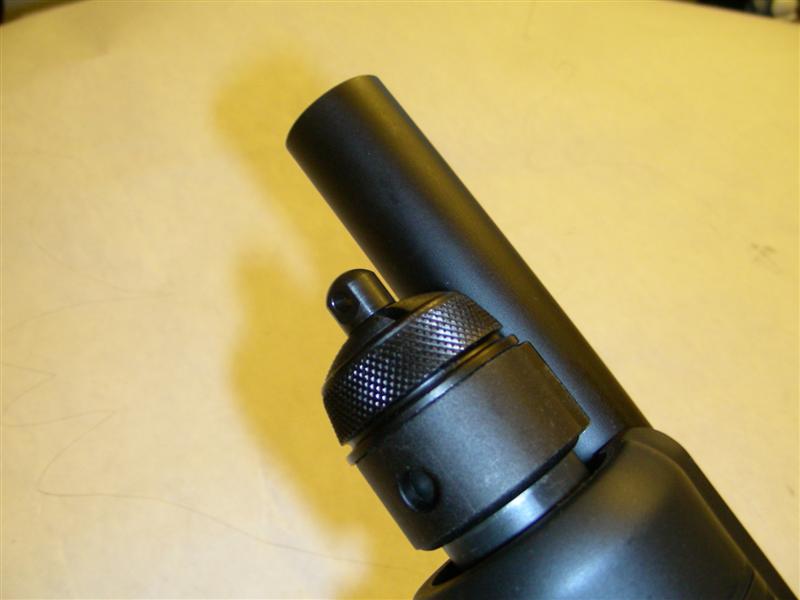
G&P Dual Laser Designator and Illuminator
in Tactical Equipment and Accessories
Posted
On your hunch, I bought a g&p tape switch [for ehobby asia]
It does fit the jack, but it still is a constant on no matter which mode it is in. meaning if I squeeze and release the tape switch it is on and stays on until I press it again.