BFOUR Posted June 29, 2010 Report Share Posted June 29, 2010 No I dont think that would work. IT would throw off the look by alot. ANd I dont see a price but I dont think its under $250. Not practical for what we can try and do for a small fraction of the price. Link to post Share on other sites
ratboy44 Posted June 29, 2010 Report Share Posted June 29, 2010 Fair enough, I saw it in the back of a catalogue and thought it might make a chassis to work around or something. I didnt neccesarily mean buy from FAB themselves but using their link as an example as i'm sure some airsoft makers etc (or other) must make a cheap enough copy. My sincerest apologise for not being as helpful as intended Link to post Share on other sites
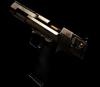
bankz5152 Posted June 29, 2010 Author Report Share Posted June 29, 2010 Any help is good to see! Was interesting to look at those conversions. Good pic bfour considering I don't have a glock at the moment so it's good for me to see and visualize. Do you think short strokeing will be necessary? Also are you going to go for the scope mount approach for the glock or male your own? Link to post Share on other sites
bankz5152 Posted June 29, 2010 Author Report Share Posted June 29, 2010 I am a little familar with plastic welding, havnt done it in a while not sure if i stll can. I found a long upper rail asw well which could be used http://www.uncompany.com/pageproductdetails.asp?prodid=27001 Link to post Share on other sites
BFOUR Posted June 29, 2010 Report Share Posted June 29, 2010 I plan on making my own mount setup. Mouting from the bottom of the glock frame to the spine. How long is that rail? Is it metal? Link to post Share on other sites
bankz5152 Posted June 29, 2010 Author Report Share Posted June 29, 2010 ahh ok, im going for the scope mount, got one cheap for £15.00. Not totally sure, its off a Galaxy MP7 so im going to assume 415mm which is perfect considering the Kriss is 400mm long. It will probably be plastic but beggers cant be choosers! Link to post Share on other sites
ED-SKaR Posted June 29, 2010 Report Share Posted June 29, 2010 Bfour, have you checked the shortstroke mimimum distance? Link to post Share on other sites
BFOUR Posted June 29, 2010 Report Share Posted June 29, 2010 No I havent. I dont think a short stroke will be necassary. Link to post Share on other sites
bankz5152 Posted June 29, 2010 Author Report Share Posted June 29, 2010 Me neither based on your picture. I did have an idea on the selector. Well 2 really, the first was to have a twisting bar coming out of the selector side ways. Although this would make the body look very different as youd have to cut a channel for it to be able to blow back. The other idea was to have a small circular hole exactly where the selector switch is and a 'pin' that you can insert and change to semi and auto but still a bit long. Link to post Share on other sites
BFOUR Posted June 29, 2010 Report Share Posted June 29, 2010 I dont know what Im going to do about that. But that picture is only of a 10-12 inch piece of aluminum square tube. The KRISS is 15 inches long so add a few inches to the back and youll see that a short stroke isnt at all necassary. Link to post Share on other sites
BFOUR Posted June 30, 2010 Report Share Posted June 30, 2010 Couldnt edit last post. Working on the mount from the glock to the frame now. Also going to draw up some of the "blue prints" on the plastic sheets and then cut them out on the scroll saw in the morning. Also working on the trigger and trigger mech. Im also thinking instead of paint, rubber undercoating the whole body. Link to post Share on other sites
ED-SKaR Posted June 30, 2010 Report Share Posted June 30, 2010 You guys do realise that with KSC/KWA glocks you have to pull the slide back before you change the selector setting or you will damage the gun. Copying the fault from the real one, so I am told, that will break if you try it. Link to post Share on other sites
bankz5152 Posted June 30, 2010 Author Report Share Posted June 30, 2010 Yes. But at the minute theres we have no idea on how to make a working selector. Personally If i cant find a way ill have it stuck in Auto. Its good that your properly getting on the the build. I dont have the cash to start, get paid next week and ill buy all the bits I need. Link to post Share on other sites
bankz5152 Posted June 30, 2010 Author Report Share Posted June 30, 2010 Cant edit previous post. Managed to get a G18C & the Scope mount so I should be able to start work much quicker. Also incase your interested heres my parts list including raw materials. - KSC G18C metal slide - KSC Enhanced Hammer Spring - HurricanE Scope Mount - G36 Stock - x3 G36 Short Rails - G36 Selector Switches - King Arms Reinforced Pistol Grip - MP7 Top RIS - ~400mm in length - x3 50rd KSC Glock Magazines - x3 Magpul Glock Floor Plates - MP7 Flip Up Sights/EOTech - Extended Glock TB Inner Barrel - Cant find one at the moment, do they exist?) - 1" Aluminium Square Tube (frame/spine) - Aluminium Flat Bar (trigger/misc parts) - Black ABS Sheet 1.5mm/2.5mm 500mmx500mm (body work) - 1mm/2mm Aluminium Sheet (if needed) Also BFOUR what are you going to use for the trigger mechanism? Aluminium, steel etc.. Link to post Share on other sites
ratboy44 Posted June 30, 2010 Report Share Posted June 30, 2010 Im sure you guys have Sky/Discovery Channel, but heres a clip from Future weapons on the KRISS, Its about a minute or so in till the end. http://www.tudou.com/programs/view/xc9ywjQhE9A/ Link to post Share on other sites
BFOUR Posted June 30, 2010 Report Share Posted June 30, 2010 Bankz I plan on making my own trigger out a block of aluminum. Ill probably be using actually selector switches from TDI. They are cheap enough. Ive got a rail here that was made for my sniper rifle but I think Ill use it here. For the outer barrel IM going to use a standard threaded glock barrel and see if someone here could make me a extention. Link to post Share on other sites
bankz5152 Posted June 30, 2010 Author Report Share Posted June 30, 2010 Im doing the same. I meant the trigger mech, making the custom trigger able to fire the glock trigger. The trigger bar etc.. Thats a good plan for the outer barrel, i was going to use an old G36 barrel extension which should work nicely for whats needed, + gives me a 14mm thread for suppressors, flash hiders and what not. If not a peice of steel tubeing will surfice. How are you going to go about the cocking handle? Also does the cocking handle on the real one blow back? Also how did Epyon get the plastic welding so neat? Ive tried it before and never got those kinds of results! Link to post Share on other sites
BFOUR Posted July 1, 2010 Report Share Posted July 1, 2010 PLastic welding is an art. What you have to do is cut strips of thin plastic off of a sheet and use that as a filler. Just like tig welding. Fill in all the spots as best as possible. A low heat soldering iron is the best. You want to over fill the joint so that you can sand it down to shape. The real charging handle to my knowledge does not blowback. Youtube might help clear that up. The charging handle will be on a spring system at the front of the slide. So when you pull back the glock cocks back and the charging handle returns to the front. Also if this is it for your glock, as far as life, then solder the back of the safety to the trigger in the on position. That way once its all together you wont have to worry about your trigger bar/roller no engaging the trigger safety. On the trigger ill be using a small spacer from a TV wall mount. Its sturdy and hollow. Ill run some type of bar through both sides and have it wrap up sides of the glock and into the spine and down to the trigger. Link to post Share on other sites
bankz5152 Posted July 2, 2010 Author Report Share Posted July 2, 2010 Ive made some progess today. Fitted the scope mount, sanded off the RIS so its nice and flat. Also got the 1" aluminium sq for the spine and working on what it looks like. Im having some real trouble with the charging handle, I cant think of how to do it without making it massive and bulky and actually making it so it works properly. I'm considering having the charging handle blowback, although lighter and small than the real one. BFOUR have you made any progress with yours? Link to post Share on other sites
BFOUR Posted July 2, 2010 Report Share Posted July 2, 2010 No mate Ive been kinda of busy at home. The charging handle,in my eyes, is one of the easier parts. What exactly are you having trouble with? Link to post Share on other sites
bankz5152 Posted July 2, 2010 Author Report Share Posted July 2, 2010 Ahh fair enough. How to actually to do it. So that it doesnt blow back i looked at it all day and found nothing. Although on looking at it I now kinda want a charging handle that blows back, would add some recoil and would look pritty cool when firing. It would look similar to the RS but slightly smaller, the only problem would be that when it blows back it would ware the paint away so I need to work on that. Hopefully by next week ill have the Glock mounted to the spine, the ejection port cut into spine, a sort of charging handle built and with a bit of luck most of the trigger bar fitted. Although apart from that probably wont be alot of progress for a while as the rest of the parts are coming from HK and I wont have the money to order them until the 10th and I go away for 4 weeks on the 15th. Link to post Share on other sites
BFOUR Posted July 2, 2010 Report Share Posted July 2, 2010 Also note the danger of a blow back charging handle. firing to close to a wall or cover and it could snag and break off. I dont think it will lend much to the recoil. Ill show you how I want to do it in a sketch or a mock up when I get a chance. Link to post Share on other sites
bankz5152 Posted July 2, 2010 Author Report Share Posted July 2, 2010 Cool thanks alot. Well basically i was going to have it so it folds down flat (ish) to the body, to reduce the risk of snagging. Ill get some pics up tomorrow. Link to post Share on other sites
bankz5152 Posted July 5, 2010 Author Report Share Posted July 5, 2010 Got some minor production pictures. Showing the slide forward and back aswell as modifications i have made to the Glock. If you can see Ive sanded down the fire selector. Doing this enables me to remove the Glock slide for Maintenance. However it can also be removed from the scope rail via 2 grub scres on the RIS & one pin through the trigger. Please note that the Glock isnt actually attached yet, I want to fit the pistol grip on first and get that bit done before I epoxy the Glock to the spine. Ive got the Grip on the way so should be too long until its fitted. Link to post Share on other sites
BFOUR Posted July 5, 2010 Report Share Posted July 5, 2010 Your gonna epoxy it to the spine?! why not just bolt it so you can easily remove the glock for any maintenance. Im revising ym design a bit later today to semi allow it to come apart in 2 pieces just like the real KRISS. Link to post Share on other sites
Recommended Posts
Archived
This topic is now archived and is closed to further replies.