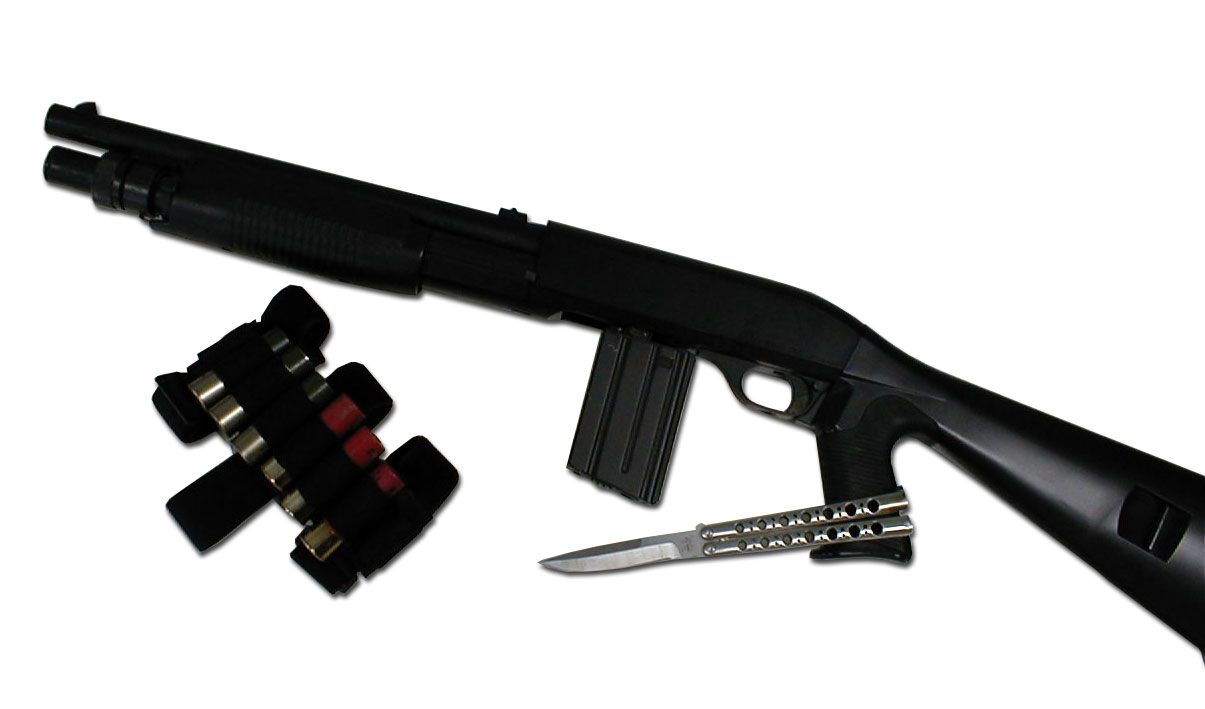
The Tokyo Marui
Custom HiCap Shell
article by Dragon1
|
There is a solution - a hi-capacity shotgun shell! |

Basically, a hi-cap shell is a AEG hi-cap mag attached to a standard shell, feeding BBs through it into the gun. This is a ridiculously easy concept, and isn't too hard to perform, provided you have some common sense and the fine motor skills required to operate power tools without cutting off something important (like external genitalia, but then again, if you can't work a Dremel, you shouldn't have kids :) ).
The entire process involves drilling a hole in the shell, removing the internals, plugging the back of the shell, removing the BB stopper in the hi-cap, and epoxying them together. So how do you build it?
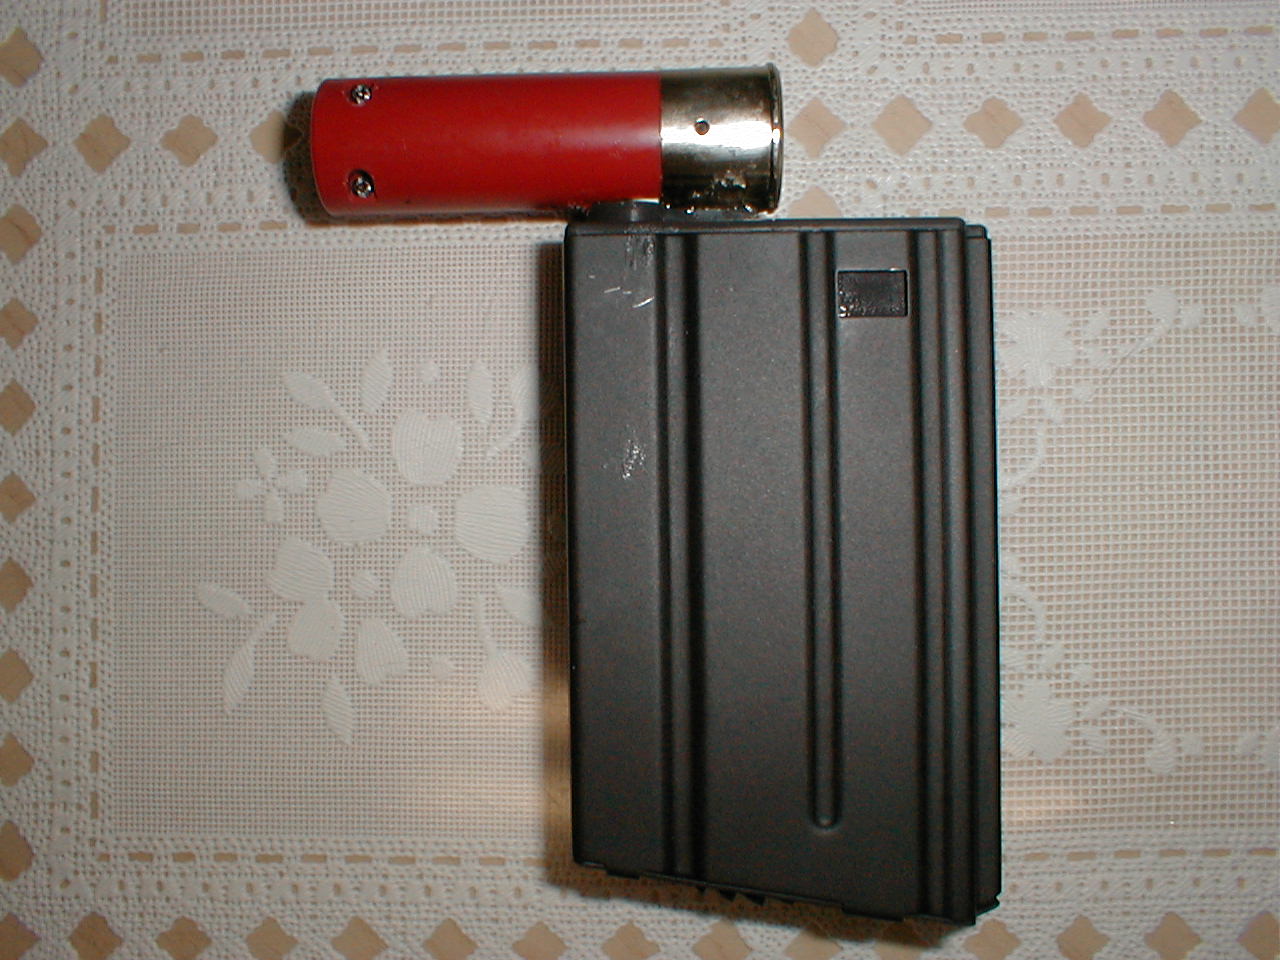
1. Obtain a shell and high-capacity magazine.
I'm assuming you already have a shell, since you have a shotgun. If you don't have a spare hi-cap lying around, obviously you'll have to buy one. You have plenty of options...I opted for an M-16 VN-style 190-rounder. There are some variables to consider, namely; the positioning of the BB exit hole and the trapdoor, and whether or not the physical dimensions/design of the mag allows it to fit beneath your shotgun. You'll see what I mean.
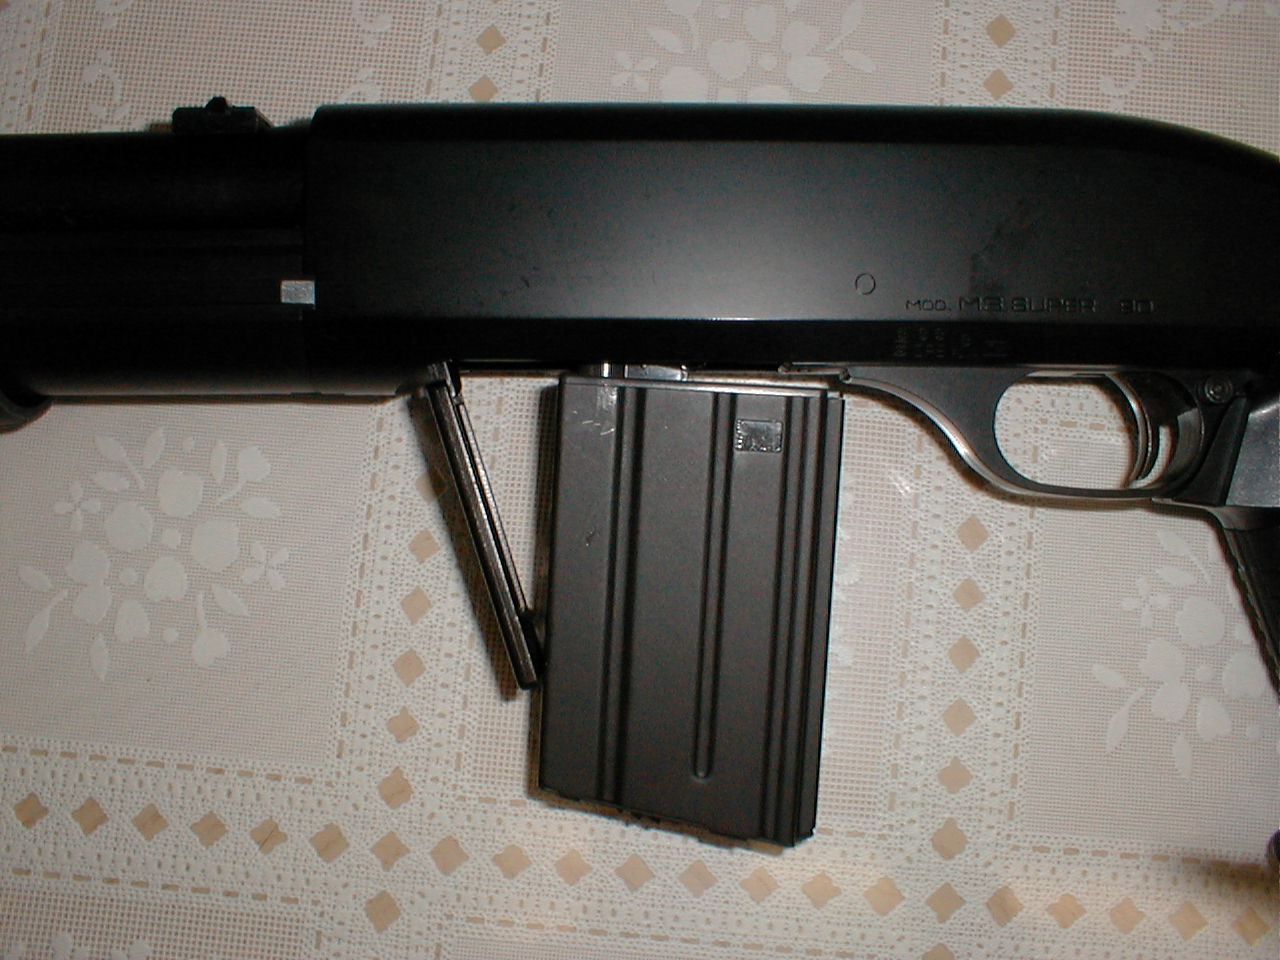
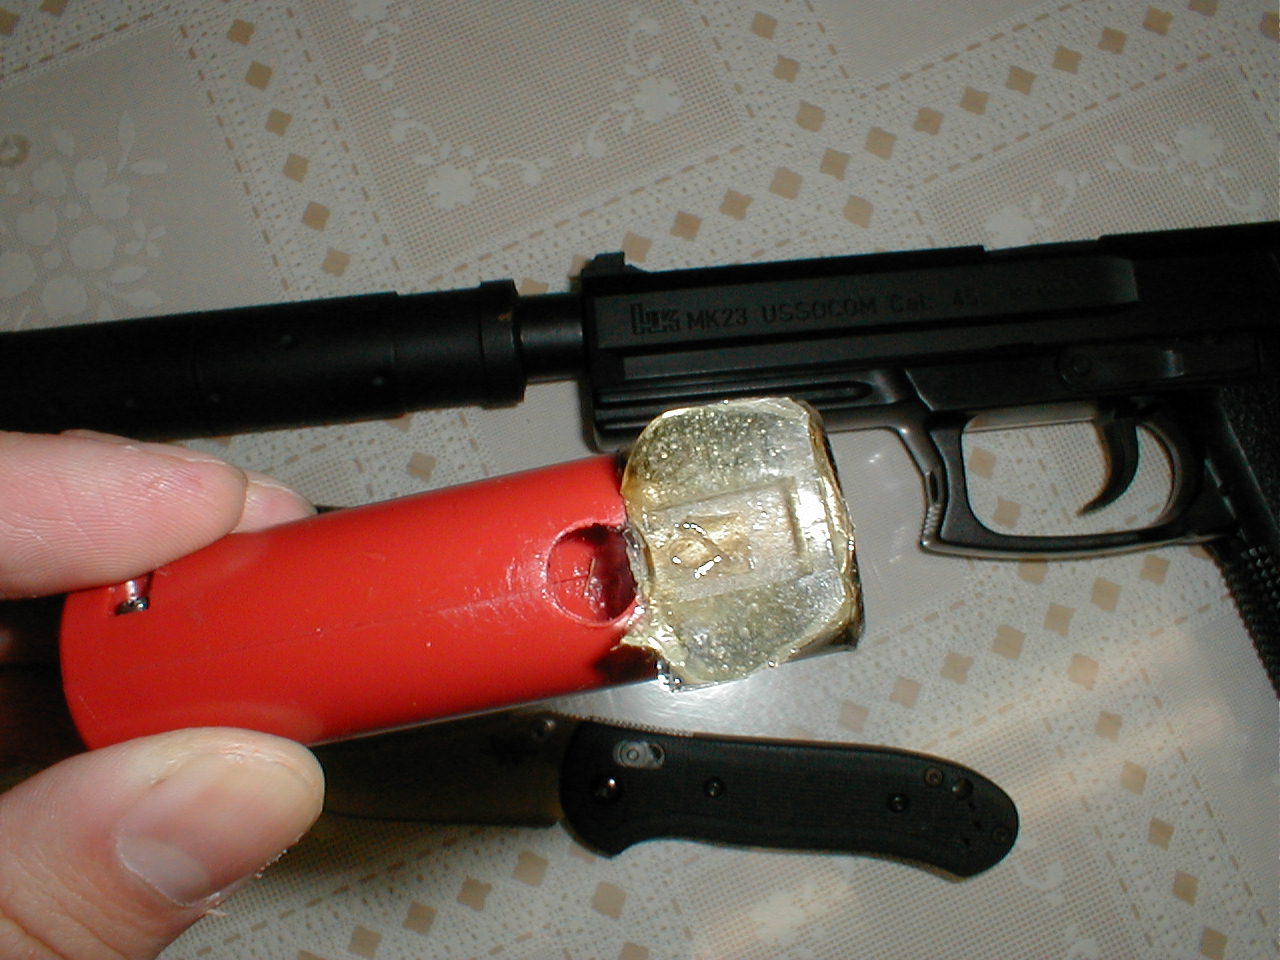
2. Decide on the positioning of the shell on the magazine.
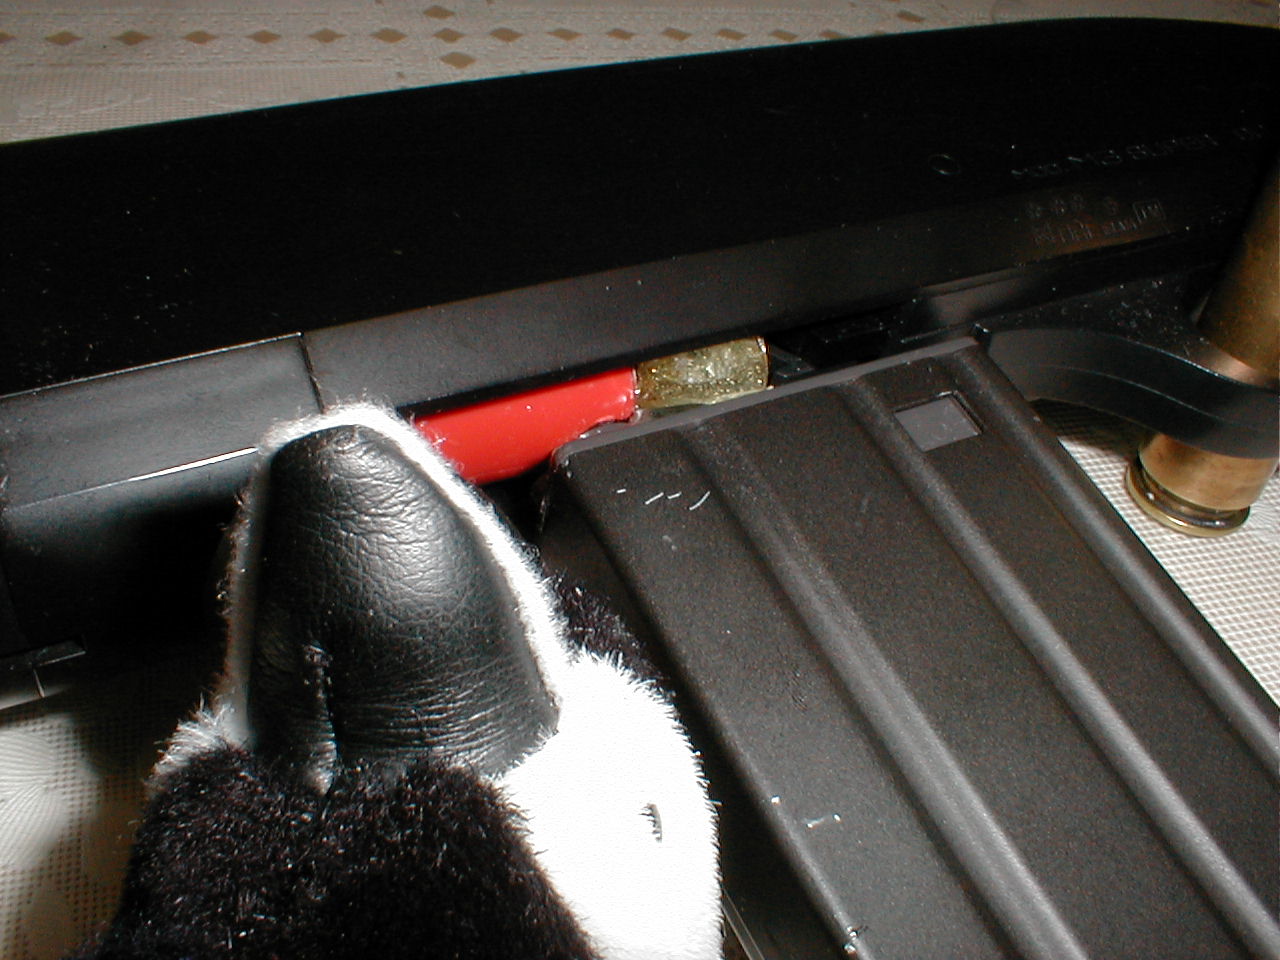
The shell needs to be attached on top of the mag so that the trapdoor is accessible and the mag will be able to fit without anything on the gun getting in the way. On most of the AEG hi-caps, (including the M-16 ones) the feeding hole is in front of the trapdoor, so it worked out for me. I have brass section of the shell over the BB hole.
However, the AK-47 magazine has the feeding hole behind the trapdoor...which my friend used. He ran into some problems; in order for the mag to fit beneath his shotgun, he would have to attach it backwards. Plus if the shell was attached so that the BB loading door was unobstructed, the whole thing physically couldn't be loaded into the gun.
Not wanting to lose the badass look of an AK mag on a shotgun, rather than epoxying the shell on, he just tapes it on after loading the mag. This means that he can't reload the mag through the trapdoor without removing the shell, but lemme tell you, with 600 rounds, reloading will be the least of your worries.
You may have to remove the shell loading door on your gun in order for the mag to fit. I made mine so that I didn't have to, but ironically, it got ripped off in the first game I used my hi-cap shell in, when I ran into an AK-47 and was running the hell away while being shot at. You don't need the shell door, shells are retained in the gun without it...not that your shells will see much use after this.
3. Mark the spot on the shell where the magazine will feed BBs into it.
4. Disassemble the shell. A shell is held together with two screws and a pin through the brass portion. The screws can be accessed by removing the red sticker, and you can use something to tap/punch out the pin. This may take some pressure...unfortunately for me, my index finger was on the other side of the pin when I finally whacked it out, and I got stabbed. Another word of caution, if you're not holding down the brass end of the shell when the pin comes off, the spring pressure with cause the brass part to fly off, along with the spring itself - guess how I found out. As far as I remember, the parts making up the shell are the two red halves, the two screws holding them together, the brass end, a plastic thing that locks into the end of the BB channel that the main spring goes on, the main spring that pushes the BBs out, the magazine follower on the front end of the spring, and the semi-circular BB stopper which has two tiny springs. These tiny springs push the BB stopper over the BBs to prevent them from all shooting out, and they're probably the worse thing to lose. If you do manage to lose both of them(like I did), you can open up another shell and use one from that one. The shell will work fine with just one spring, but like how we can manage fine with just one eye, two are better. You won't need the spring, just the body of the shell and the BB stopper. The hole should be made on the bottom part of the sideways-U shaped chamber in the shell. |
5. Reassemble the shell.
I hope you can figure this part out.
 6.
Remove the BB stopper in the hi-cap mag.
6.
Remove the BB stopper in the hi-cap mag.
Obviously, the ideal way to do this involves disassembly of the magazine. With the M-16 VN-style one I used, this was easier than I could have hoped for. I suppose if you're desperate, you can dremel down the notch so that it's too short to stop the BBs.
 7.
Drill the hole in the shell.
7.
Drill the hole in the shell.
To test if the hole is big enough, you can fill the hi-cap, place the shell over it, wind the mag, and see if the BBs will enter the shell.
8. Plug the back of the shell channel.
You should plug the rear end of the hole with something to ensure that the BBs can only go forward in the shell. I used silicone sealant; I think my friend used part of a pencil. I tried to make the plug a little slanted to push the BBs forward as they came up.
 9.
Epoxy the shell and magazine together.
9.
Epoxy the shell and magazine together.
Sounds simple, eh? This is probably the most crucial and frustrating step. Screw up here, and you'll have to rip them apart, sand off the epoxy, and try again. Apply the epoxy with a toothpick to the surfaces where the shell makes contact with the magazine. Make sure no epoxy gets in the path of the BBs. I ended up doing this about four times.
To make sure no epoxy had gotten in the way or the holes hadn't shifted and misaligned, I had filled the mag with BBs and would occasionally wind it to see if BBs could still feed into the shell.
Oh, and this is the only thing holding your precious hi-cap shell together, so you don't want to skimp and use Elmers Glue or something. In the days following my creation, I reinforced the area with a butload of epoxy, layer by layer. I was afraid of the mag snapping off, so trust me, I used a lot.


 10.
Congratulations on a job well done.
10.
Congratulations on a job well done.
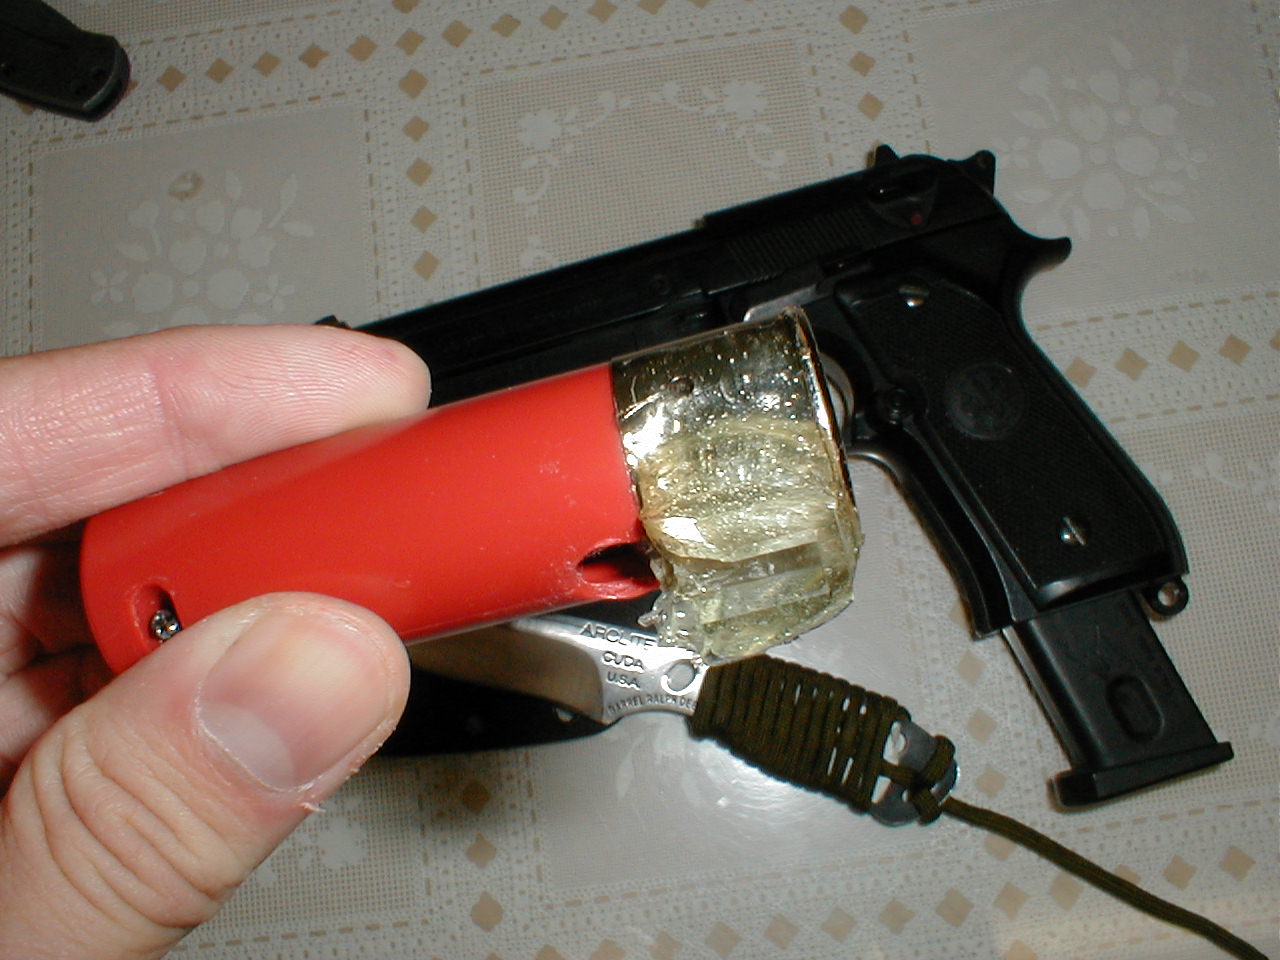
So there. Congratulations, you've just made a high-capacity shotgun magazine. Kiss your ammo worries goodbye; with a lowly 190-rounder, I have more rounds than the remaining six of my shells combined. Now, if you were to use, say, an AK-47 mag...
I suppose some might argue that having a massive ammo capacity defeats the purpose of being a shotgunner. Well, whatever rings your ding-a-ling.
I'd like to give credit to Inferno for giving me this crazy idea in the first place, and putting up with my incessant questions and sensuous come-ons.
Update(27/12/01): A couple months after making the hi-cap shell, when I was writing this guide, it broke. A classmate and I were wrestling with my Benelli, and lo and behold, the mag fell off and hit the concrete we were standing on. I was pretty amazed, but that means...more pictures!
Update (29/12/01): Niall Orr e-mailed in this little tidbit of info (thanks Niall):
"I have just
read your description of the shotgun hi-cap magazine. I don't have a shot
gun but there are a couple of products, obtainable from model shops, which
are useful for this type of job. The first is "Milliput" this
is an epoxy resin filler whict is better than epoxy adhesive as it dries
rock hard. The second is "Pastic Weld"(made by EMA Model Supplies
Ltd, Unit 2, Shepperton Business Park, Shepperton, TW17 88A). The latter
is a solvent which desolves ABS, the plastic Marui uses for its guns. "Paint"
the surface you wish to stick with Pastic Weld and push together, the solvent
evaporates quickly forming a "weld". This can then be reinforced
with Milliput."
External
links:
DonJarr's
Airsoft page - just about the only other TM shotty
hi-cap DIY page out there. DonJarr uses a slightly differing method
form the one described here, but the theory is the same. A brilliant page
and well worth a read.
AndyR's design - the 'Reader's Digest 'of TM shotty hicap designs, simple but straight to the point. A wonderful little image made by AndyR of GremlinGunWorks , which ironically says more than a heap of words ever could.
by Dragon1