

Guinness
-
Content Count
978 -
Joined
-
Last visited
-
Days Won
5
Content Type
Profiles
Forums
Gallery
Blogs
Calendar
Posts posted by Guinness
-
-
WHAT!
What gun is that Guinness? Is it the ACM "M500"?
Sexy!
-Blink
Yes sir

The ever changing, never the same week by week ACM M500 clone

Those keeping score at home, this is why Chinese clones are good for America, good for the world, good for you!
For a little over $100 dollah you have a gun that shoots very hard, very well, and you aren't afraid to let your creativity run wild on!
Slainte!
-
chas requested I put the original ghost ring sites back on and take some pics-
So here you go sir!
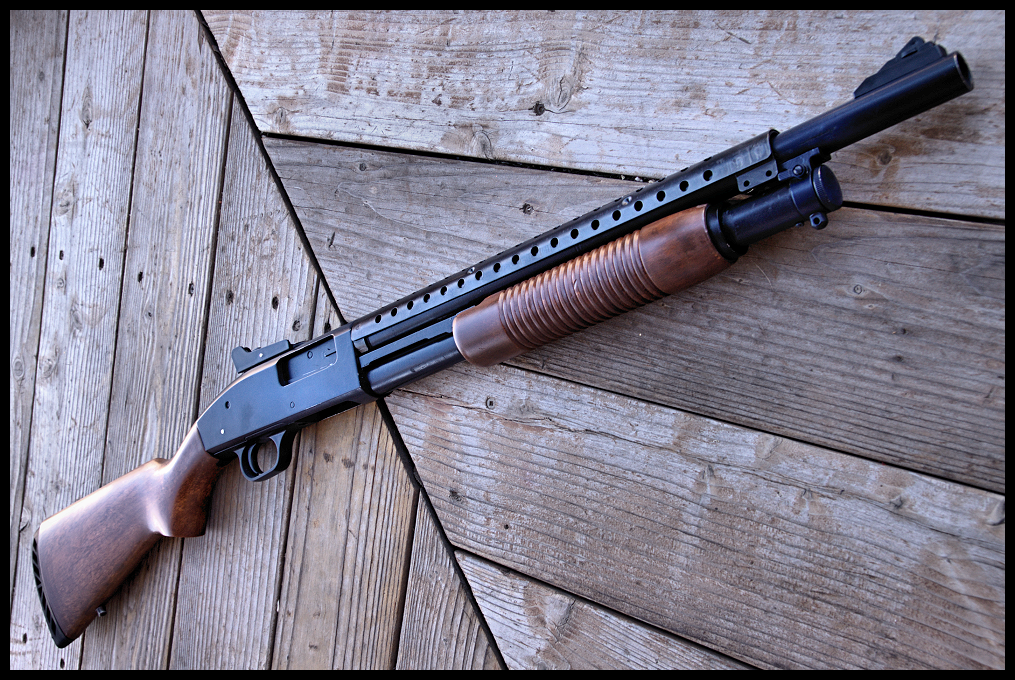
I may apply a bit of aging and weathering to the shotty next along the lines of Sgt. McKenzie's amazing Tanaka M870- I'll post pics on the outcome.
They say imitation is the sincerest form of flattery

Slainte!
-
Thank you sir!
All that for a little over $100 bucks too-
-
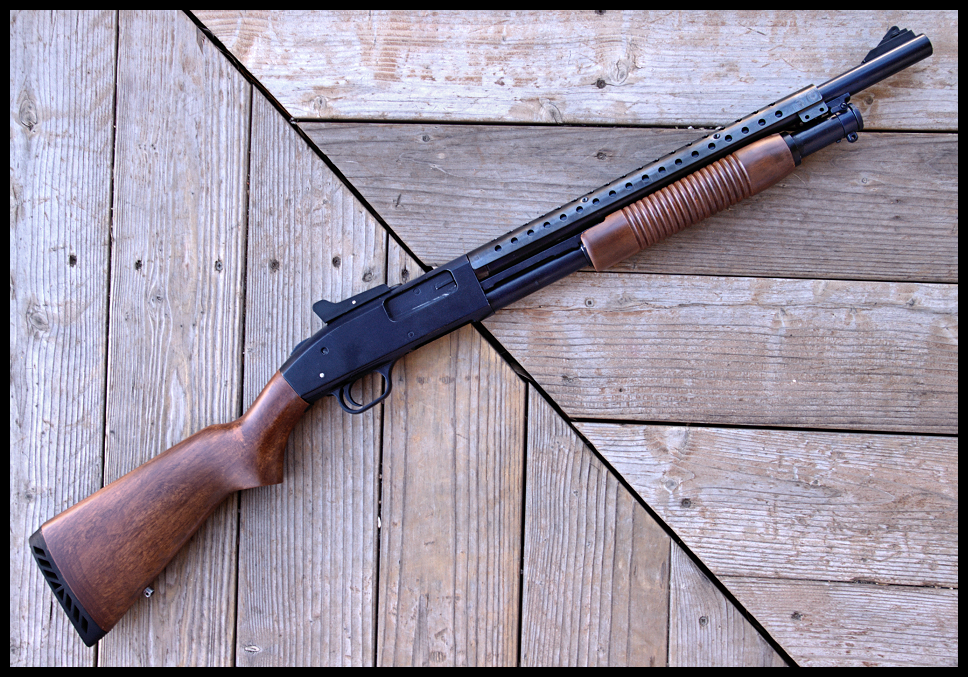
As per request by my friend chas, I put the original ghost ring sights back on this weekend and took some pics-
Slainte!
-
Thanks guys!
I can't tell you how much I appreciate all the support! As I said in the series, I hope this helps you guys to personalize your replicas and add a realistic weathered and aged appearance to them.
Before I started doing this to my guns I was always kind of 'afraid' of them so-to-speak. I handled them very gingerly and carefully and would get very bummed out if something broke, fell off or otherwise went away from the 'brand-new' appearance- then the light kind of went off over my head

"No matter how much I baby this gun, it is going to eventually become worn and used"
I then began doing more and more research on real steel guns and noticed that 'Hey, these don't look brand new either!'
Then the last thing that dawned on me was seeing so many players on the 'battlefield' all decked out in amazing, authentic kit. Some doing modern MilForce or LE loadouts, some like me, doing authentic WWII load out, or even Vietnam era- And it struck me as odd that they would give the 'n00b's all kinds of hell when they showed up in their brand-new repro uniforms-
"Hey newb! Get that uniform dirty!!" or "Your too clean!"
But each one of their weapons looked like mine- just fresh out of the box- I thought "well that's not right" If I'm going to wear in and dirty up my expensive uniform, then the gun has to be at least as important to having an authentic impression, right?
So I started playing around with this and that- painting this one or taking steel wool to that one, usually my older, broken or marginal guns to see what I could create.
This whole process taught me quite a bit- First it has taught me quite a lot about real-steel guns, but the better part is it has taught me quite a bit about Airsoft guns and how they work, don't work, or could possibly work better- I used to send any issue I had with a gun out to my local qualified gunsmiths- I no longer need to do that as much. Other than the nitty-gritty business of mech-box repair, I now feel confident that I can handle anything that happens with my weapons.
One of the other reasons I got into this was seeing the amazing Custom gun work done by friends of mine over on the WW2AA forums, custom KAR98's in real stocks, PPSH's, M1919's etc., and the excellent work on the UK WWII Airsoft site- I was very intimidated and felt I would never be able to do that
 but I figured I could handle making the gun I did have more realistic. However now, after learning by doing, most of the fear of Airsoft guns has vanished.
Anyway, I hope the moral of the story is, whether your into "Period Airsoft" like me or just like to throw on some MOLLE gear and a Shemagh and a ball cap and go PMC, the gun they are using would not be fresh and clean and without a little bit of wear and abuse in real life, so why not add that dimension to your Airsoft equipment.
As stated in the series, I want to add some disclaimers here: First, as with deciding on what kit to wear, DO YOUR RESEARCH! I can't stress that enough- It's one thing to say 'Hey, that looks cool!I'm going to weather my gun! and it's a completely different thing to tie it onto the back of an ATV and drag it all over hell and gone- or run rampant with a sander- Ultimately it is your property and who am I to tell you what to do,
But if it's a 'Realistic' effect you are going for, the place to start is in weapons books or on the internet doing research of your weapons system to see what the real ones look like with use.Second, Airsoft weapons and kit are called "Toys" yet, they are often some of the most expensive 'investments' you (or your parents
) make- Please use caution and good common sense when embarking on a weathering project- this goes along with the DO YOUR RESEARCH caution, I would hate to see your $400 dollar AK reduced to scrap by an overzealous out-of-control dremel that would cause you to regret the effort.Thanks again Ladies and Gents, don't hesitate to contact me with any questions!
Slainte!
-
First a note: It would be easy and somewhat 'logical' I suppose to just bang and scrape the heck out of a metal replica to achieve the use and abuse that a rifle or handgun would receive over it's service life, however if you research weapons pictures that have been used or are being used in the field, you will seldom see guns that appear as though they have just been run through a wood chipper and put back in the gun rack. While 'scratches' are certainly a part of natural wear, what is more common is the fading or 'silvering' effect that comes from the greases and oils from hands or equipment used with these weapons. Leather holsters rub and wear down corners and leading edges from use- The acidic oils on our hands or faces will interact with gun metals and woods to change the appearance over time. Sand and grit from 'Desert Climates' and areas wink.gif really do a number on guns. Gouges and scratches are generally limited to the 'protruding' edges of a rifle such as the leading edge of an M16 gunsight, or the casing bulge, etc.
The best advice for anyone wishing to create this effect on their gun is to start by searching images of their particular weapon on the web, find as many pictures as you can to get an idea of how 'real guns' age and wear, then decide how much wear is appropriate for your weapon. Consult this guide for tips on how I did it- As usual feel free to ask me questions.
Let your creativity flow and have fun!
PM'd
Slainte!
-
Guinness's Weathering and Aging 'How-To' GuidePart VIiiPlastics Cont.
Step 4 - Painting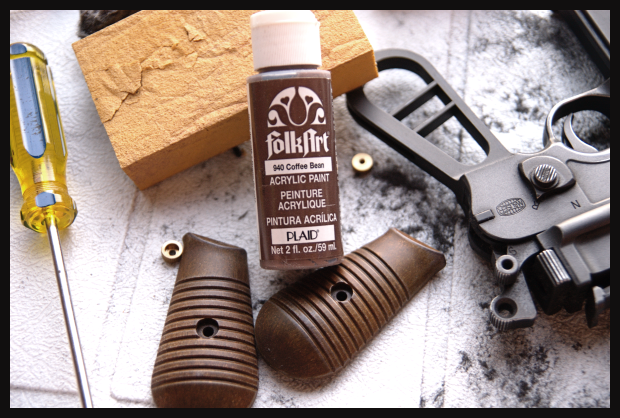 Preparing for first acrylic paint coat on Broomhandle grips
 Acrylic paints to be used on 1911 grips
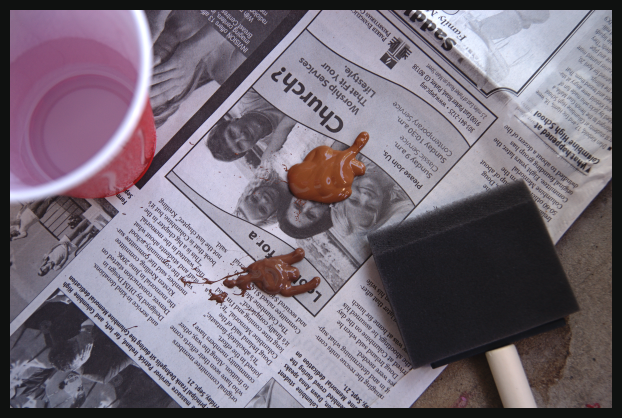 Mixing acrylic base colors for 1911 grips
I always use newspaper as my 'palette' for these projects. And I use a plastic cup for water to mix the acrylic paints.
Just as we did with the wood treatment with applying acrylic paint, you will paint, then wait about a minute, then wipe the paint off until you get the darkenss or degree of aging you want.
Plastic is different than wood in that the paint will not 'soak in', this is one of the reasons that you sand the plastic to begin with, this roughs the surface up so that the paint will stick better and mimic as much as possible the soaking effect that wood has. Just make sure you don't wipe the acrylic paint off too soon, and conversely, the longer you leave it on, the more 'permanent' it is.
Don't worry, remember acrylic paint is water based, so just dip your brush in the water cup and go over any areas you want to 're-do' before they dry hard.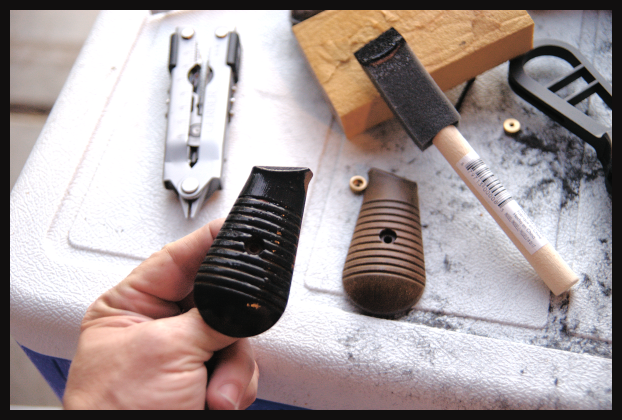 1st coat on Broomhandle grips
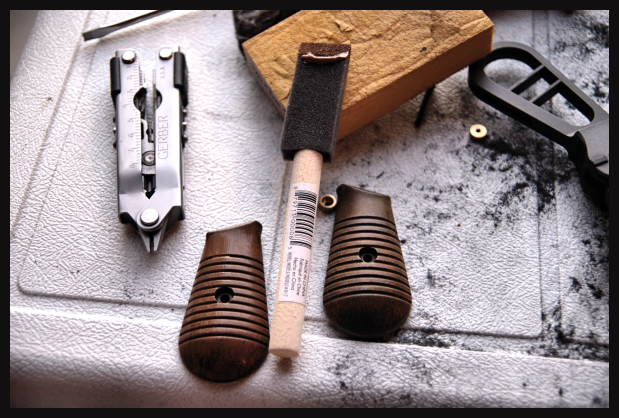 Black 'Layer' Wiped Down, 2nd Brown Layer applied
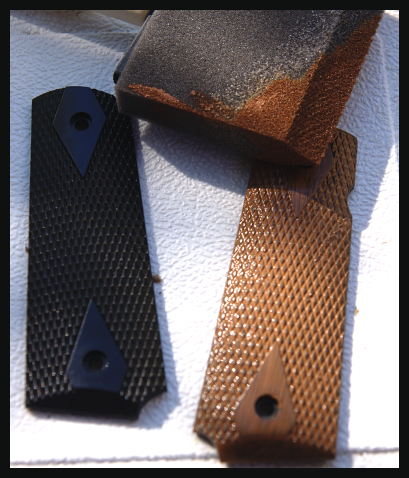 Applying First Layer
 1st Layer on 1911 Grips
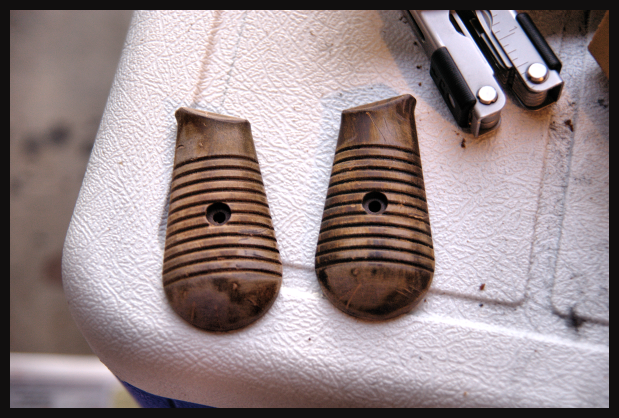
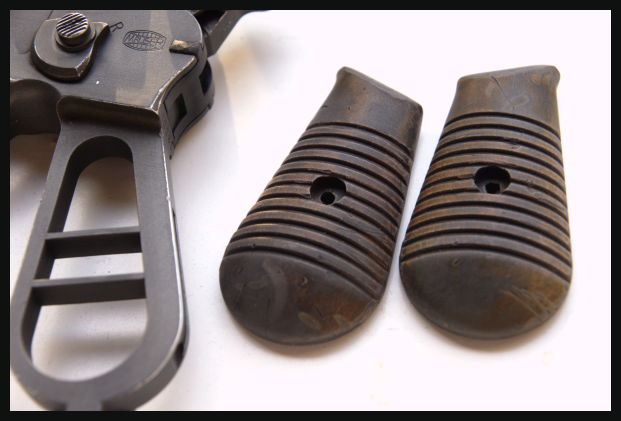 Broomhandle Mauser Grips Completed
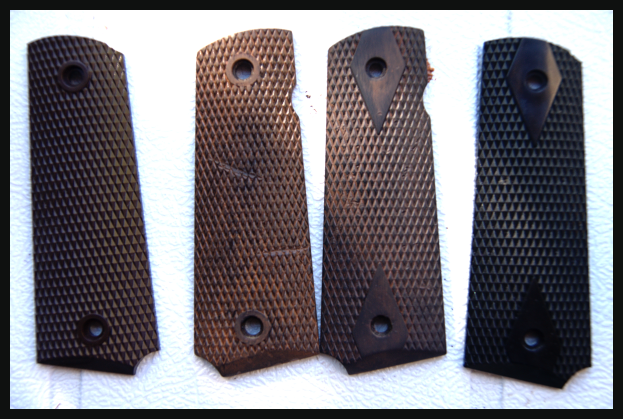 Halfway Done-
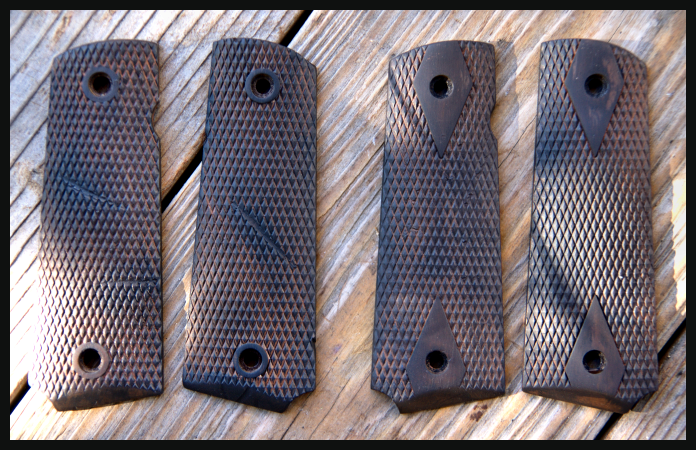 1911 Grips Done, Just Need Clear Coat Spray
Final Step - Clear Coat Spray
Now that you have sanded, distressed, painted, wiped, and painted again until you reach the look you want, it is important to over spray the plastic grips, stock or whatever piece you are working on. This is especially important for 'high use' areas such as pistol grips. The sweat from your hand can ruin the all the work you have put into the replica quickly. Clear coat provides a protective layer over your work that will keep the acrylic paint from coming off. This is also useful if you use regular spray paint on plastics. For instance, if you use Testors 'Metalizer' gunmetal paints to apply a more realistic gray or parkerized effect on gun barrels or other surfaces, the clear coat will protect the finish and keep it from scratching or rubbing off with normal use.
In Conclusion...
This concludes Guinness's Weathering and Aging 'How-To' Guide
As I said earlier, I really hope this helps all you to weather and age your replicas. At very least perhaps this will give you ideas that you can try on your own guns. It was certainly a lot of fun doing this series, and I will be putting it up on the Review Database so its in a convenient place for everybody to find.
Please don't hesitate to contact me with any questions or assistance you may need!
Tons of thanks to Arnies and all the members that have requested this information! Do your research on the look your going for, and let your creativity come out! Have fun with it and let's be sure to see your work in the "Battle Worn" and the other picture threads!Slainte! -
Guinness's Weathering and Aging 'How-To' Guide
And now, finally, the conclusion of my aging and weathering guide for Airsoft replicas.
But first, a brief recap.
Part I: Sanding and Preparing Wood- I began the series discussing how to sand and remove the original finish from wood kits. Techniques for stripping the wood down, sanding and refinishing.
Part II: Distressing and Aging Wood- The next part of the series covered how to get that 'Battle Veteran' appearance from your furniture using simple household tools. Using screwdrivers and a hammer to put nicks and dings in the wood. Then, how to apply acrylic paint washes to darken the wood and give it the aged look.
Part III: Linseed Oil Application- This completed the Wood Furniture section of the Guide and discusses the final step for producing a Veteran Airsoft replica.
Part IV: Rack Numbers- Just a quick section on adding 'Rack' or Arsenal numbers to add even more realism to your replica.
Part V: Metal Replica Weathering and Aging This section focuses on techniques for giving your metal bodied Airsoft replica a worn appearance. Again using common tools and inexpensive supplies from the local hardware store you can create a War Vet look for your replica.Part VIPlastics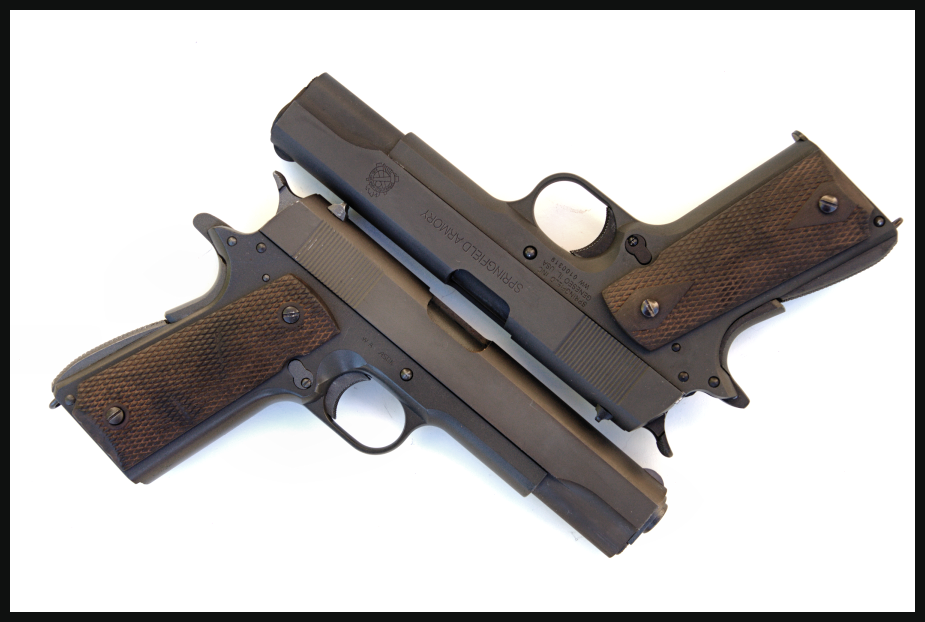
I would like to just take a moment and Thank Everybody for their very kind words of encouragement along the way. I have received a ton of very positive feedback and I want to thank you guys for the support. I truly hope this guide helps you guys to create your own "War Veterans" for use with your impressions or just to wow them at the local skirmish site!
This will be the conclusion of my series as we have covered pretty much all of the major areas of 'weathering ' or aging your replica. There are techniques to use for the wood stocks and furniture that you would add to an Airsoft replica weapon or those that come from the factory with wood. As well I have given you tips and pictures to deal with the wood kits that are coming out of China right now, these are quality wood, but seem to be very red in color for some reason- that is covered in the series.
I have also shown you how to add rack numbers to your gun, And in the last episode I provided techniques to create the aging and hard use effects on metal replicas.
Finally in Part IV we will look at how to achieve this effect on plastic. This will mainly be concerned with plastic grips, the technique will help you to create a real wood-like effect on plastic.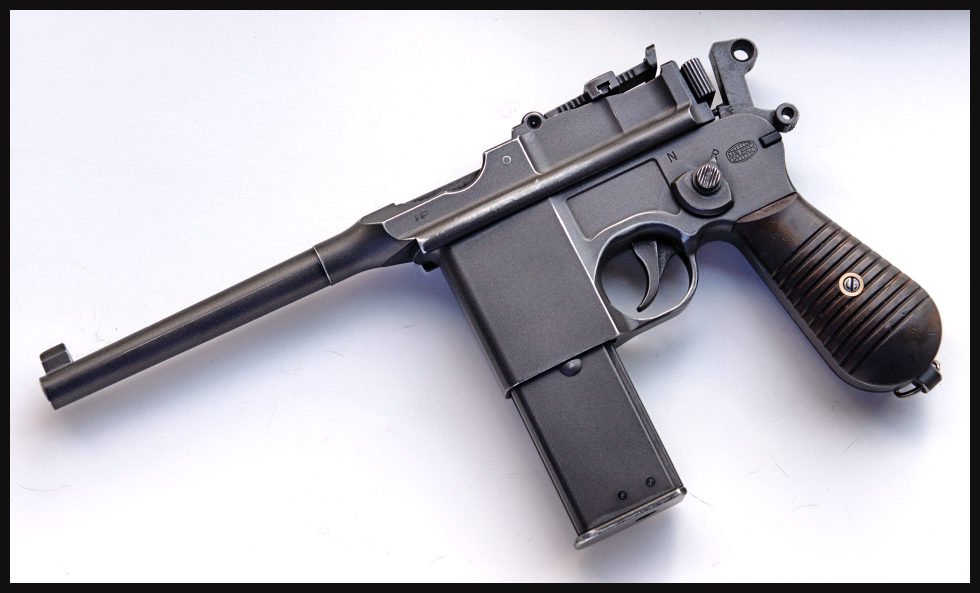
Right then, let's get to it!
Step 1 - Preparation
Materials Needed:
-Acrylic Paints from Arts and Crafts Store > $2 bucks a bottle
-Medium Grit Sanding Pad > $3.50 from Hardware Store
-Clear Coat Spray Paint- > I use Krylon Clear Coat, $5
-News Paper, Paper Towels, Plastic cup for paint mixing
-Hand Tools: Flat head Screwdriver, File, Dremel (Optional)
As with all of the processes we have discussed in the series so far, the first step is to make sure you have an adequate work area and all the materials you will need to get the job done ready and handy.
I do all my sanding, dremelling, distressing, and painting work in my garage on nice sunny days. I open one door of the garage so that all my neighbors can see me work and wonder what "The kook with all the guns is doing now" ;D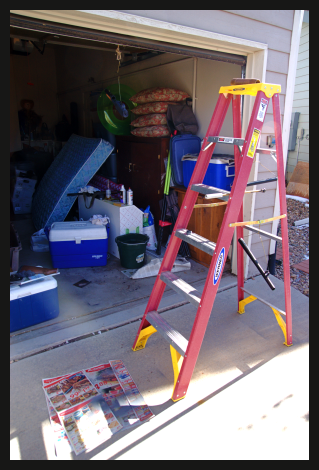 My work area and 'portable paint bay and dryer' otherwise known as a ladder..
Step 2 - Sanding
As with the process for aging wood, working on plastics requires beginning with a good sanding of the item to be weathered.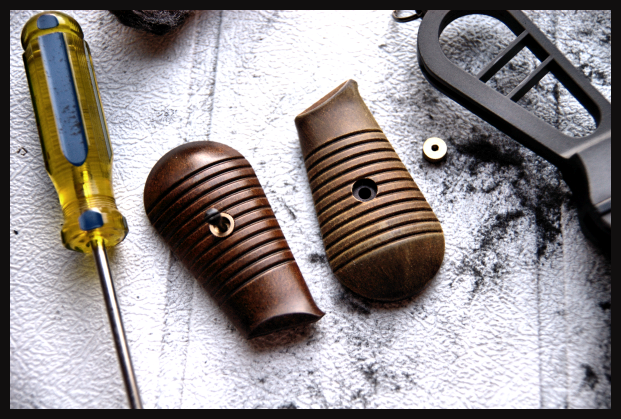 First sanding on Broomhandle grips
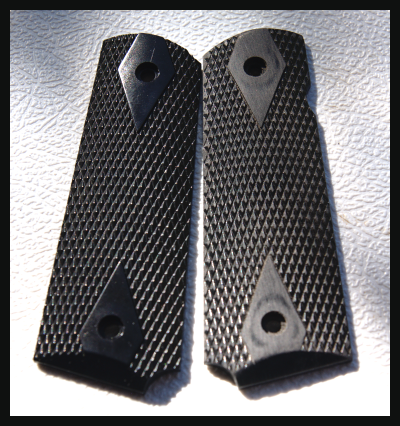 First sanding of black checkered 1911 grips
Sand using medium-grit sandpaper or sanding pad. Sanding pads are better to work with because they allow you to get into the cracks and ridges much easier.
Sand until the top shiny layer has been removed. And here's another tip- its a good idea when doing pistol grips do one at a time, this makes it easier to gauge how much you have done because you can compare it to the original form the opposite side.
Step 3 - Distressing
Similar to what we did on the wood furniture, we will use household tools to create the distressed look on the plastic pieces. However a hammer won't be used in this process.
I use a screwdriver to create small dents and nicks, and I also use the file from my multi-purpose tool to make deep cuts and gouges.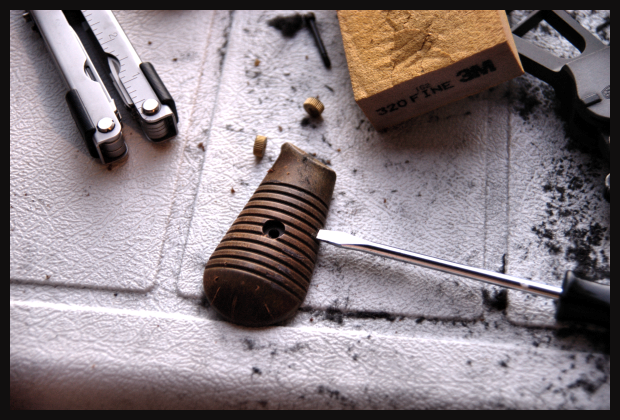 Broomhandle Mauser grip about to get abused...
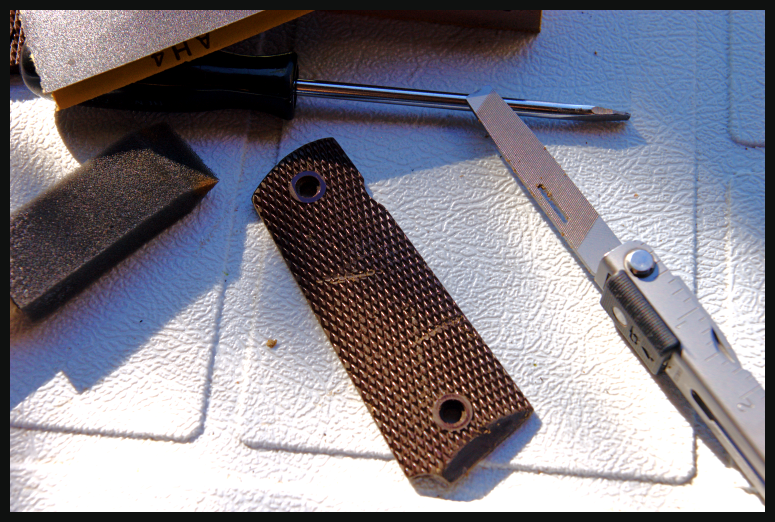 1911 grips getting the file treatment
Follow this step with a good sanding to remove rough edges and to smooth the gouges out to help make the plastic look even more like wood. For the most realistic 'wood' effect, be sure to sand edges and 'wear areas'- for instance on 1911 grips, the 'points' of the checkered grips would be worn smooth with use- make sure to hit those especially, leading edges or forward and rear edges as these would be 'contact' areas of the grip. On the Broomhandle's grips I used a dremel and went through the deep ridges, again to simulate the wear that real wood grips would see over the life of the weapon. As always, a couple of good nicks and gouges add 'character' to the piece and keep it from looking 'brand new' to go along with any other aging you have done to the replica.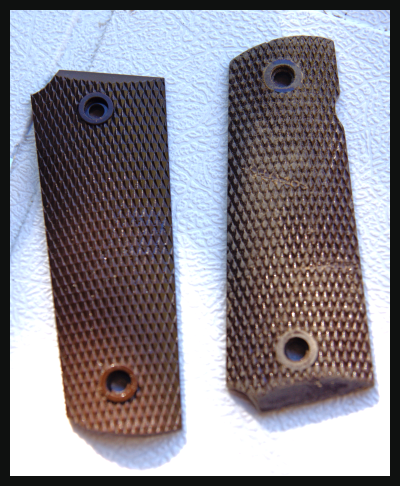
 End of Part VIiPart VIii Follows
-
Nice review Boar! Well done!
You should add this to the Review Database-
Actually both you and Snorkleman should put each of yours up there so we have alternating reports on the same gun in easy reach!
Slainte!
-
Got mine off eBay
-
Wierd I can't edit my post above. Anyways the time has come, I know you guys are tired of seeing pics of my WE and I am considering selling it. The problem is I can't think of a good price. I was thinking about $150-$160. Maybe a little more if I sell the american legends with it. Well, whatever here are pics of it again with my old painted stock grips.
-Snip-
In my humble opinion......
I like those grips better- Save the Pach-y-derms for the next gun-
Slainte!
-
Well shucks...
 Thanks man!
Actually I am thinking of working on it this weekend after seeing Sgt. McKenzies amazing M870. I will probably limit any 'aging' I do to it to the leading edges, meaning the edges of the receiver, end of the barrel, etc. and not so much sanding off of the sides of the receiver or the controls, trigger, safety switch etc. I guess on that one I would probably go for a 'lightly' used look rather than the 'Battle Veteran' look the good Sgt did on his Tanaka.
Plus the trigger guard on mine and the Marushin it is a clone of are black plastic to begin with, so there is not much I would be able to do there even if I did want to go for a more 'beat up' effect.
And actually it all depends on me finishing this article first this weekend, since I've committed to that before I do any more project work

..plus there is Christmas shopping I need to get done...

Slainte!
-
i like this.
how many rounds does it hold ? fires 3 at once yeah ? looks a bazillion times better in black with the full stock. are real wood parts expensive in the US ? i dont think the wood effect plastic looks that bad tbh, but it wont feel as good.
48
...hmmm kinda reminds me of Hitchhikers-
42...the answer to everything is 42
But to be clear
the Shotgun holds 48 8mm bbsSlainte!
-
They are roughly on par with each other in terms of fitting. Both require some work to get to cycle smoothly. The PGC is just higher quality.
What he said
The PGC's weren't available when I did mine, and I really wanted a SPA G.I. replica. I think one of them, maybe it's the new Guarder kits have a 'Hecho in Brazil' or something like that on them now, which is technically accurate, but doesn't exist on the real-steel weapon. Much of SPA's 1911 line is actually forged by Imbel then finished at Springfield.
Slainte!
-
right on, I didn't even read the product descrip to see it wasn't steel- apologies

-
LOL. Thats a nice mbk but i'm leaning more towards the sfa kit. But then again not many people have the series 70 kit. I shouldn't even ask this but what about the guarder kits. Their 'cheap' even from US retailers. I'm not buying an mbk until I sell my WE though.
Guarder kits are pretty good-
And I agree on the Springfield, I'm just liking the idea of a Stainless or Chrome 1911 after seeing "No Country For Old Men" last weekend
Here is my Guarder Springfield with real-steel stocks to replicate the Springfield "G.I." model
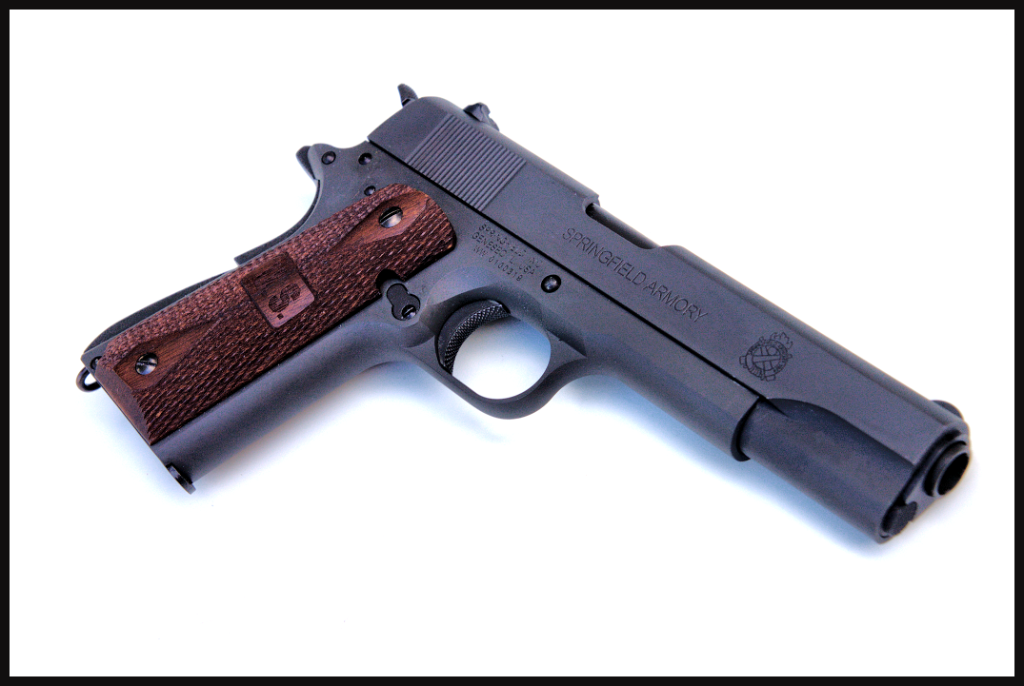
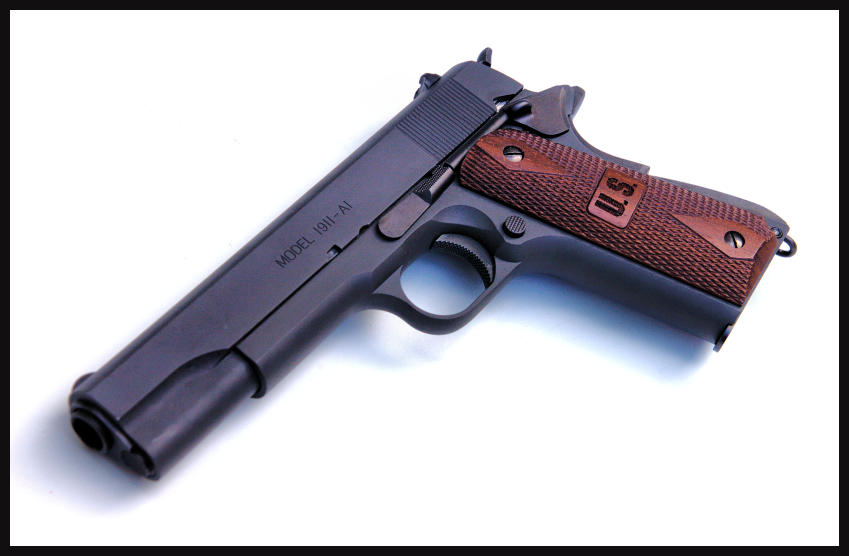
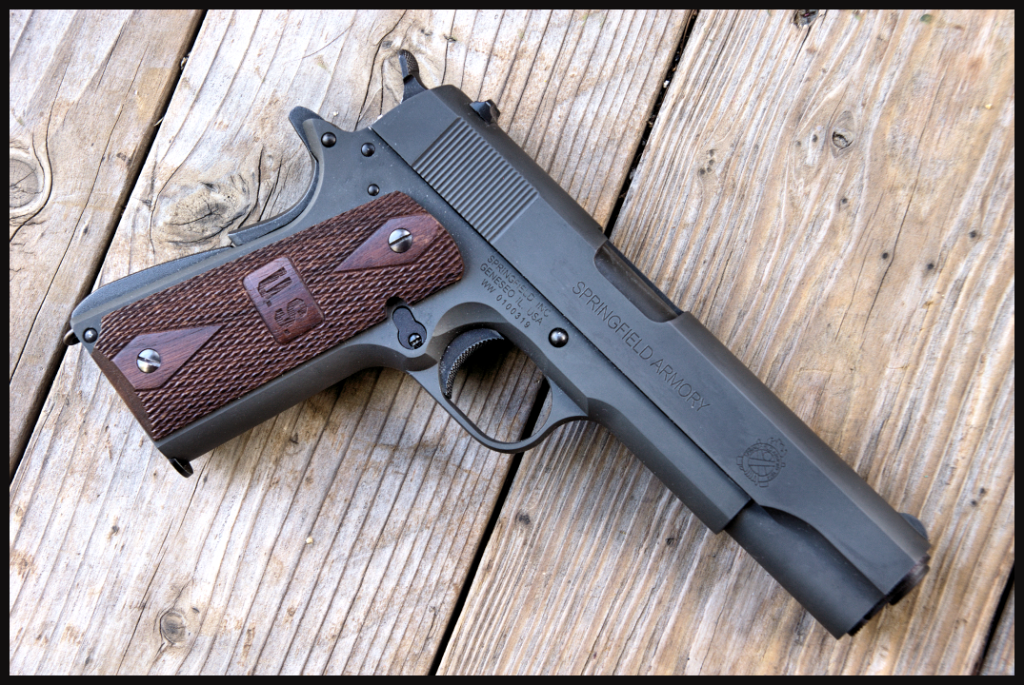
Slainte!
-
-
No worries, my French comes from Google translator
I got the grip from eBay and yes, I expect all the real-steel parts would fit, except the bead sight which will take some modding, but I'm going to just get a Tanaka M870 for a folding stock Shotty.
Slainte!
-

....wow
-
Thanks hks.
Just got my TM 1911.
Welcome to the club bro!
Now then, get the Series 70 Stainless body for it from Boomarms
And get some pictures posted! Take that Subie, and that gun in a case of course down to Ponte Vedra beach at sunrise and get some good images eh?
Slainte!
-
Look at you!
Already contributing to your new home!
Very informative and appreciated, at least by me
Well done to you!
Slainte!
-
Nice Work Maccrage!
I'm glad you got this up so quickly, well done to you!
Slainte!
-
Gorgeous man!
Thanks for adding your work here!
Slainte!
-
Really? thats cool! I always like the Sgt Barnes / Shorty A1 even though technically it wasn't available during the war, just happened to be what they had in the Philippines during the filming of 'Platoon'
What....did they offer it to you in trade for helping them release millions from their bank?

1911 Picture Thread
in Weapons
Posted · Edited by Guinness
If your 'gryphon' from the WW2AA boards, nice paint jobs and pics man!
...even if your not gryphon, excellent work!
Slainte!