

Hatchet
-
Content Count
372 -
Joined
-
Last visited
-
Days Won
5
Content Type
Profiles
Forums
Gallery
Blogs
Calendar
Posts posted by Hatchet
-
-
First big failure today - gearbox has completely locked up and can't be cleared with full auto. The motor's trying to turn it over, but no joy. Not the battery, it was a fully charged Eagle6 LiPo and I gave it another hour of charge after the problem occured just to double check. Any suggestions before I have to take the whole thing apart?
Also starting to see some empty mags not locking the bolt back now - I shall have to investigate that mod a few pages back.
-
Can whoever gets it first for review please *not* title it "Initial impressions of..." as it's getting hard to tell which is which!

As an aside, I'm wondering if this means we might see a recoil HK417 or SR-25 in future, since they'll essentially have a 7.62 recoil chassis to build them around.
-
I've also been running the same charger for a while now (year or more) with no problems. Straightforward to use and charges a variety of battery types. There are several different balance lead connectors which should cover most of the standard ones. Programs include balancing, charge/discharge cycles and "storage" modes for LiPos. It comes with a few different connectors, but uses banana clips on the connection between charger and battery, so it's easy to make up your own cable should the one you want not be included.
A separate power supply is needed, which is an extra cost, but the advantage of it not being integrated is that you can use this charger from a car battery at a skirmish field, if required. Some of the safety timeouts may need adjusting if you use a low charge rate and a big battery - I've increased mine to 3 hours, since a 3000mah lipo on 1c charge can take a while if low.
Component shop (UK) have it for £35 and also sell power supplies if needed, or try your local RC model shop. More expensive than the standard/free chargers you get, but if your charging needs are anything greater than "stick in the wall the night before and hope it's charged" or if you're using LiPos then you should give it a look.
-
I had the same problem when I moved away from using Excel - terrible feed issues not improved by stripping, cleaning, etc. As soon as I switched back, all the problems went away. YMMV.
-
They've only been out a year and a bit haven't they? How'd he wreck it so fast?!
-
If (when) they bring out a recoil MP5 it's going to get expensive...
-
Just got myself a CQB-r and I am looking for a recommendation for a rear sling plate that's a reasonable cost (i.e not £50!) can anyone help please?
I've got Marui's one on mine. About £35, but fits well, should stop anything becoming unscrewed and it works.
-
I tried a longer Guarder barrel (407mm) in my CQB-R with a complete hop unit. Didn't really see a noticeable improvement and after 5 or 6 games started to see flyers that barrel cleaning didn't resolve. Switched back to the short barrel and accuracy was right back where it had been, so I've stuck with that. Still running around 310fps and absolutely no issues with feeling outgunned/outranged.

-
New toy arrived *obviously* the first thing to do is krylon it...

-
SCAR-L CQC is up on Marui's website for those that prefer the shorter look...
-
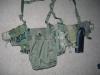
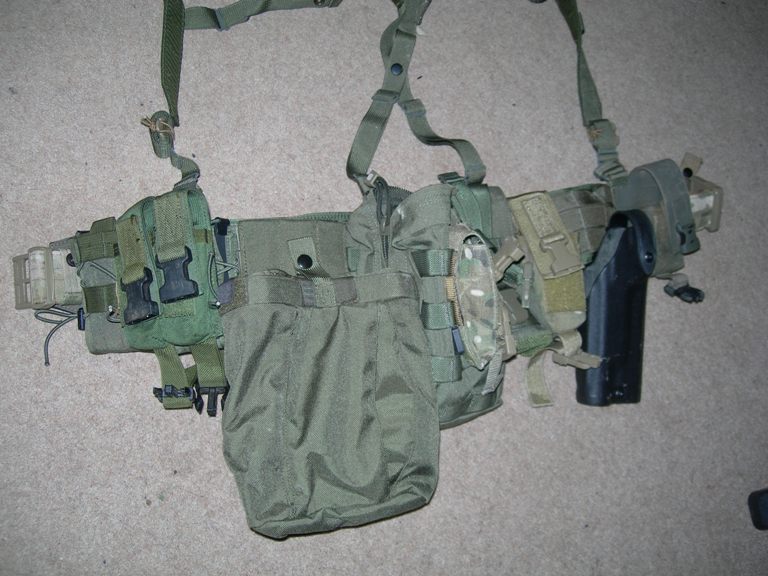
Apologies for the terrible pictures, but I find it hard to get a decent shot with so many pouches, etc stuffed on. Would look better worn, but that would require additional people. This is an attempt at a fairly universal rig
So:
ATS Warbelt over CM-EMDOM belt.
EMDOM battle suspenders with HSGI shoulder pads.
2 HSGI TACO's - there is a double HSGI pistol pouch piggybacked onto the second one (ideally I'd like to replace this with the piggyback TACO).
Emdom dump pouch (recommended, can run around with 6 mags in and nothing falls out)
Flyye GP pouch (copy of the eagle one) with strobe pouch piggybacked on. - Used to carry 1 litre source hydration and radio in the strobe.
Flyee/Eagle canteen/gp pouch - bag of bb's and speedloader.
generic smoke grenade size pouch - Airsoft Innovations GasCan
safariland for 2011 with X300. Mounted on the inner belt on a UBL.
bulle (I think) grenade pouch) - carrying BFG.
In a DMR config with a VSR I put 2 pistol mags in the first taco, speedloader in the second and 2 more pistol mags in the pistol pouches. The rest is as above.
Tacking inspiration from Mayflower, I've used a buckle repair kit and attached it to the suspenders at around chest height. When in "assault" mode, I clip a mini chest rig onto it with an additional 6 m4 mags on it and use the Tacos for 2 more.
So far it's working pretty well. In assault I have all that I need (8 m4 locaps) and pretty much nothing I don't. Rushing around with the VSR I retain mobility and carry extra pistol mags. There are a few minor tweaks I might make (consolidating colours/getting piggyback tacos to distribute weight) but for layout I think this will stay a while.
-
The Marui one is good, although it doesn't then let you fully collapse the stock, if that's an issue. It is proper QD too, on three sides.
-
I was considering the possibility of replacing the rail system as one possible resolution to this issue. Unfortunately, I can't remove the blasted thing. The six screws are out but it obstinately refuses to go. Interestingly, the screw the covers the ejection port nicked the receiver paint work on the way out.
It does that unless you make it the last screw out so that you can move the ris forward as you unscrew it, thus preventing the screw moving backwards and fouling the ejection port. Not sure why it won't come off though unless the design is different. Gas block stopping it coming off? Anything in the manual?
-
Thanks.
It's a Madbull Gemtech G5 - twist/pops off in seconds. -
Bloody hell, sounds like a right hassle. I'd say there's a lesson for everyone there, definitely go with rails that have an easily detachable lower quadrant in future if you want to fix a low-pro gas block inside it. It's pretty much pure luck I've not had that issue before myself I have to say.
Though could you not have loosely put on the rail, fixed in your gas tube/block, then slid the rail forward slightly along the tube until one of the holes in the bottom allowed you to get at the gas block securing screws? The madbull Lite might be different I suppose but my G&P has various holes along the underside.
Sadly the Madbull DD lite doesn't have holes on the bottom. You are also limited in how you can move it due to how it attaches. In order to run the gas tube all the way through you'd also have to go through the hex mount that's secured by the barrel nut. This wouldn't give you much more advantage anyway, since you have the fake gas tube prong behind that anyway (the one that the little silver piece goes on to give the illusion of a continuous gas tube on the normal sopmod/cqbr).
Forgot to mention the Marui scope mount. Pretty good as it's QD and has removable inserts so you can use it for 1 inch or 30mm scopes.
But yeah, I'd do a MK18 ris and the "correct" KAC suppressor if I was doing it over.
-
This came out a little darker than I had hoped - I could do with a bigger range of colours - and I didn't use enough stencilling. That said, it's better than solid black, and if I *really* hate it I can just redo it...

-
More messing about with spraycans and parts.
Looks pretty similar to how it did a while back in the thread, but it's a lot more solid. I put some electrical tape round the base of the barrel where it goes into the receiver and this firms things up a lot more than just shims can. Everything has been threadlocked, the DD rail has done up without the need for shims on the six bolts (probably because I bought some...). Replaced the magpul buis with G&P ones, etc.
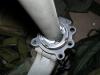
Actually, the most fiddly bit was probably this:

Dytac low profile gas block and King Arms M4 gas tube. The Madbull DD rail doesn't have a hole for the gas tube, so I had to use a 5mm metal drill bit to put one there. I then had to put another in the underside of the RIS to enable access to the grub screw that holds the gas block in place. All of this for something purely cosmetic that most people won't see. If I had to do it again I'd probably start with getting the 9.5 inch MK18 ris instead of the 9 inch lite one.
The bipod is QD as is the Gemtch G5 silencer, so it can go back into CQB mode in about 10 seconds. Only thing I fancy doing next is the stealth mosfet trigger when it comes out.
-
I don't think a standard USGI barrel nut would work at all (assuming you're talking real steel). Real ones are a one piece job and that on the sopmod/cqbr are entirely different (almost like a second castle nut). As you pointed out earlier, the "cog" part of the delta/barrel assembly has a cutout to allow wires through. I think I'd want to see close ups of how it all goes together before I spent any cash on a rail.
Edited to add - anyone know the translation of the screw sizes in the manual. Specifically those going in to part NGM4-39 (the stock position notch rail). Shows as 2x4 and some symbols. It probably says "Loctite these" in Japanese too...
-
DD lite shouldn't need any extra chopping. The barrel nut just replaces the normal one, so you can still pass the wires through the cap in the semi-circular barrel clip. Think there are pictures earlier in the thread. Very tight for space though.
Edited to add picture.
-
 1
1
-
-
I continue to think about getting one as a sniper backup, despite the ludicrous size, simply because a chromed hi-capa cracking off rounds doesn't exactly say "stealth".
-
Sounds about right. Currently if anything major goes it seems to be cheaper to buy another gun and split the parts.
-
Oh well. Guess it'll just have to be a second gun/gearbox at some point then.
-
I just went brute force and pulled the spring out the back. It's possible, if not perhaps as much of a good idea.
Saying that, can I now just remove the rear stock and unscrew the back of the buffer tube and pull out the recoil mech and gearbox spring without having to do the whole business of taking the stock pipe off?
-
The hicap version.

Initial Impressions of the TM SOPMOD M4 AEG
in Rifles (AEG)
Posted
Broken sector gear tooth. And bearing.
Also, the wiring to the rear is now sheared in half since the "medium" strength threadloc is more like superglue and the wiring gave way before it did (I think I'm actually going to need a vice to hold it). Anyone know what/where to get that inflexible wiring that goes to motors?
This is a day without sunshine!