

wilekcmc
-
Content Count
334 -
Joined
-
Last visited
Content Type
Profiles
Forums
Gallery
Blogs
Calendar
Posts posted by wilekcmc
-
-
Real Sword Type 97 Personal Review
I've been looking around now for a new AEG but didn't want something that you see every weekend on the field. So I contacted Real Sword and they hooked me up with their Type 97 AEG. Please remember that this is from my point of view, we all have different ways at looking at things.
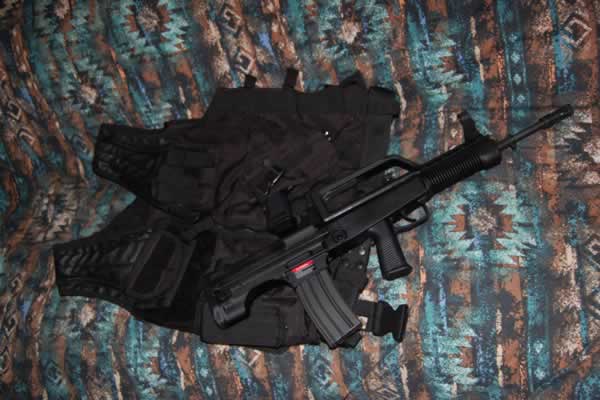
Table of Contents
First Impressions
Real Steel History
Appearance/Feel/Build Quality
Internals
To Be Continued
First Impression
Will i have to say that i am impressed with the care in which they package their products. Everything is protected with foam cushions and neatly packaged. When I opened the box the first thing i saw was the Japanese Certificate meeting the one joule limit (I live in Japan so there's a one joule limit).
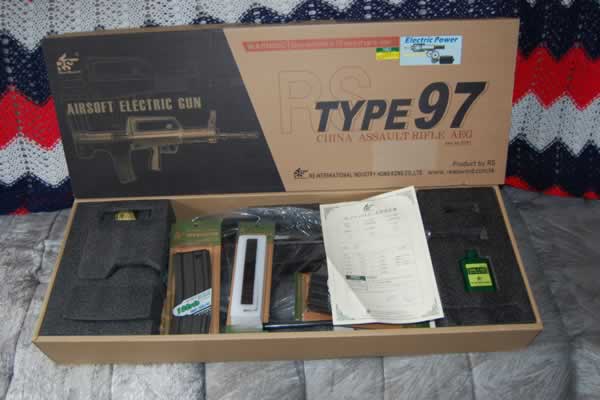
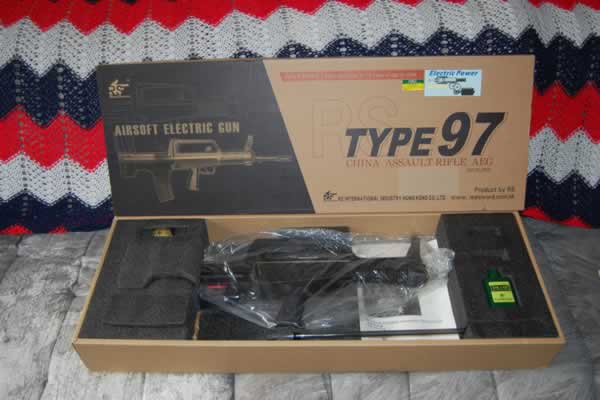
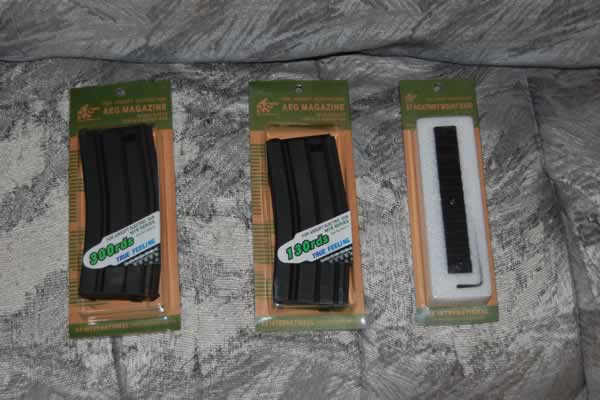
The purchase includes the following items: Type 97 AEG, Small Tool Kit, Oil Container, 130 Round Mag, Extra Muzzle (Not The Orange One That Came With It). Cleaning Rod, BB Loader, Owner's Manual and a Quick Reference Take Down Guide (Not Shown In Photo). Battery is not included with the AEG and is a custom style.
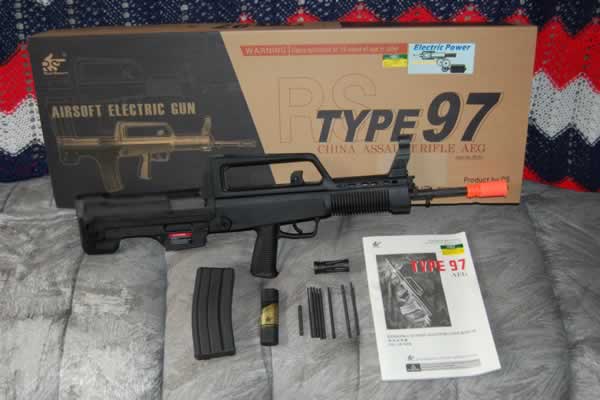
With this purchase for Real Sword I included an extra 130 round mag, 300 round high cap mag and the 97 picatinny mount base.
At this point I am pleased with what i have, but the real test of this AEG is how it handles, its construction and upkeep.
Real Steel History
Sorry but i am not going into the history of the Type 97. If you would like more information on the real steel, please checkout the Wikipedia at
http://en.wikipedia.org/wiki/QBZ-95
Appearance/Feel/ Build Quality
Picking up the Type 97 seemed to be very natural and comfortable, compared to the real steel the weight of the AEG was surprisingly light. movement and handling of the AEG is easy, fits tight against your shoulder, trigger feels to be in the right place, along with the front hand grip. This will also make a good CQB weapon besides as the Standard Assault Rifle.
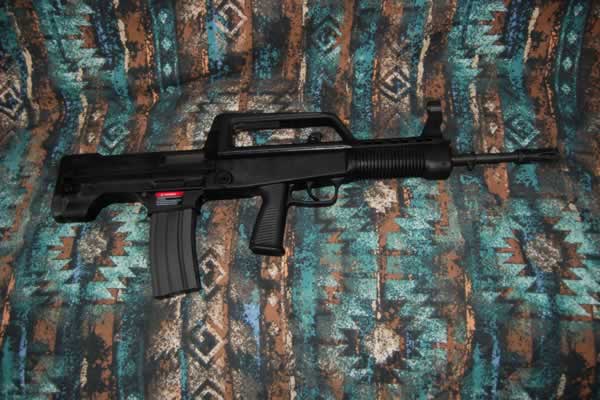
All of the steel and polymer used on this AEG looks great and seems to be of high quality. The front and rear sights are easy to use and are at a good height from the base of the AEG. One thing that is needed is to make shore after each usage that the AEG is wiped down with some kind of gun oil to help prevent rust.
There are only three markings on this AEG, serial, select switch and a warning label.
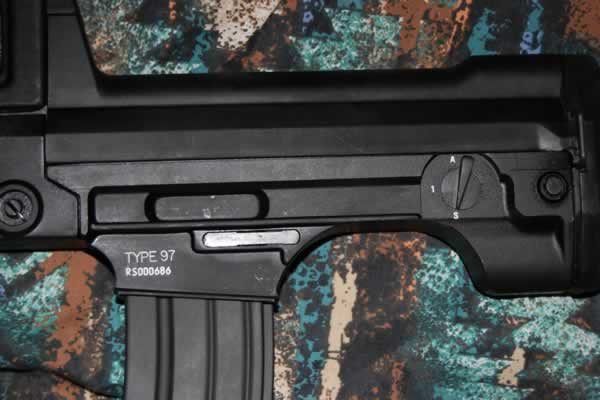
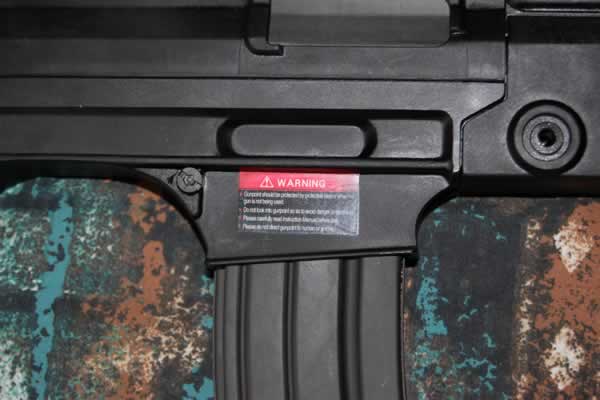
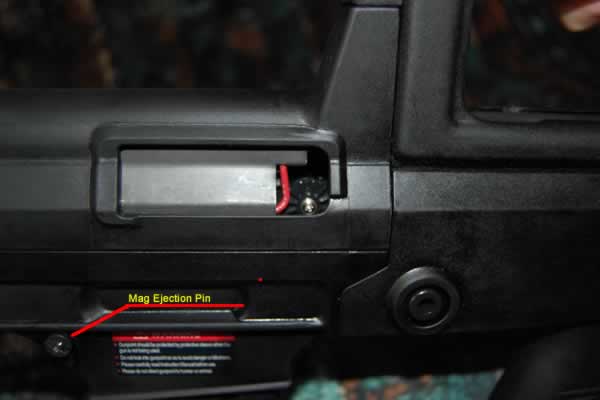
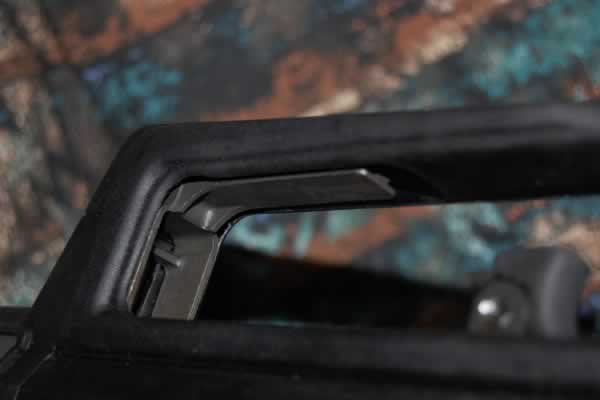
Hop up adjustment is easy, pull back the charging handle and it will open the ejection port exposing the adjustment knob. The port only opens about half of a inch or so. The mag release is only on this side of the AEG and that's is the ejection round side/hop up is located, right by the warning label.
part 1
part 2
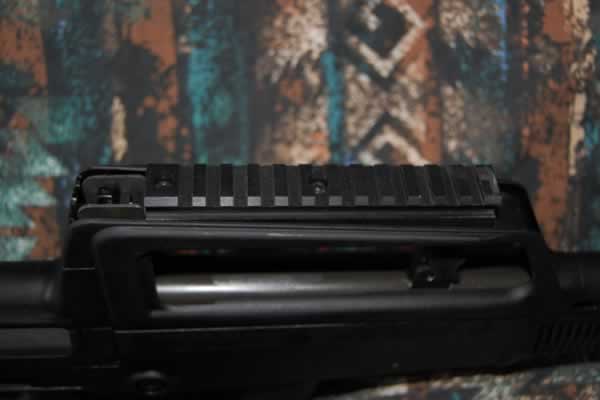
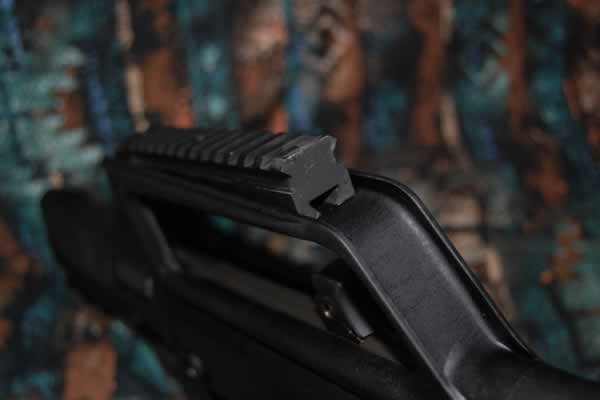
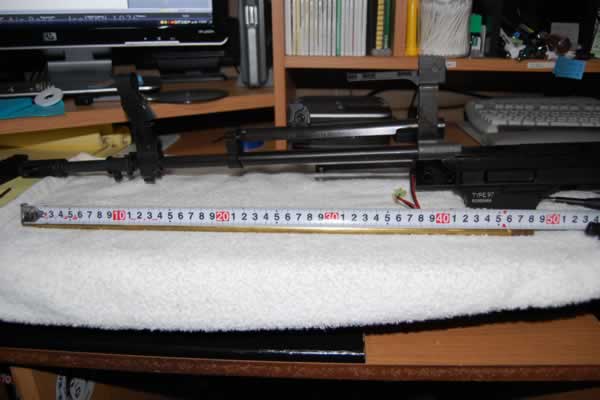
Now for something interesting, the way they set up the mount for your scopes, red dots and so on, was thought out. They used a good heavy peace of steel that was lathed and set in the carrying handle. What you see is that the steel can support the weight, but also the carrying handle re enforces the rail system for your scopes/red dots.
Before
After Rail Installation
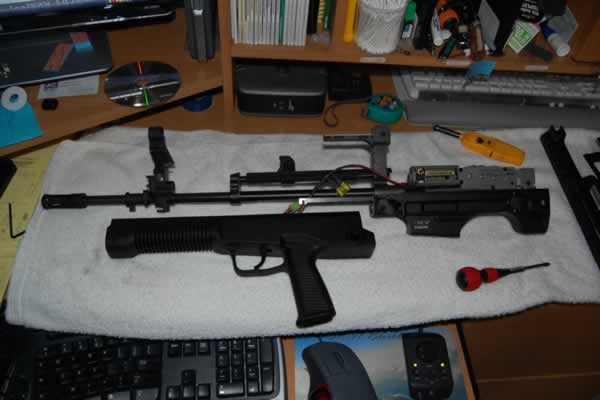
Internals
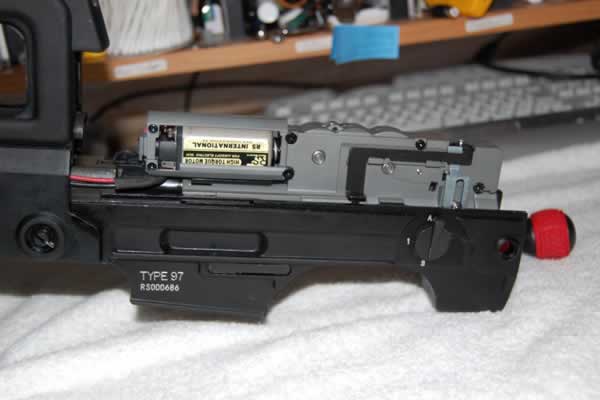
Now we are to the heart of this AEG, what makes it work and how well it will stand up to other AEG's and its performance. For the take down, i will use the quick reference guide that was provided.
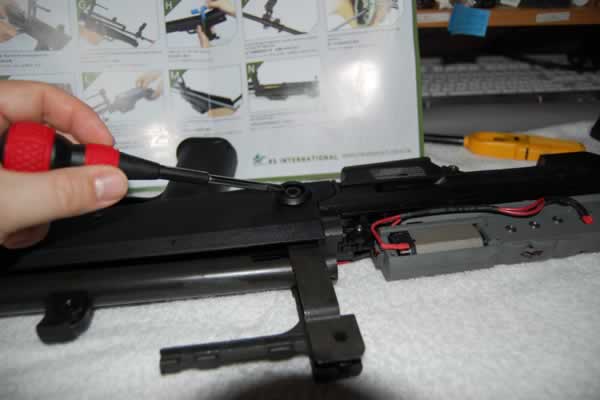
1. Push though the stock butt pin (pin does not remove from the slide well), then remove the rear stock when pulling the cocking lever to the rear. Pull the cocking lever to the rear and reove the screw on the dust cover. This will expose the mecbox.
2. Remove the fixed screw on the rear trigger lever. Set the selector lever to the A position and pull the trigger. The trigger lever will break lose.
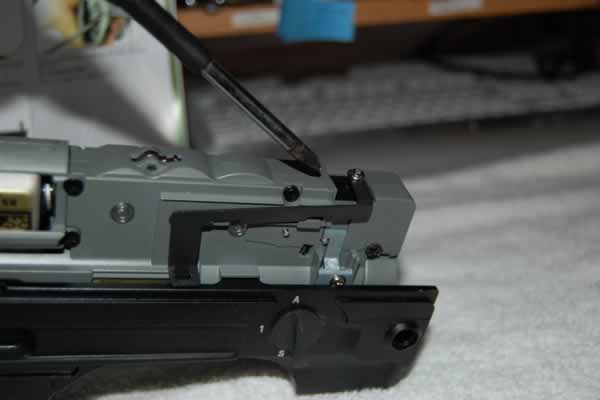
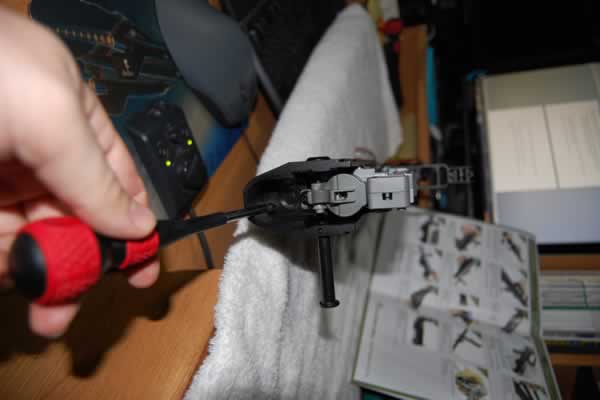
3. Pull the upper carry handle back and upwards to remove it.
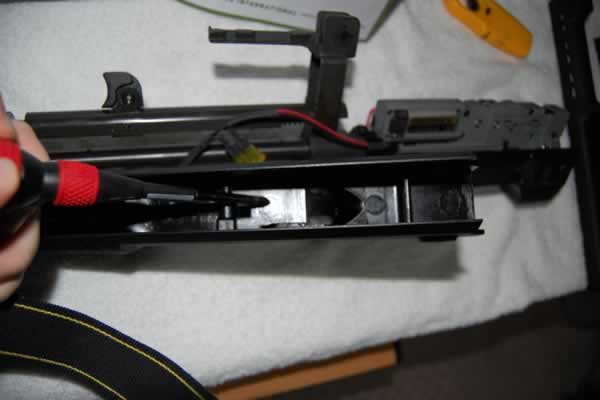
4. Remove the lower hand guard pin, Pull the lower hand guard down and forward and remove it.
5. Look down were the trigger is and this is where you place your battery.
Part 3
6. Remove the fixed on the rear part of the mechbox, this will allow you to remove the machbox.
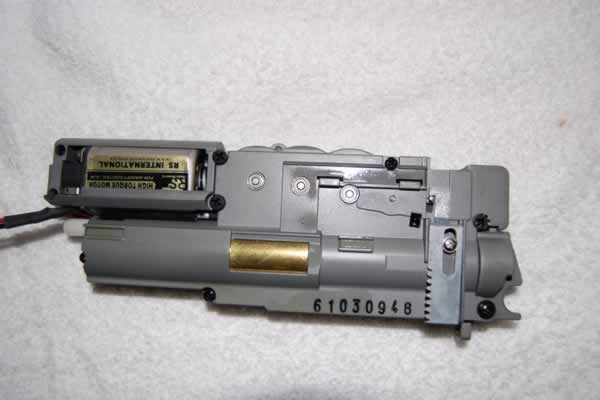
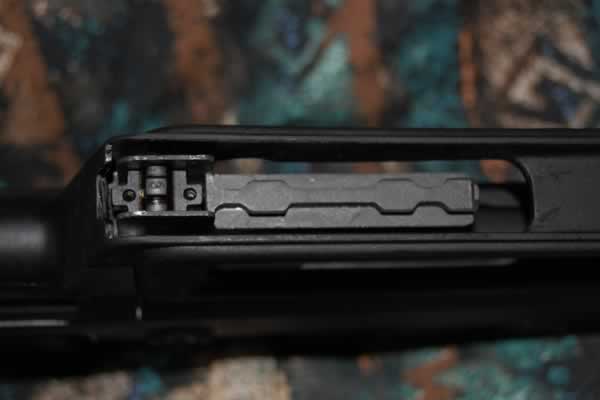
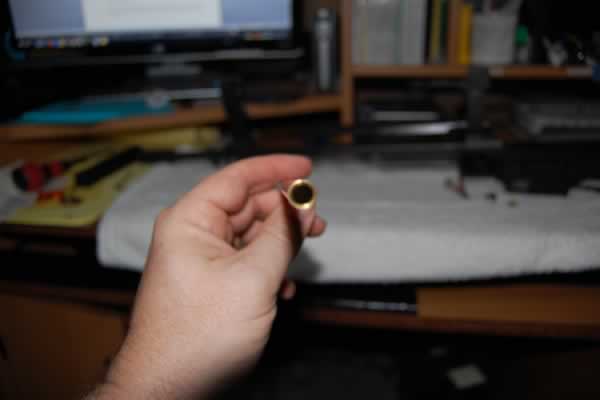
7. Remove the two screws holding your hop up unit in place. Then pull back on the unit to remove the inner barrel. There's a surprises here, the inner barrel is a smooth tight bore with a length of 485mm. The hop up rubber is that of a stock AEG.
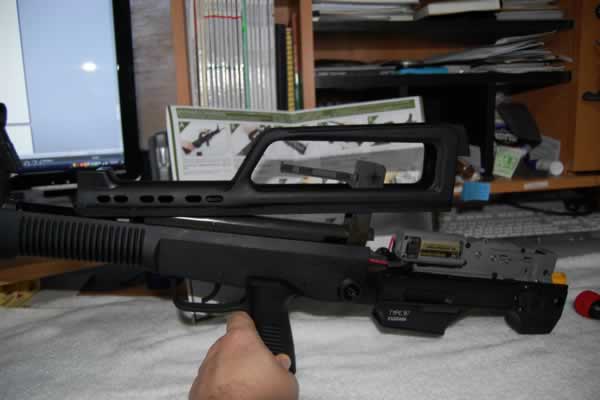
Over all take down is not that hard but if you are not use to it, it can take time. All the metal is well oiled and fits well together. No lose parts or wobbles that I can see. As for the battery it may be better to leave it in for recharging, but for long term storage its best to breakdown the AEG and remove it. Recharging can be done though the bottom of the hand grip. Here's an option for you if you don't want to use the custom battery, try a LIPO, it will fit in the trigger handle.
The Mecbox
· The outer cover of the mechboxs has a finished coating to it, you can also see the 7mm ball bearings.
· Spring is a SP90 with a polycarb spring guide with metal base.
· Reinforced piston and ball bearing piston head
· The gears are well made and are up to standards
· Standard cylinder
To Be Continued
This is the first part of a two part review; the second half will cover the Performance, Pro, Cons, Mods and The Final Word of the Type 97 AEG.
Real Sword Type 97
in Rifles (AEG)
Posted
Shore can, but i can tell you now that it looks like the same style used in my TM G36C and TM P90, the only differences is how the adjustment wheel is set up.
Thanks for the kudos.