Katotaka Posted April 29, 2016 Report Share Posted April 29, 2016 More like R&D / Technical stuff, but it's shotgun-related-pics, so here:( While typing this post I did some search and there's a 3D Printed Parts thread somewhere else, I will just copy whole thing and paste there again ) A friend of mine is thinking of a way to prevent / reduce chance of slam-fire when using PPS metal shells, or ND if shells are dropped,He gave me one 3d printed part of his design and I decided to make some more for my own further testing.Since the copy from him is a SLS'd part so measuring dimensions from its "grainly" surface is not ideal.I took the original metal part off from my shells, measured, modified and created my own version. I need like twenty-something of those parts so I "linked" them together to save printing cost, if printed individually it takes ONLY 3 pieces to reach the same price of the "sheet" above. And yeah, the sprue looks ugly."Improved" sprue AFTER I ordered the sheets above, maybe next time... I still need to confirm the size tolerance of the service provider when I receive my order, adjust model to fit, so I will definitely print again. Awaiting my order to come................ in mid-MayThe goal of the design is to use some non-CO2 power source, which originally tend to slam-fire / ND, on the purple metal shells, without the danger and the risk getting DQ'd in matches.CO2 powered shells are AWESOME to shoot but not as nice to maintain, shells would break and o-rings swell A LOT.These will be SLS printed nylon, my friend tested his version like 100 times with some stronger gases like big fat gas from Guarder, WE 4X and "Red" gas and survived, while apparently stopped slam-fire when operated "violently". CO2 will snap these stuff but there's no point using these with CO2 at the first place........ you just can't slam-fire a CO2 filled shell. Quote Link to post Share on other sites
Greenmeance Posted April 30, 2016 Report Share Posted April 30, 2016 I like fold stocks but not the extra weight! Ca870 still have their uses.... Quote Link to post Share on other sites
mightyjebus Posted May 2, 2016 Report Share Posted May 2, 2016 My TM shells had started to look a bit beat up so I thought I'd knock up some new covers from them Photoshop+red sticky backed paper = success! 2 Quote Link to post Share on other sites
abbadon101 Posted May 2, 2016 Report Share Posted May 2, 2016 So does this mean you have a spare breacher pistol grip knocking around now Jebus? Quote Link to post Share on other sites
mightyjebus Posted May 3, 2016 Report Share Posted May 3, 2016 no but eagle6 have the bits in stock Quote Link to post Share on other sites
mightyjebus Posted May 3, 2016 Report Share Posted May 3, 2016 (edited) For anyone wanting to have a go at printing off new shotgun shell covers then you will need: This red paper These designs: Print them off in a normal A4 printer and cut them to 68mm long by 51mm high. Remove the old label from the shell and attach these ones. Edited May 3, 2016 by mightyjebus 3 Quote Link to post Share on other sites
Got Wood? Posted May 3, 2016 Report Share Posted May 3, 2016 You sir are epic. Quote Link to post Share on other sites
mightyjebus Posted May 3, 2016 Report Share Posted May 3, 2016 You sir are epic. naa not really...I was making them anyway and thought I'd share. If I can be arsed I'll knock up some more designs. Quote Link to post Share on other sites
Got Wood? Posted May 3, 2016 Report Share Posted May 3, 2016 What size do those images need to be printed? 100% size? Quote Link to post Share on other sites
mightyjebus Posted May 3, 2016 Report Share Posted May 3, 2016 I printed them straight from photoshop but looking at windows photo they should be a straight print with no changes. If you have problems try printing them from paint. Quote Link to post Share on other sites
Katotaka Posted May 3, 2016 Report Share Posted May 3, 2016 If you did the artwork in photoshop you can sort of "define" it's physical size, for example you can make an A4 sized canvas and put multiple stickers on it, export as PDF, then everyone can print 100% size on A4 paper and get correct sized stickers. Quote Link to post Share on other sites
mightyjebus Posted May 3, 2016 Report Share Posted May 3, 2016 I played about with the PDF but it was proving to be more hassle than it was worth. If you open them in paint and go to file-properties and click centimeters you can confirm the size before printing. here's another couple of designs and this time they are for solid shot. 1 Quote Link to post Share on other sites
Katotaka Posted May 4, 2016 Report Share Posted May 4, 2016 Well maybe just some occupation-caused-OCD (is that a thing?), I don't feel comfortable if the viewer not seeing same thing as I make. 1 Quote Link to post Share on other sites
Got Wood? Posted May 13, 2016 Report Share Posted May 13, 2016 Learnt how to dissassemble my Cyma tri shot. Also fitted a rail to the top receiver. Pretty pleased with it even though it's not dead centre on the gun, it's straight enough by far. A much needed addition to these. Sadly the shell carrier I bought was no good. Designed for real shells and required too much work to make TM shells fit. So the old cheap Velcro patch will have to do for now. 2 Quote Link to post Share on other sites
titchikov Posted May 17, 2016 Report Share Posted May 17, 2016 How is the disassembly? My Eli one has broken and I'm not sure what the problem is Quote Link to post Share on other sites
Got Wood? Posted May 17, 2016 Report Share Posted May 17, 2016 It's not too complicated. I haven't taken the internals apart though. I've just broken down the barrels and tubes, stock, arms, and removed it all from the receiver 1 Quote Link to post Share on other sites
Got Wood? Posted May 25, 2016 Report Share Posted May 25, 2016 (edited) Sorry for the double post. All 3 different variants, all 3 Cyma Trishots. Kind of wish I'd spring for the Metal body on the Overfolder, but they're getting hard to find. Two on the left are mine, the one on the right is for a friend. Edited May 25, 2016 by Got Wood? 2 Quote Link to post Share on other sites
Safeword Posted June 21, 2016 Report Share Posted June 21, 2016 When you have very limited space and 3 shotguns, this was my solution 5 Quote Link to post Share on other sites
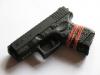
Safeword Posted July 9, 2016 Report Share Posted July 9, 2016 I was bored and took it out on my PPS xm-26, already shortened it by removing the stock and put in a sling swivel and end cap from a AR-15 but wanted it even shorter. It's super crude but looks awesome. It's only for very close combat or backup now because I had to remove the inner barrel. 1 Quote Link to post Share on other sites
renegadecow Posted July 10, 2016 Report Share Posted July 10, 2016 If you're going THAT short, you may want to use Goblin shells instead. Orange PPS ones do under 50fps without an inner barrel. Quote Link to post Share on other sites
Safeword Posted July 10, 2016 Report Share Posted July 10, 2016 Yeah I guessed that would happen without a inner barrel, I have a couple purple PPS shells, are they the same? Quote Link to post Share on other sites
renegadecow Posted July 10, 2016 Report Share Posted July 10, 2016 It's better than the orange shells at any rate. But the shells by Goblin are mechanically closer to APS shells utilizing a dump valve. That and the bb holder acts as a barrel in itself so even when firing the shells alone they can still deliver usable power at a 12 bb payload. Quote Link to post Share on other sites
Katotaka Posted July 13, 2016 Report Share Posted July 13, 2016 (edited) YAY! No more slamfires! Neither the fear of ND when "hot" shells are dropped on ground! Installed: 3D printed primer in nylon, arranged together as close as possible I could think, 41 primers per sheet in case of wear/breakage, or if someone out there has 41 shells! Video shows original primer VS improved primer: Works with green gas and slightly powerful gas from WE or Guarder, around 14 kg/cm^2 @ 25°C, and NO, doesn't work with CO2, pressure is so high that the primer just snaps in two. Edited July 13, 2016 by Katotaka 4 Quote Link to post Share on other sites
Safeword Posted July 14, 2016 Report Share Posted July 14, 2016 My APS build, I call it the Salient Super Shorty CAM 870 AOW based with all external SAI parts from APS and all APS internal parts. 5 Quote Link to post Share on other sites
renegadecow Posted July 14, 2016 Report Share Posted July 14, 2016 How's the bolt feel? The one I've handled was excessively tight and had to sand a lot of material off the inside of the SAI receiver just to keep it from chewing the gold off the bolt. Quote Link to post Share on other sites
Recommended Posts
Join the conversation
You can post now and register later. If you have an account, sign in now to post with your account.